Fair warning, this is a LONG post – pic heavy
I found a complete front and rear BBK kit on Facebook Marketplace for $600 shipped. This article will go over the restore and rebuild of the FRONT Wilwood BBK. I’ll have a separate article for the rears, which is an obsolete / hard-to-find kit. This will be an ongoing article – meaning I’ll just publish it, and post updates as the progress moves on. I’m going to take my time with this rebuild.
-
Dismantling the calipers, including stripping down to bare metal
-
Dismantling the rotors.
-
Assessing the calipers and pads
-
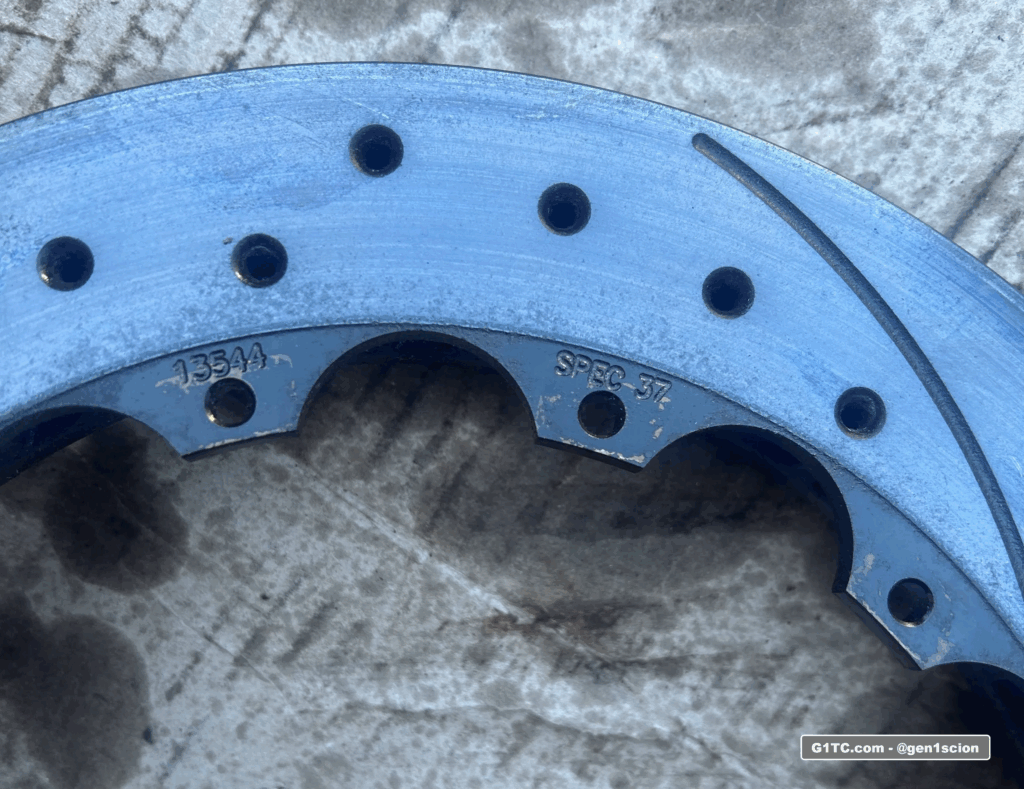
Assessing the rotors condition
-
Identifying parts I will order and replace
-
Reassemble, Stage, and test fit.
-
Powdercoat and rebuild.
I never buy used brake kits
I’ll start of by saying I’ve been into cars since the mid 1990s. I have only ever bought used brakes TWICE in that time. This is the second time. The amount of work I am about to put into restoring these is a reminder why! Regardless, I chased this kit down because of the rear (rare and obsolete) caliper bracket and I’m going to do my best to get the most out of the kit.
The goal for the fronts
- strip the brakes calipers down to bare metal, repaint or powder coat (haven’t decided yet)
- assess all the supporting parts, see what needs to be bought new
- bare minimum will buy new pads, new seals, new pad retainers
- assess 2-piece hat make sure the rotors aren’t warped
- test fit the entire setup on my car before final repaint, assembly and install
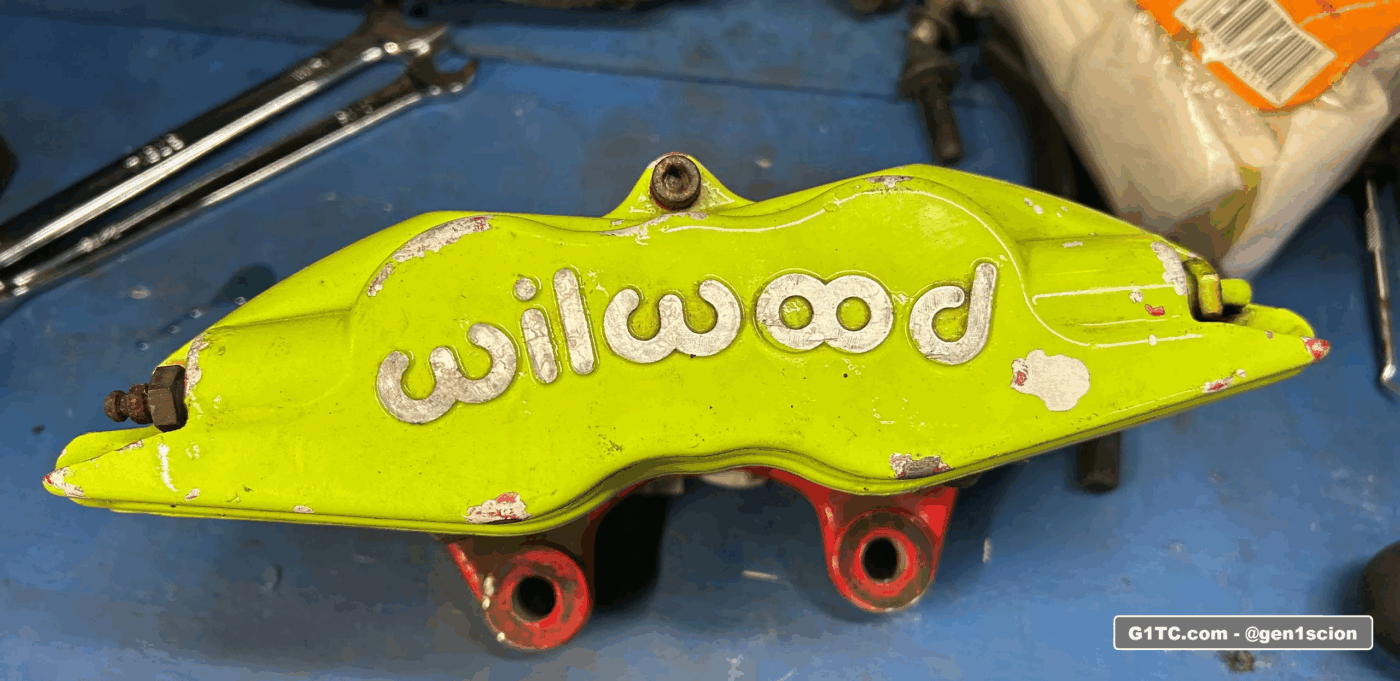
Initial assessment revealed several issues w/ the fronts
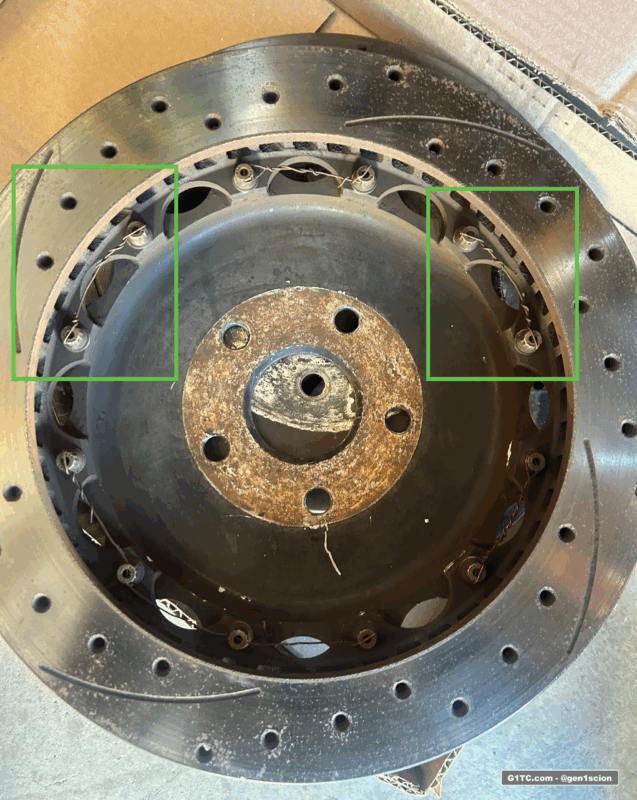
- Bad safety wire installation. Wil re-do
- Stripped bolt on one of the hat bolts
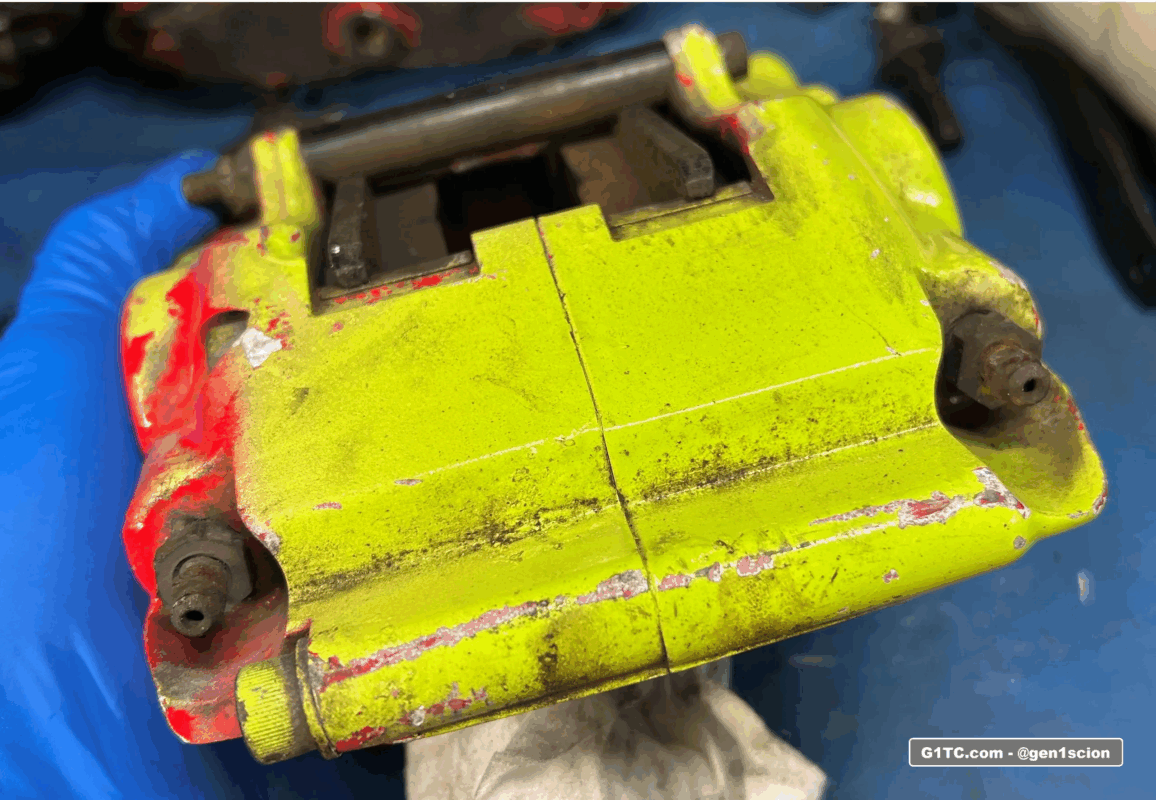
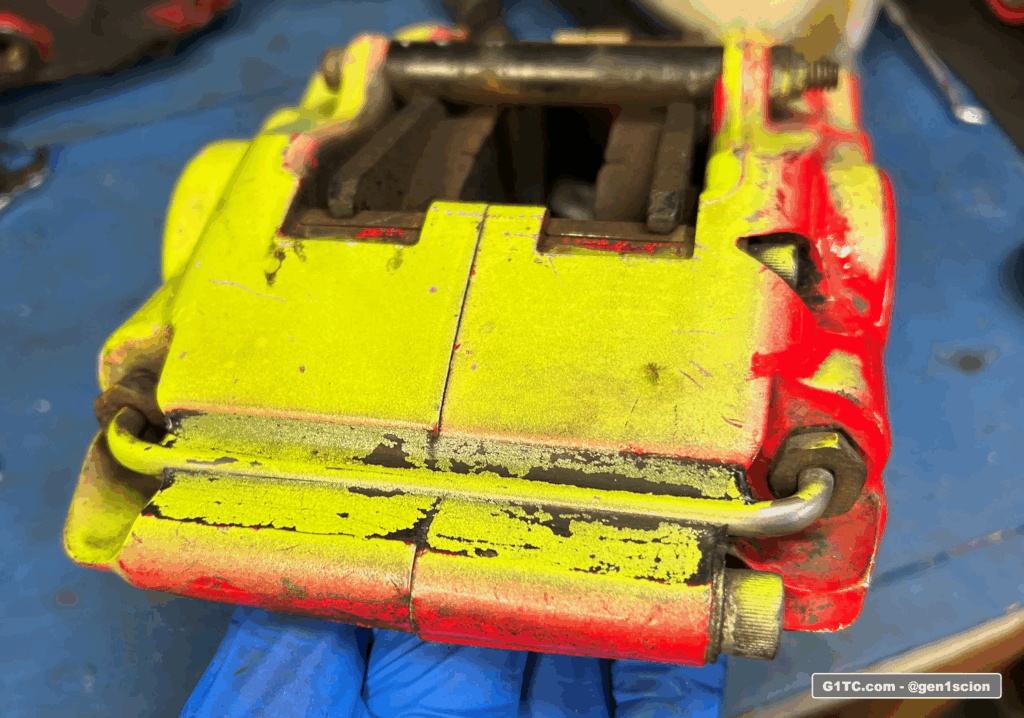
- Yellow spray paint over Red powder coat. Will completely strip down and paint (or powder coat) a new color
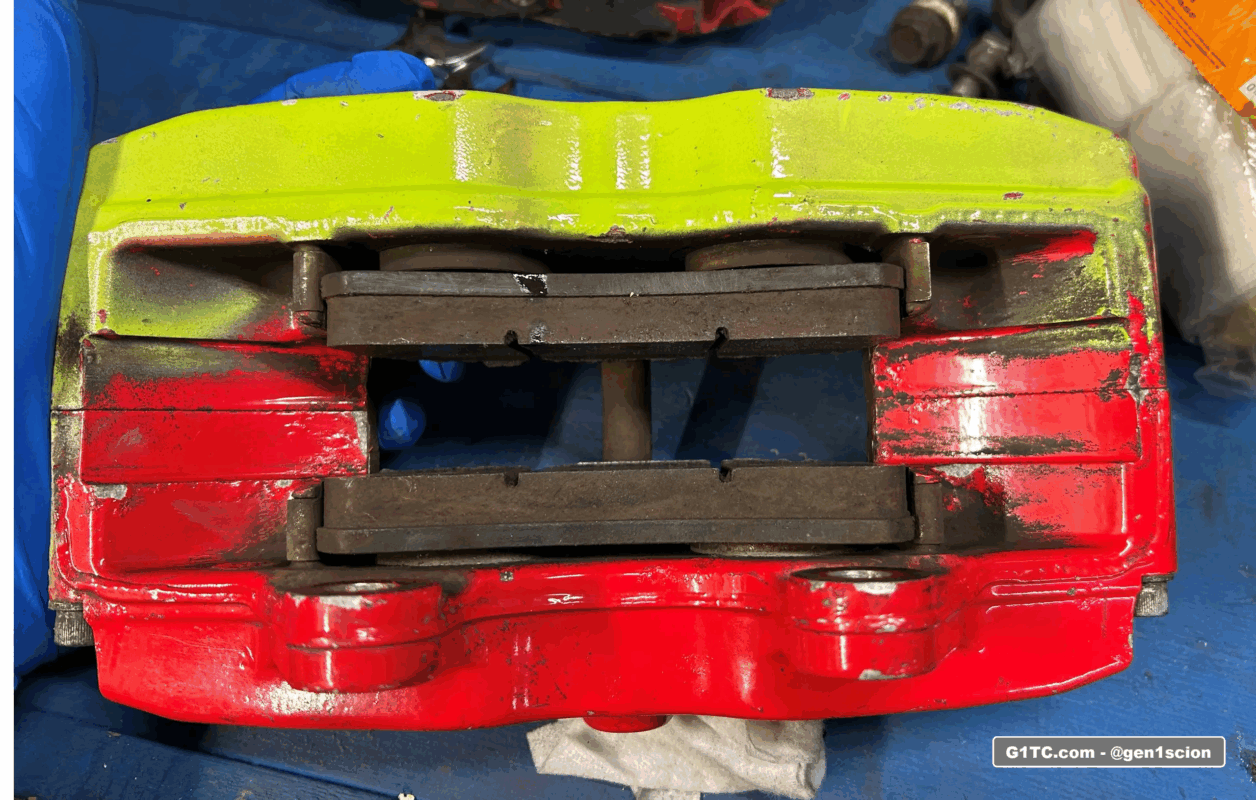
- brake pads seized
- brake pads showing slightly off center wear, will investigate fitment on front
- need to make sure used rotors aren’t warped
- light rust on rotors, not too big of a deal.
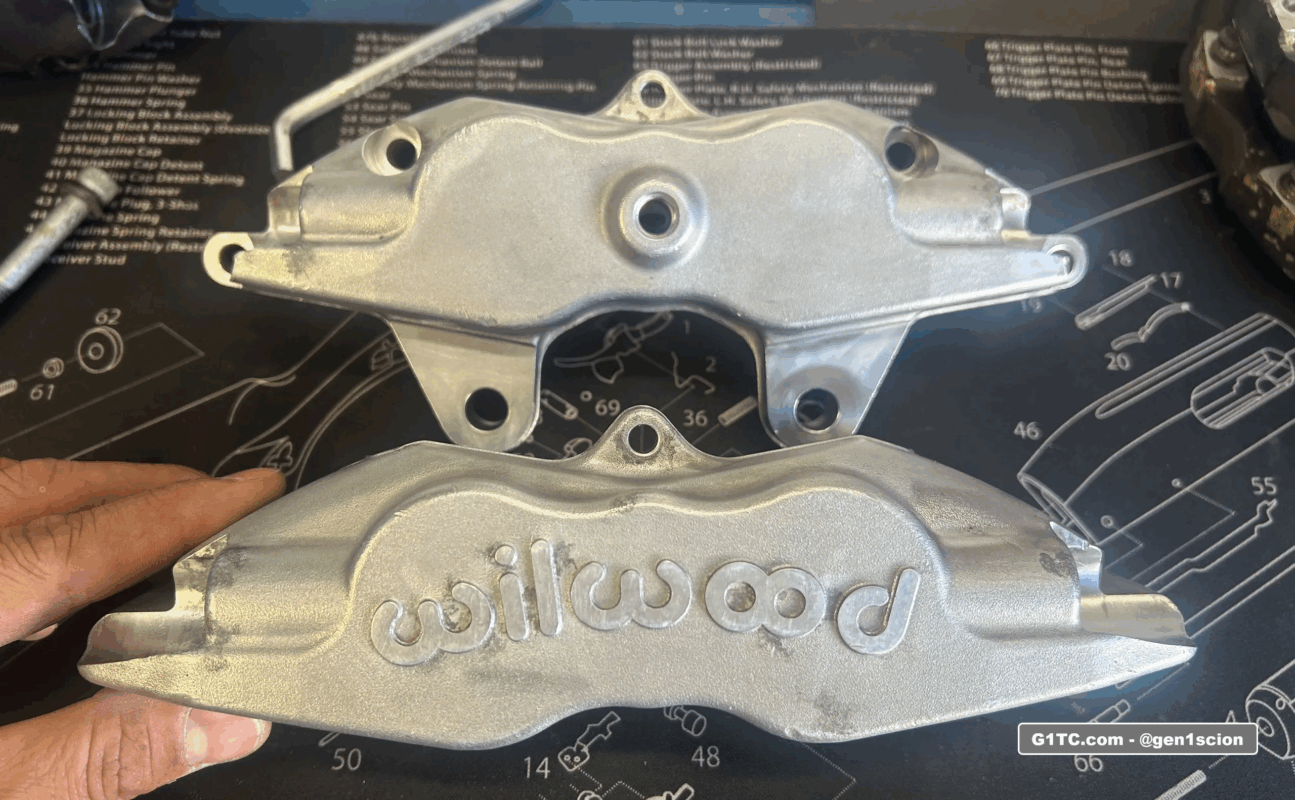
Wilwood Part Numbers
Through some internet sleuthing I found the exact kit:
I also found the install instructions here. 140-9013 Installation instructions
The tell tale signs are the raised lettering on the calipers and the caliper is the older style w/ the external crossover tube. Newer kits have an internal connection. Here are part numbers FOR THIS SPECIFIC KIT and individual rebuild parts. You can find all this info on Wilwood. Double check with them before ordering anything.
Main full Kit: Front Brake Kit – Part No: 140-9013-DR
Individual parts:
-
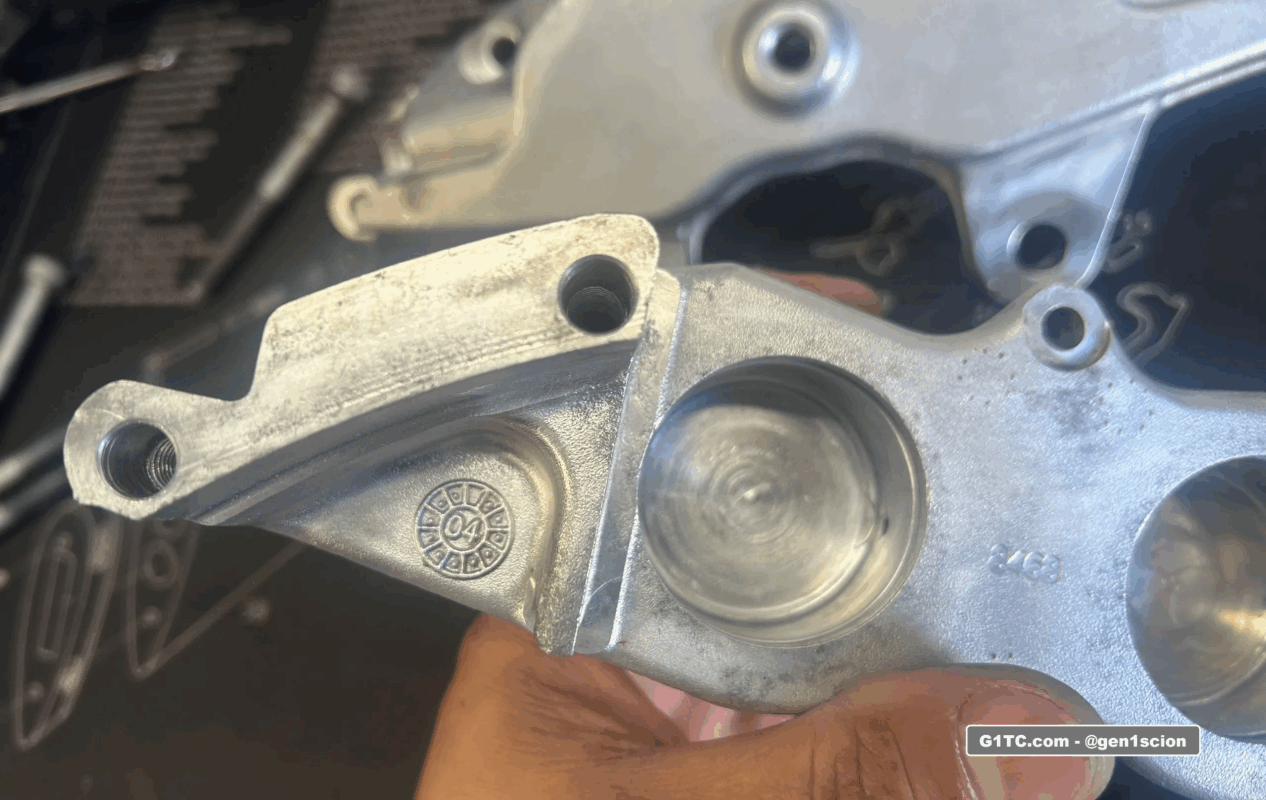
Right Caliper Forged Superlite Caliper – Part No: 120-8464-RRD
-
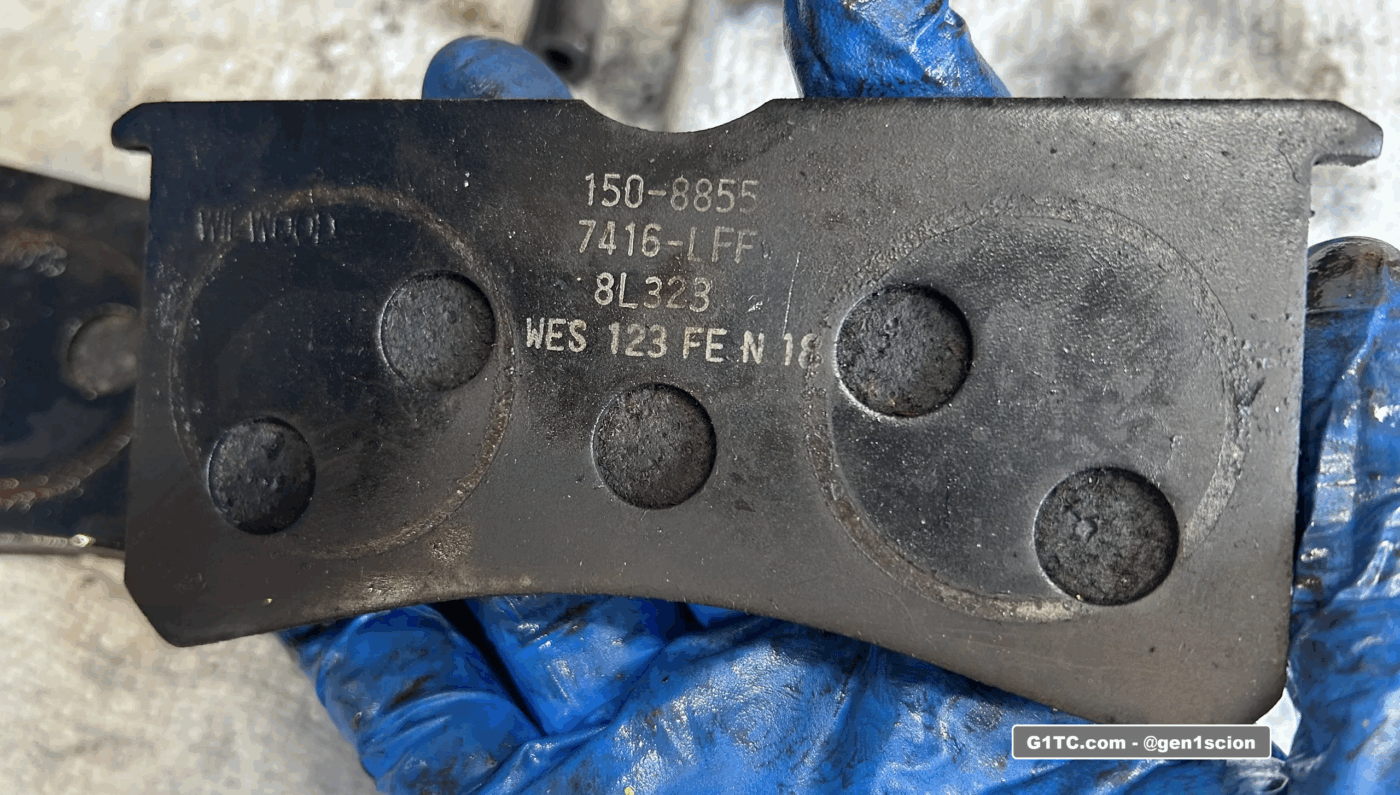
Brake pads Front 7416 BP-10, .65, 150-8855K
-
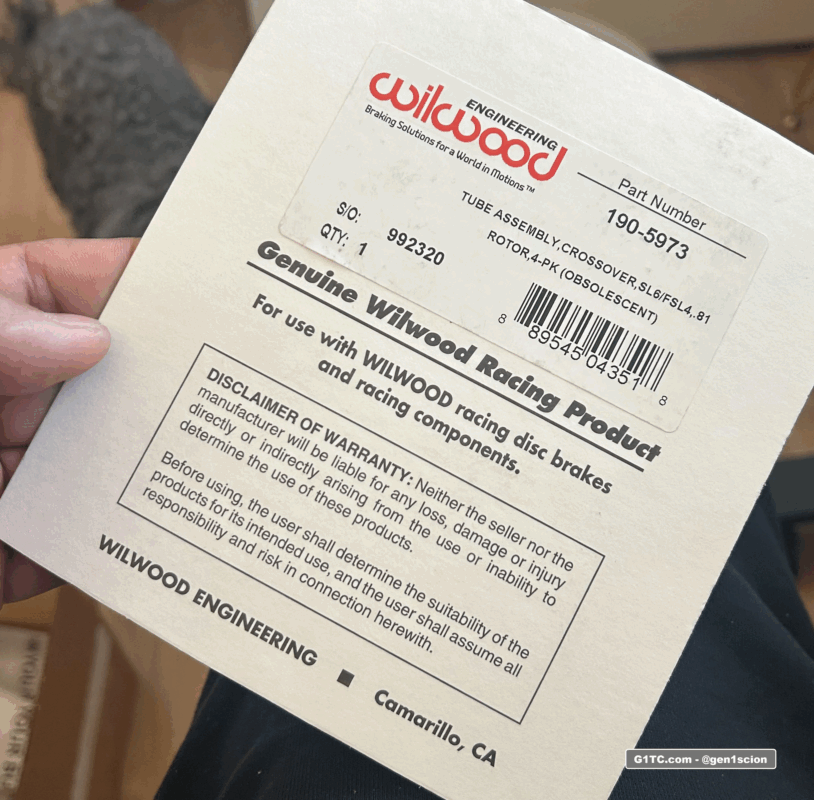
Crossover Tube kit (obsolete), 4.17″ on center, 4pk, 190-5973
-
Bridge Bolt Kit 230-7539
-
Bleeder screw, 2 piece, 10m x 1.0, qty 4, 220-6069
-
Caliper wear plate LH (need 4) 300-5923
-
Caliper wear plate RH (need 4) 300-5922
-
Rotor Hat (L or R) 170-9011
-
Rotor hat bolt kit 230-4572 (12 total)
-
Brake line kit 220-9365
-
Rotor replacement GT 48 Curved Vane Rotor, black electro coat 160-12962-GTB, SLOTTED LH
-
Rotor replacement GT 48 Curved Vane Rotor, black electro coat 160-12961-GTB, SLOTTED RH
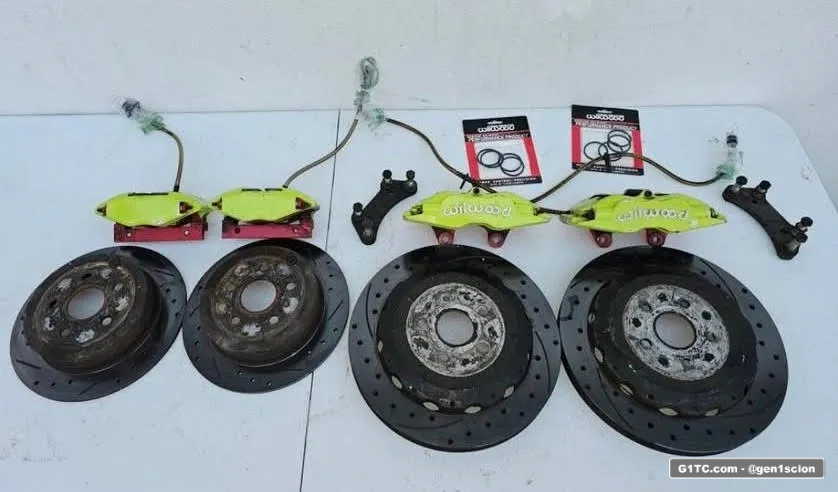
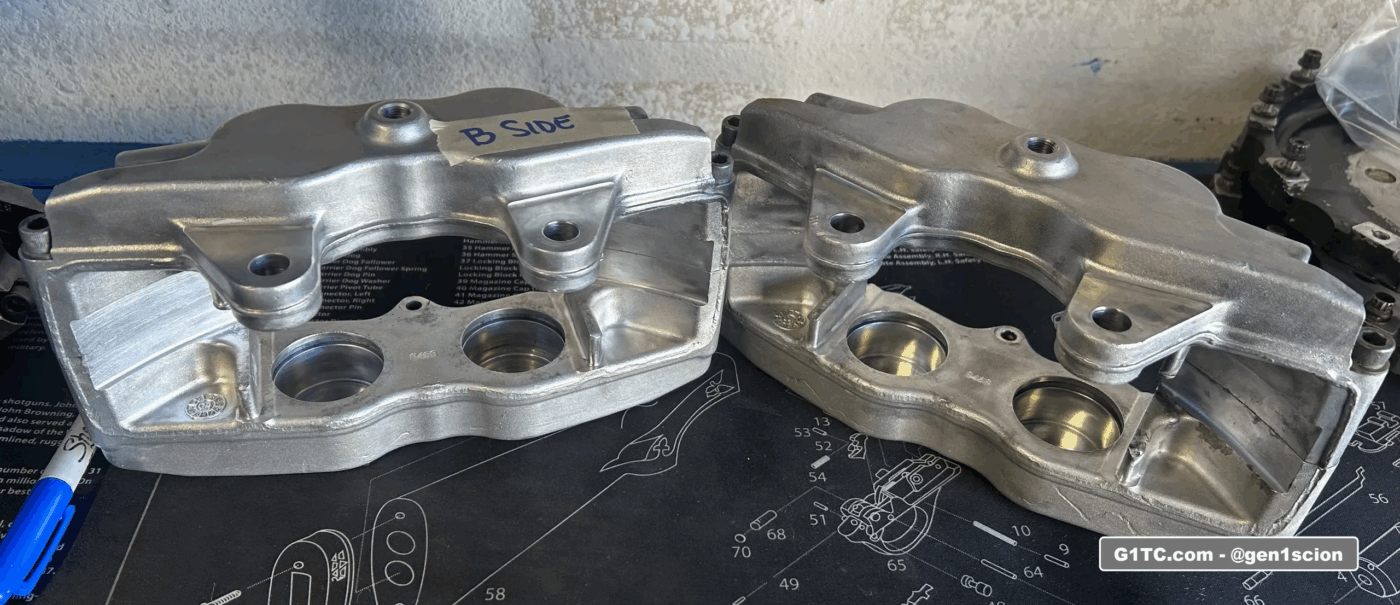
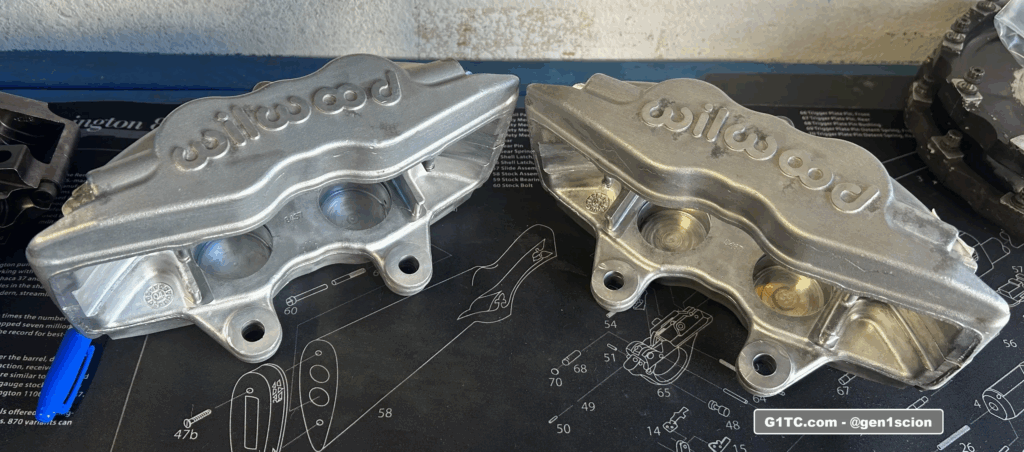
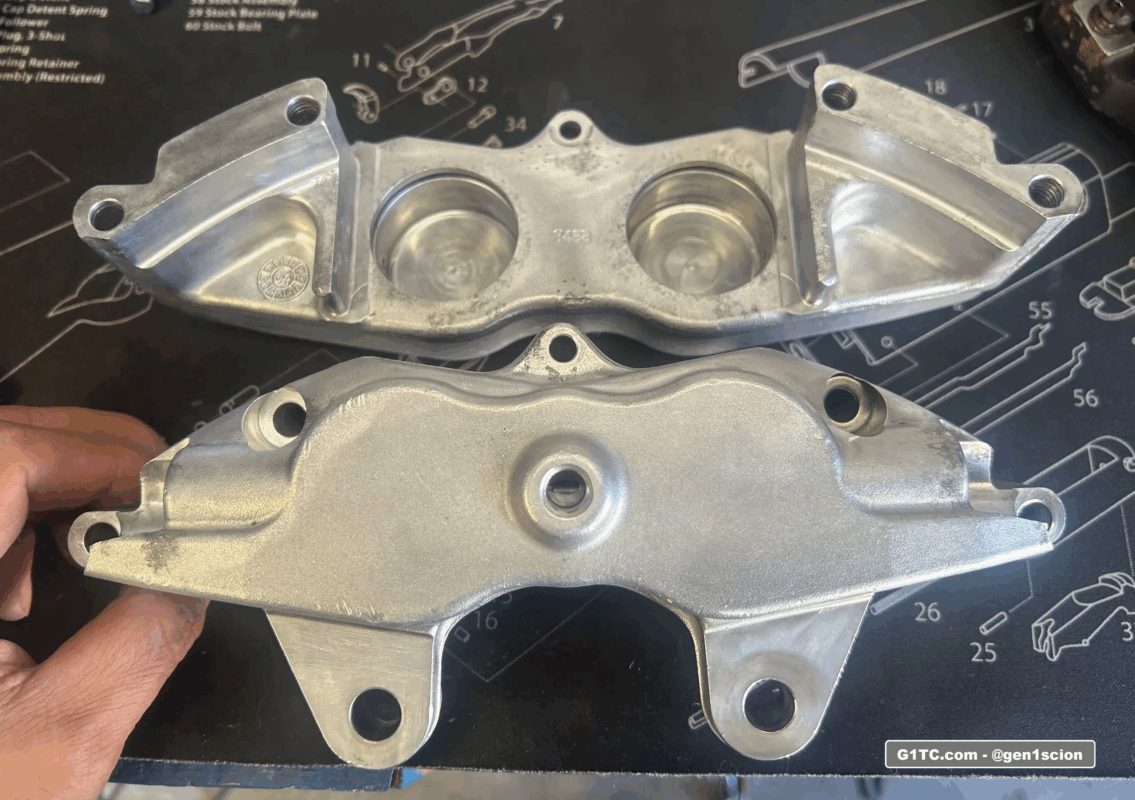
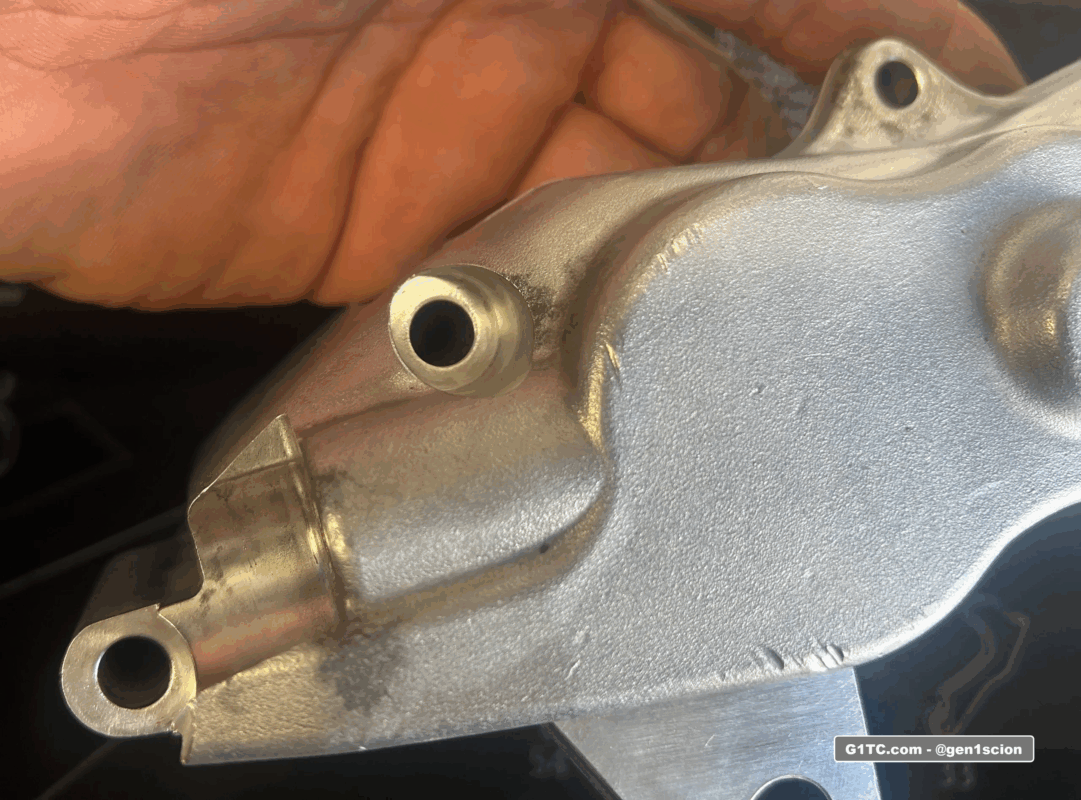
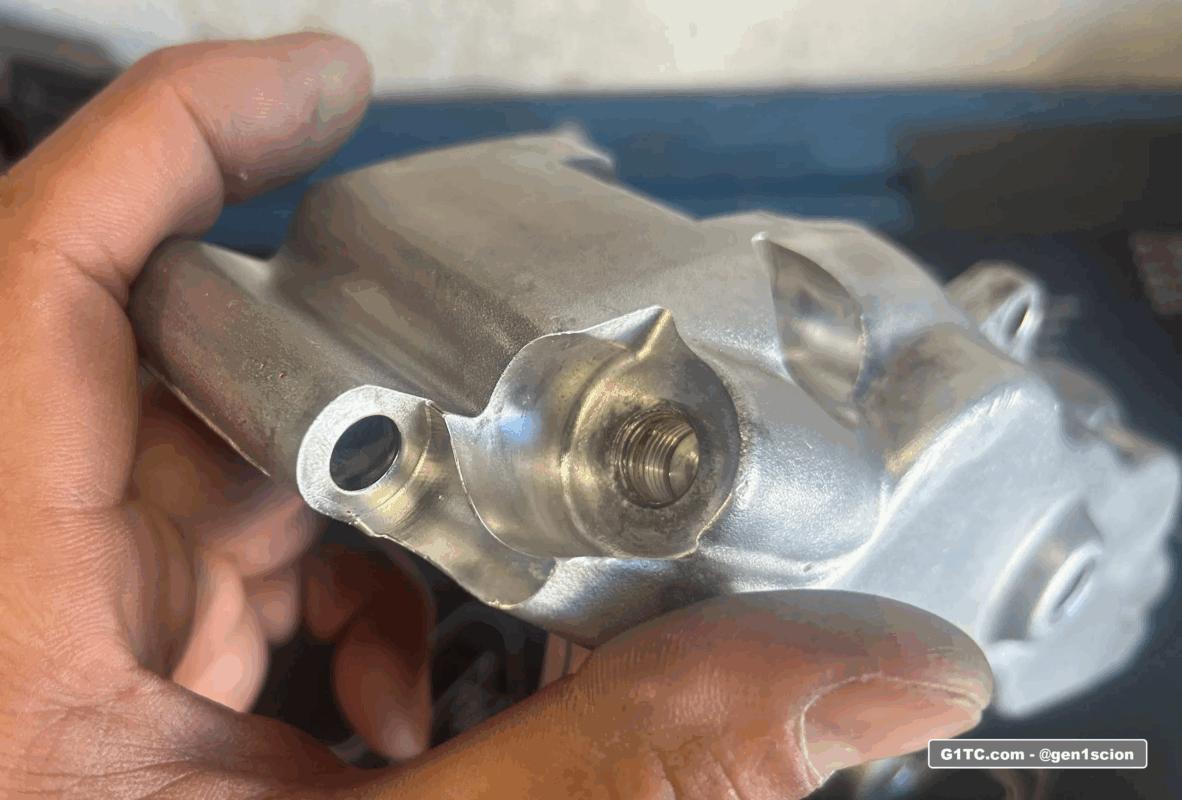
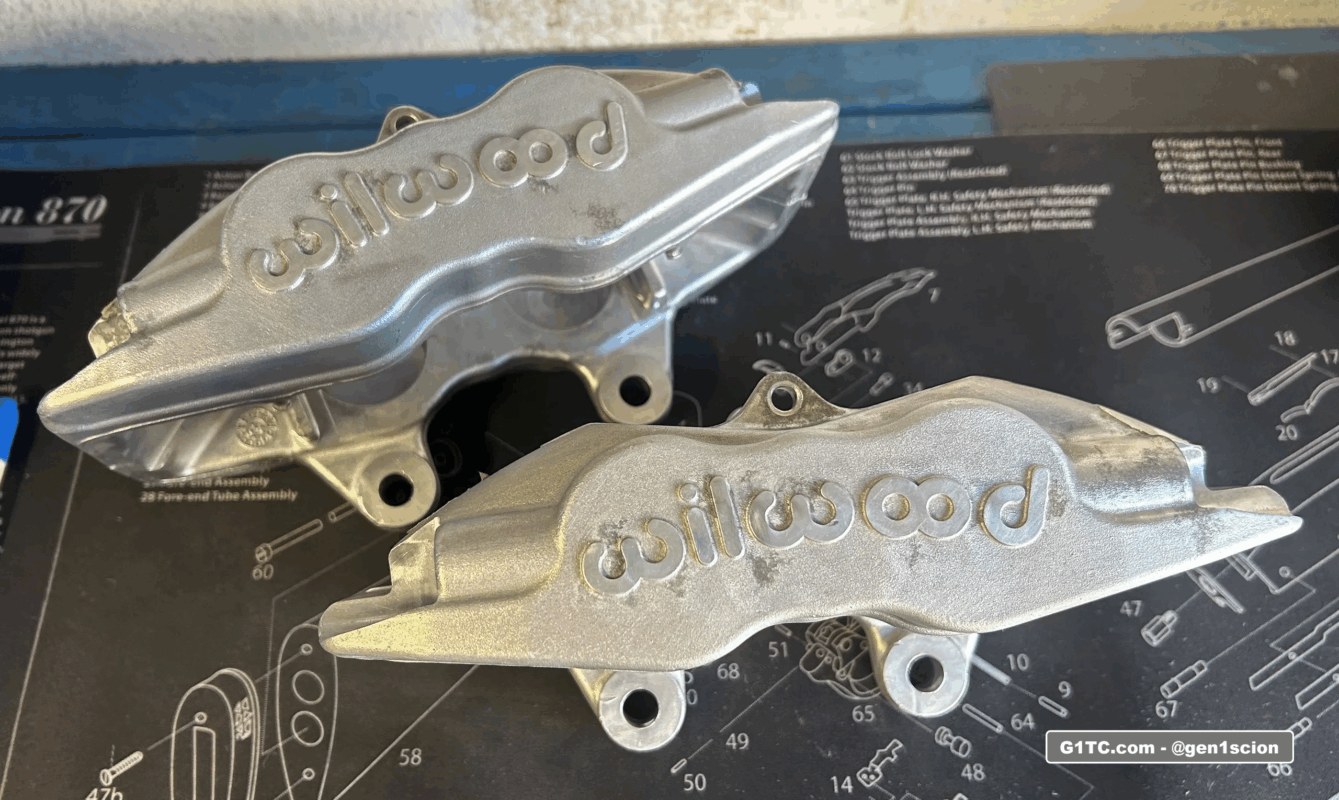
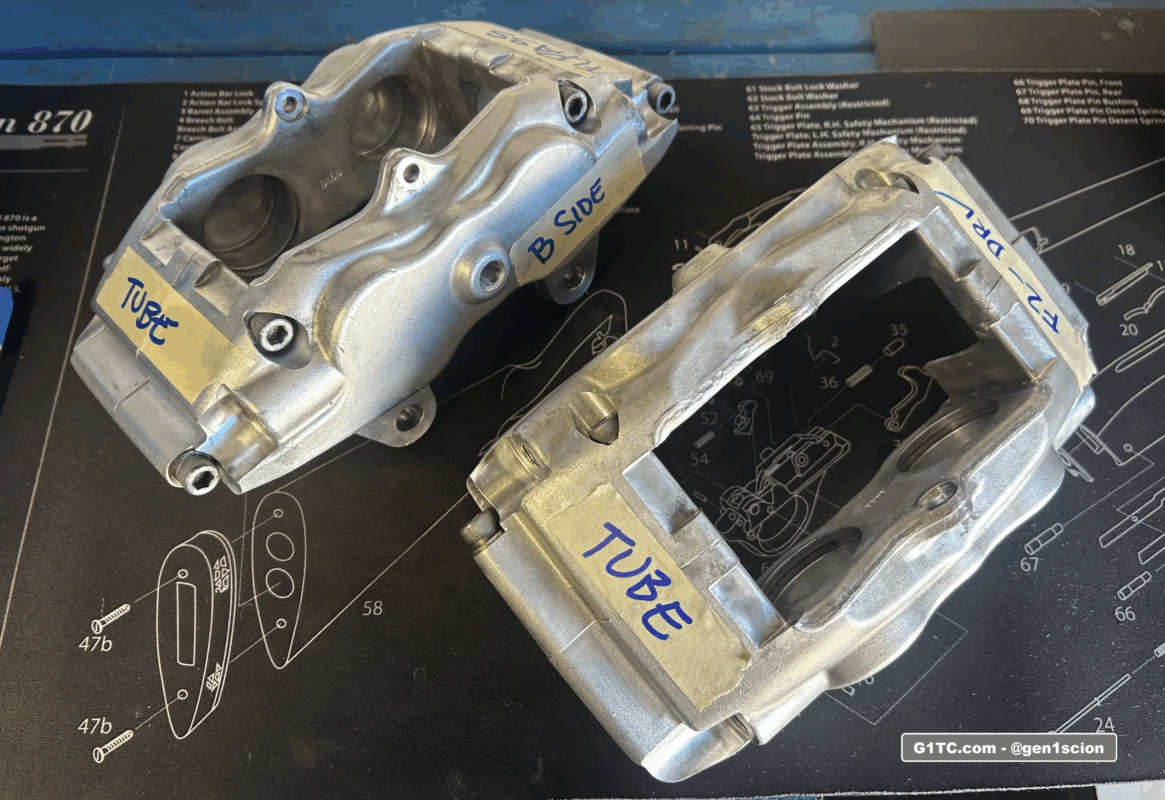
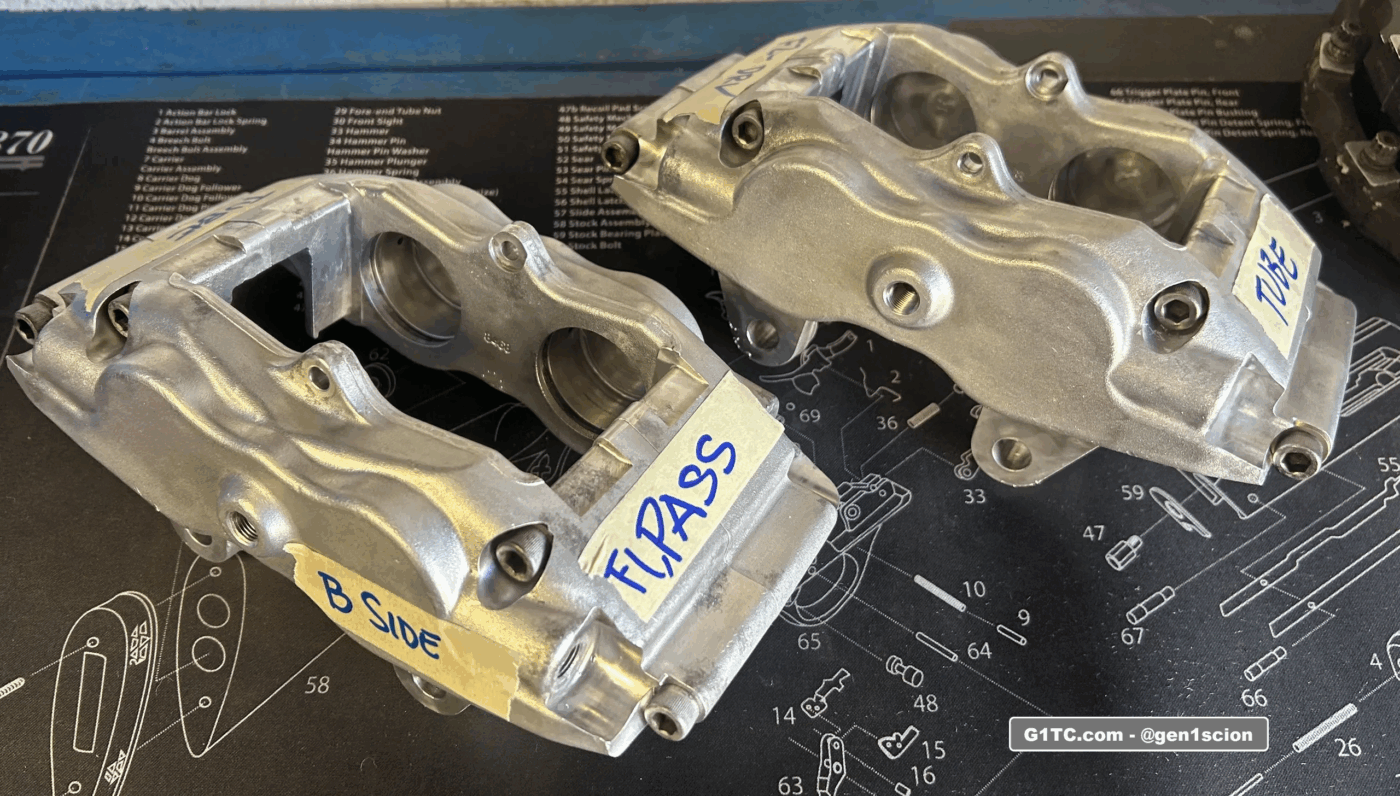
Initial photo dump of front BBK fronts
Here are some initial photos. I’m just going to dump them all here so you can see what I’m up against.
Calipers:
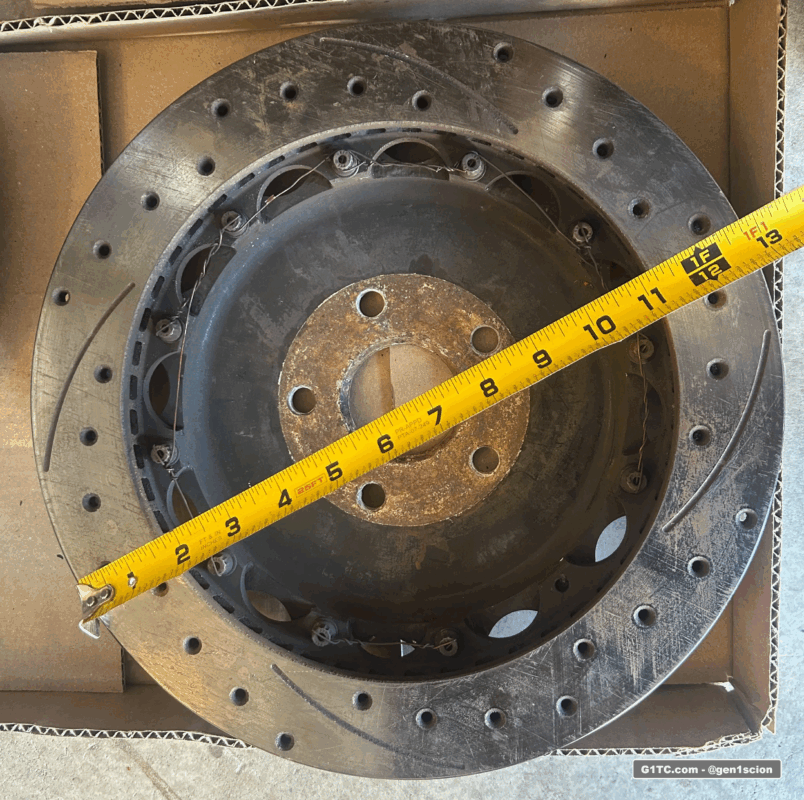
The surface rust on the rotors isn’t that bad. I will clean up just fine.
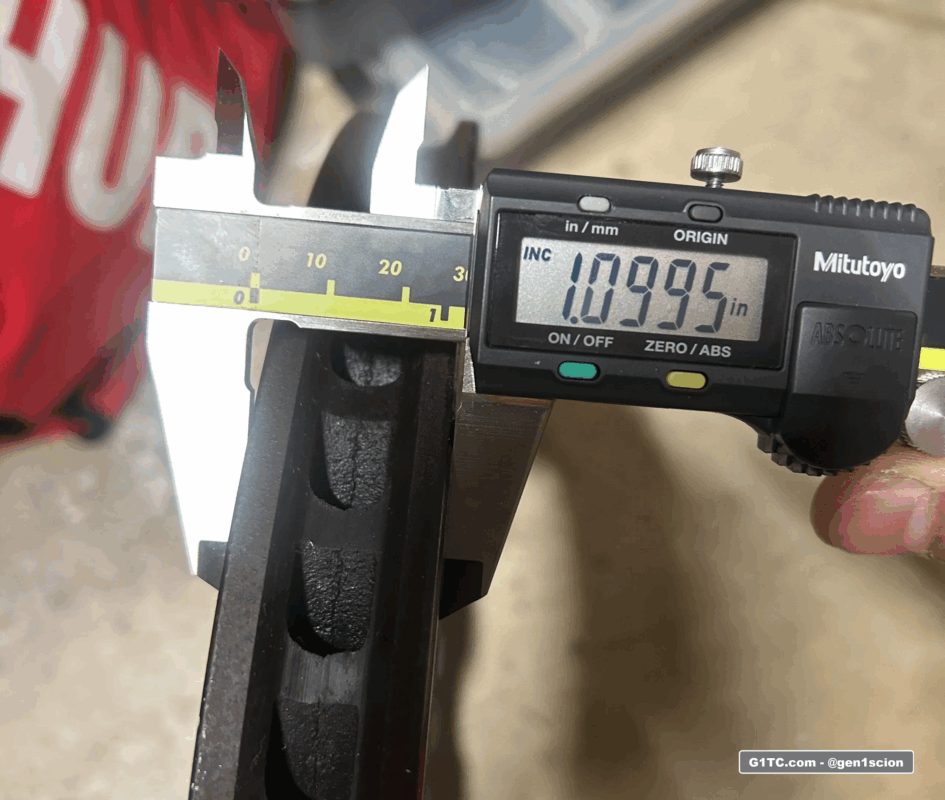
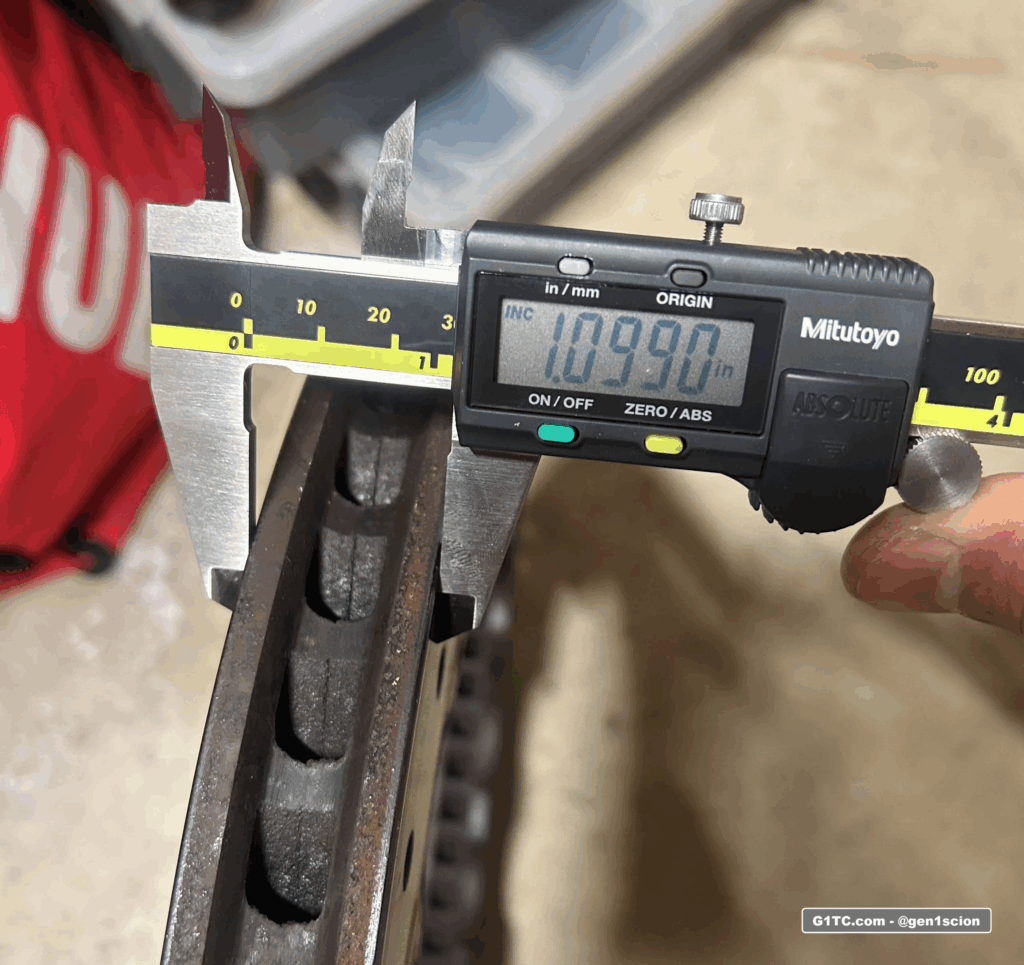
Measuring the width in a few spots of the rotor reveals they are almost brand new (1.1″) or barely used.
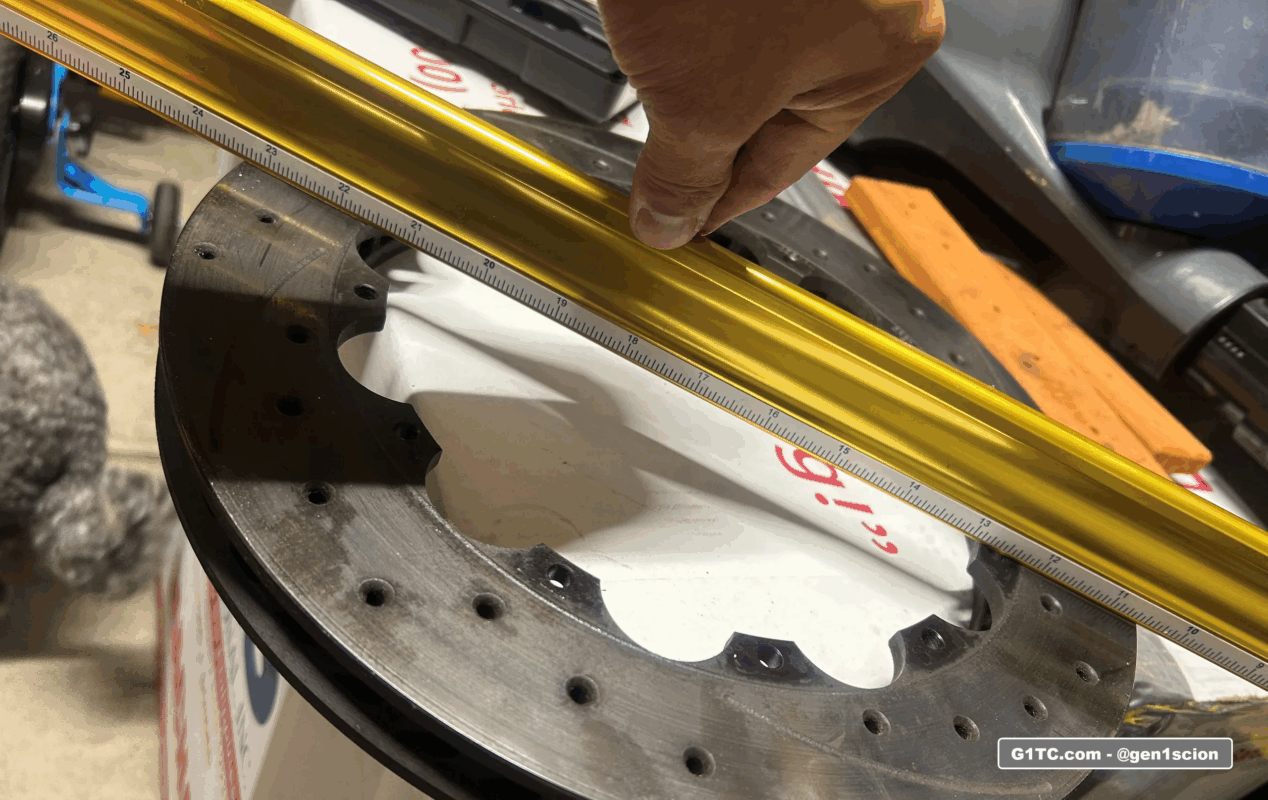
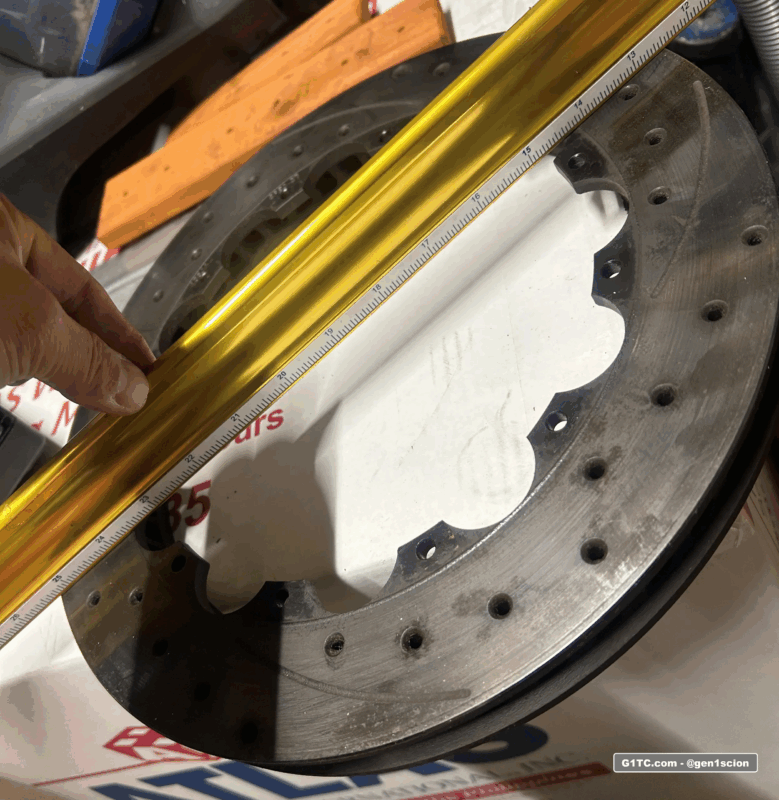
I need to make sure they aren’t warped. Going to order a run-out gauge for this project, which I’m sure I can use for other projects. For now I use one of my woodworking flat bars to check straightness… seems ok with this method. I checked different points and both sides.
Stripping down the hat. I’m not sure if I’m going to paint, powder coat, or cerakoted.
One of the rotor hats had a stripped bolt. This one was really tough to take out.
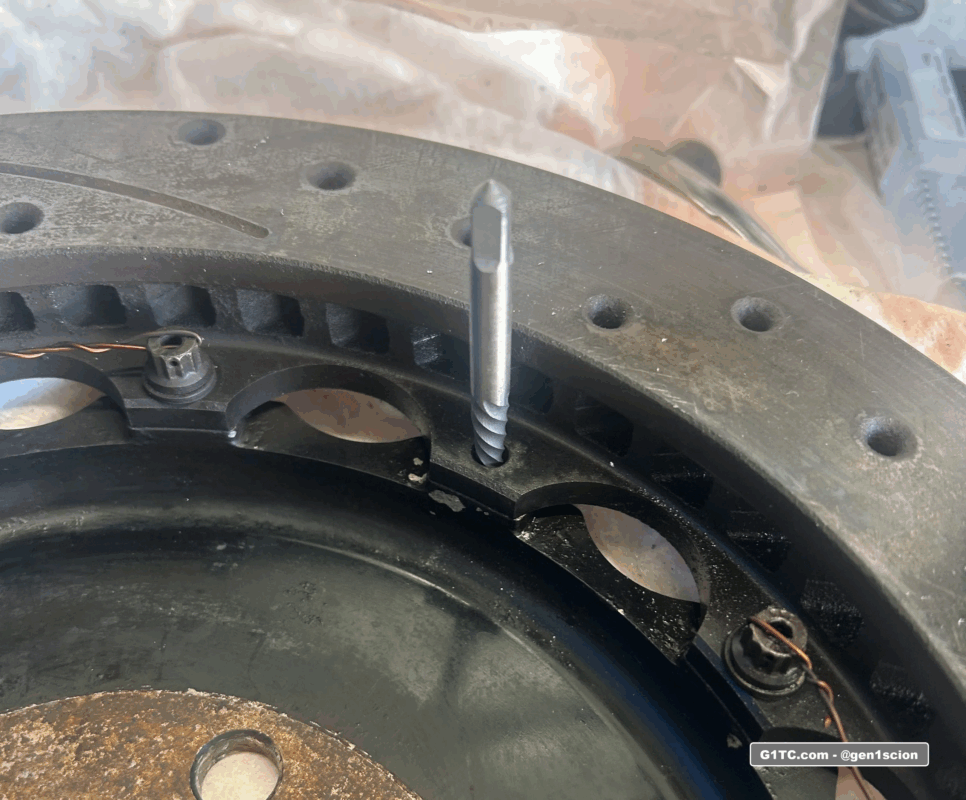
I removed the rotor to get cleaner access to the stripped bolt
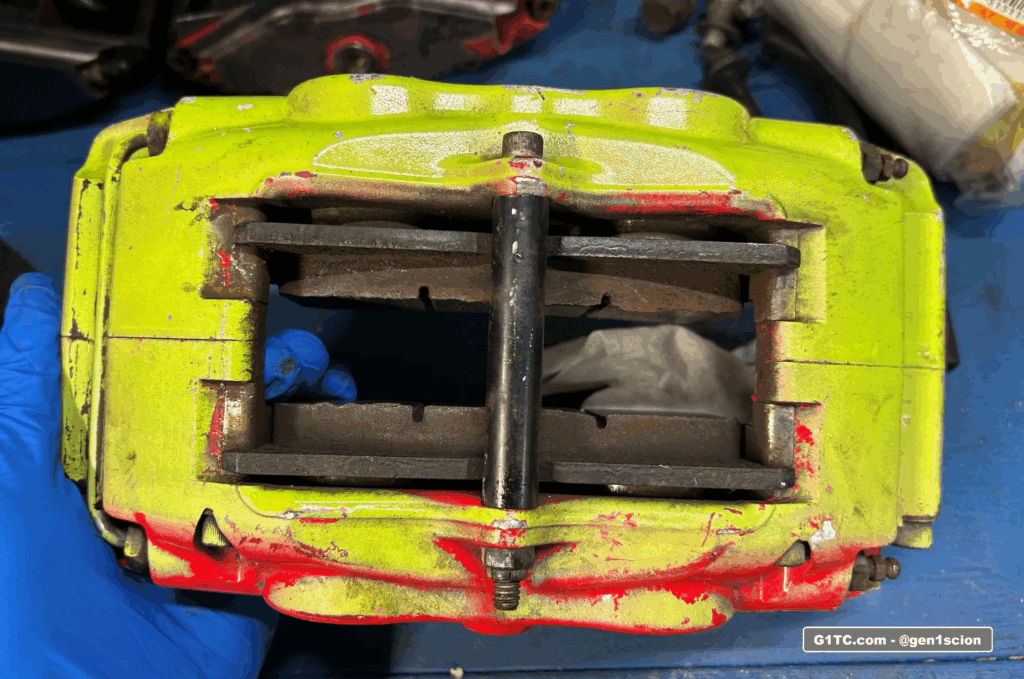
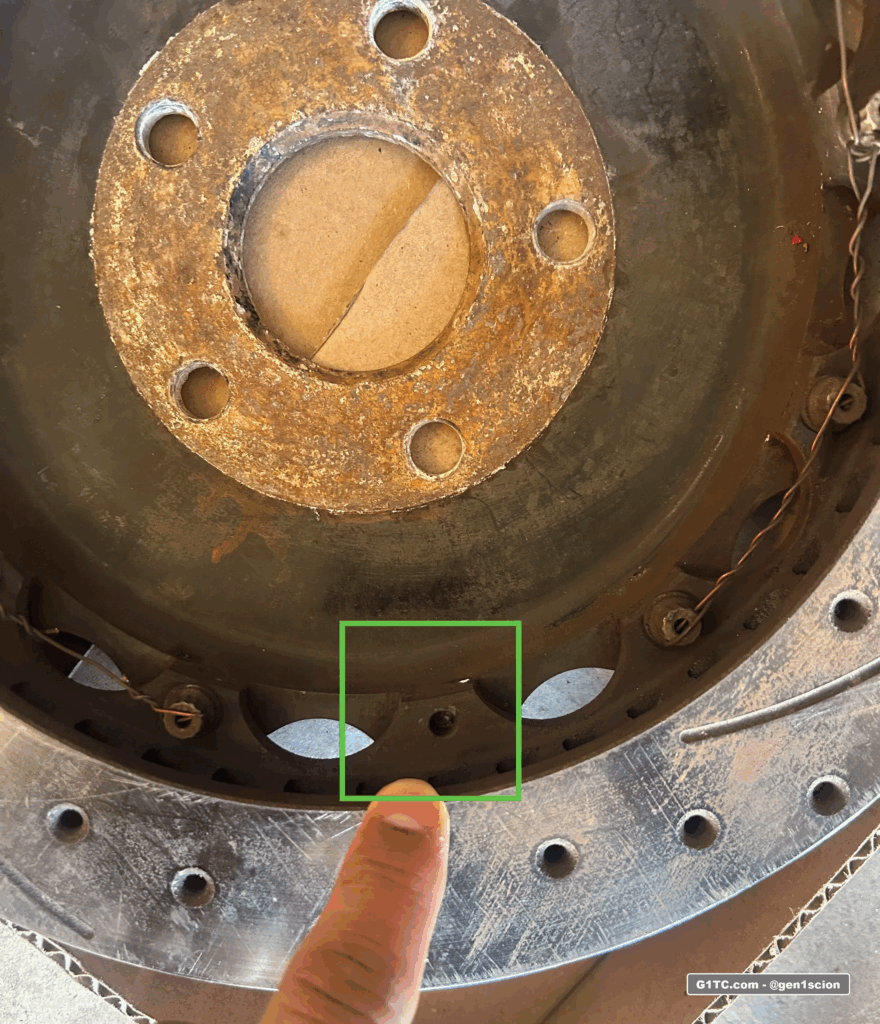
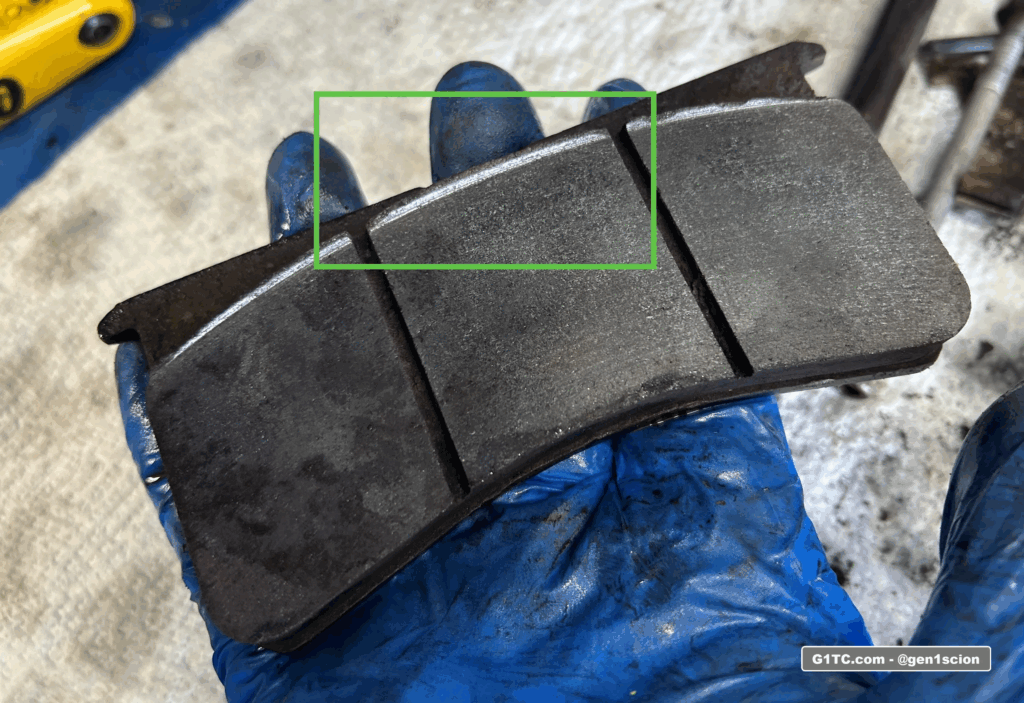
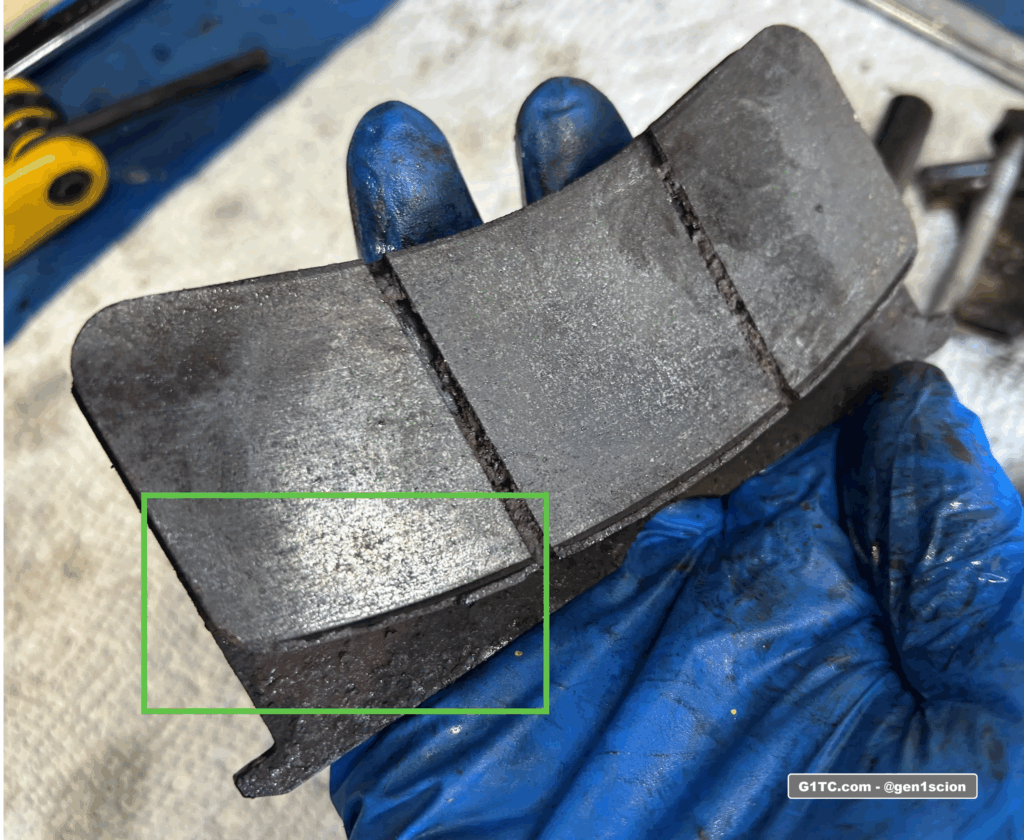
Removing seized brake pads
Notice the lip on the pad, it’s not sitting fully on the rotor face. I’ll have to investigate this.

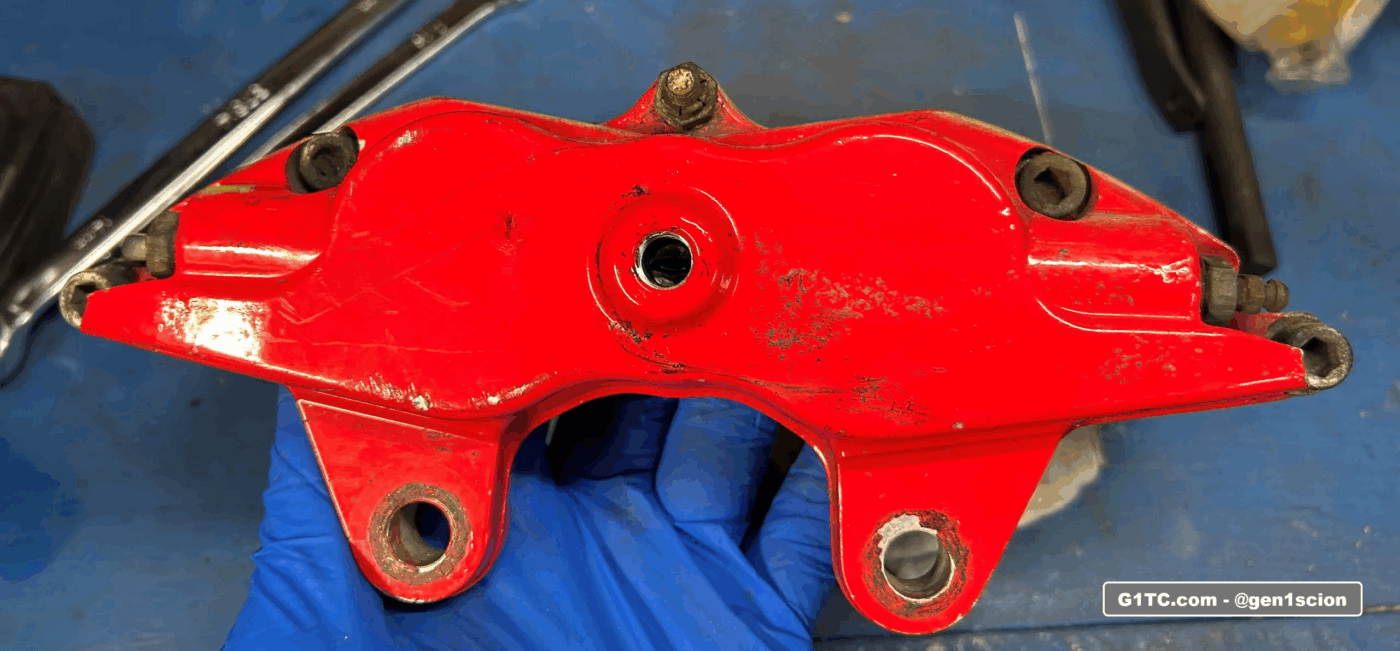
Soaking the Caliper in Citristrip over night, taking this down to bare metal.
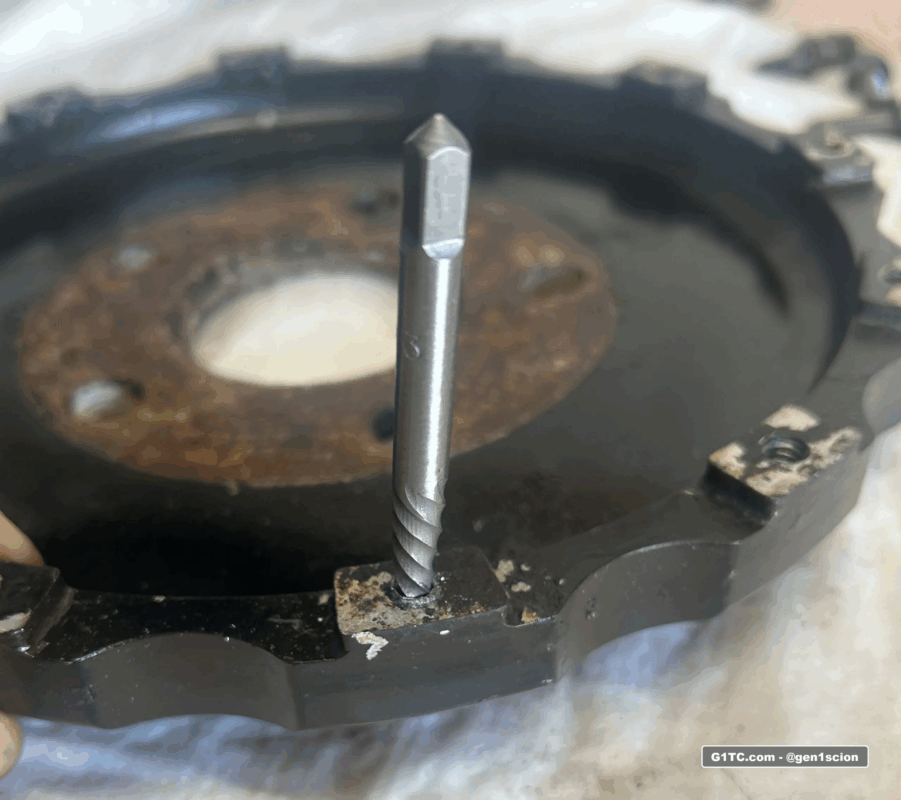
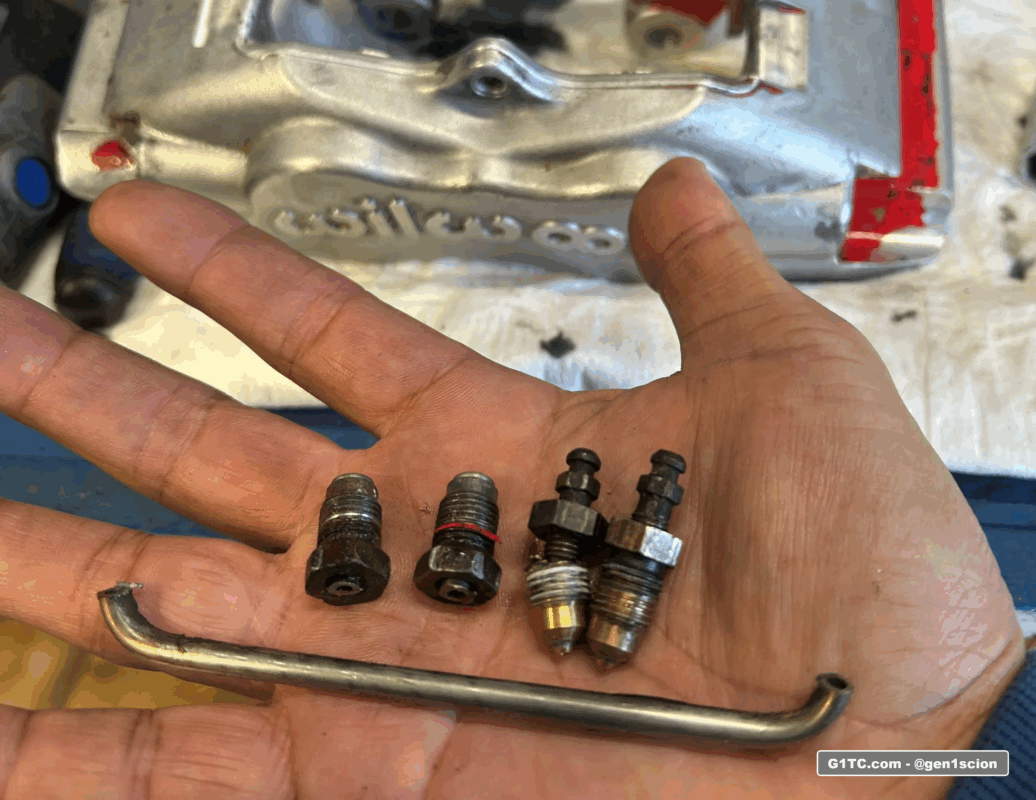
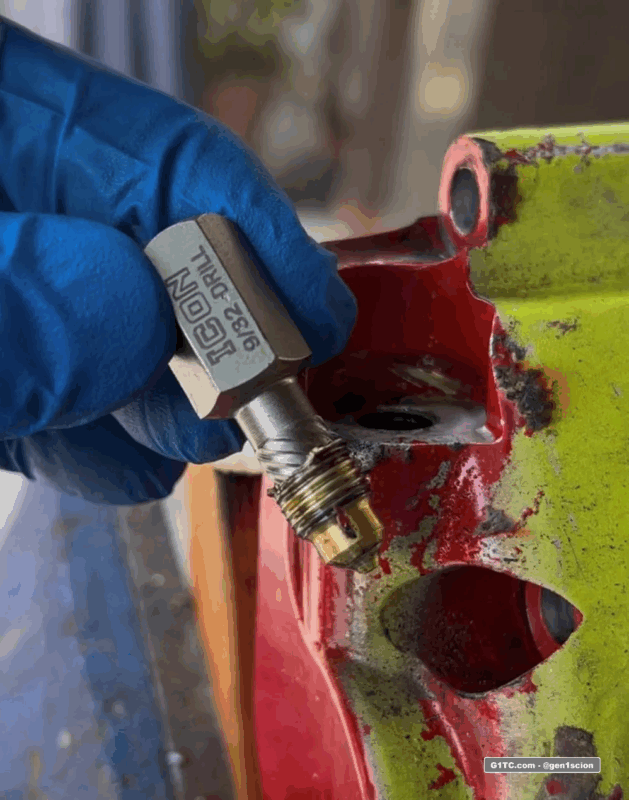
Passenger Caliper – Removing a sheared bleeder bolt
Bleeder bolt sheared while trying to remove it. Here I use a #5 1/4″ extractor screw to remove it.
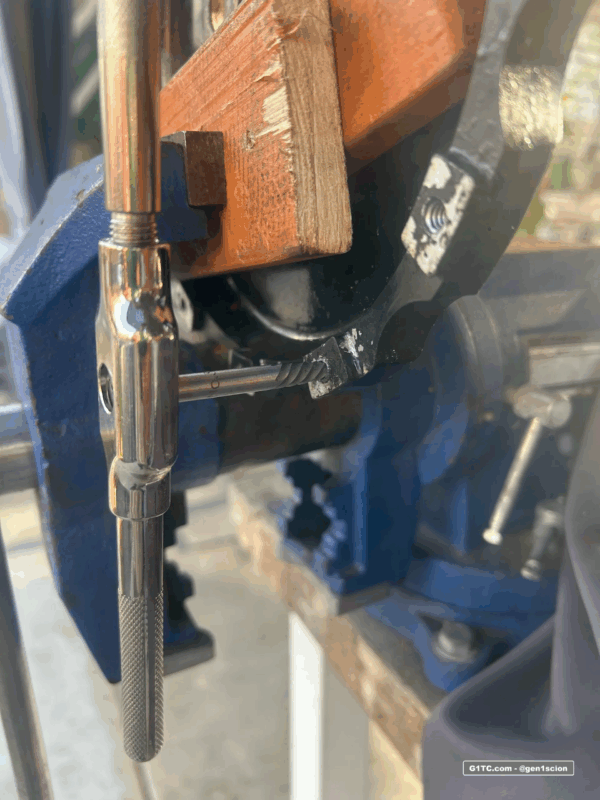
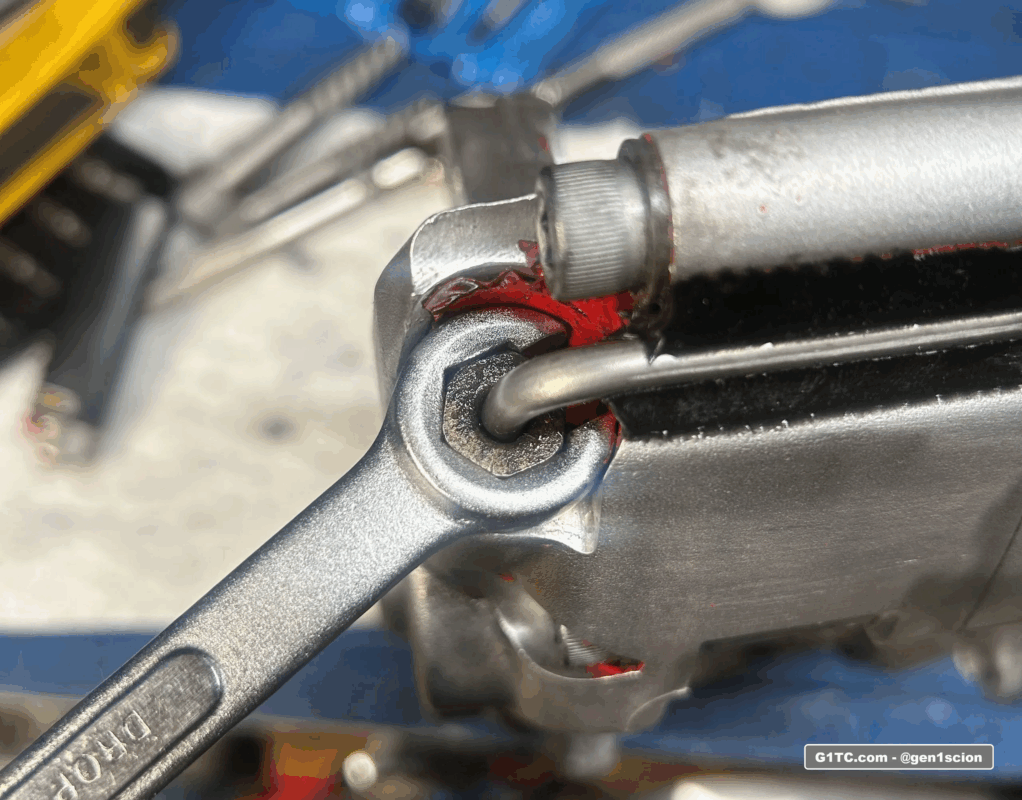
Cutting the crossover tube
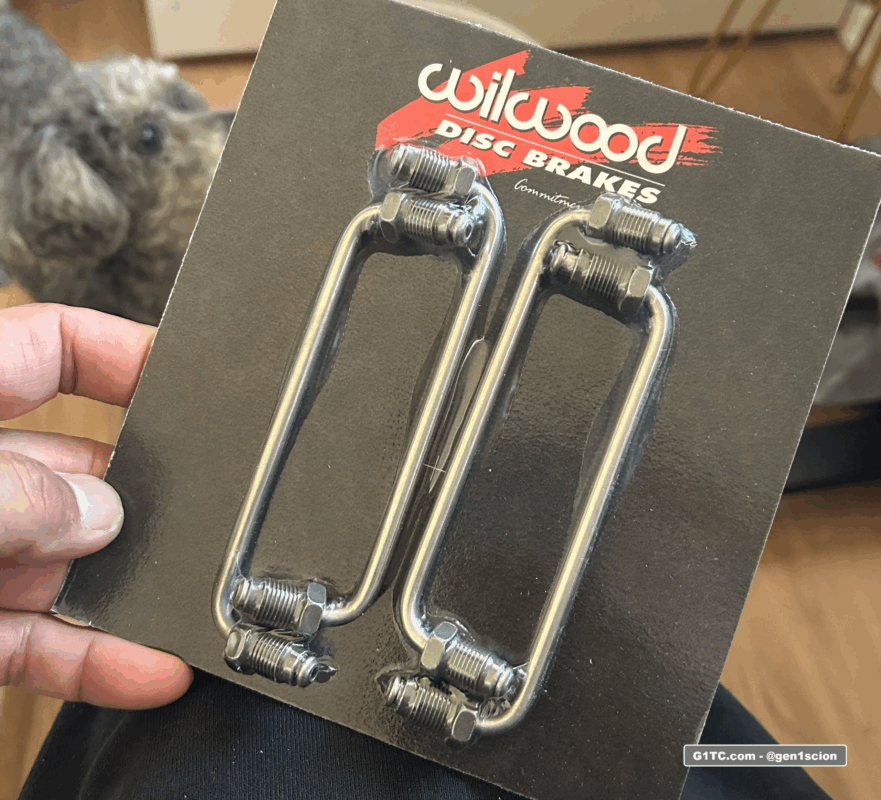
I can get the wrench on there, but I can’t get enough torque to break it free before it starts to strip the bleeder nut head. I’ll just buy new tubes for the rebuild. I won’t bother struggling with this. A few days after I cut the tubes, I found out the replacement tube kit is OBSOLESCENT (becoming obsolete). I found them online and ordered them immediately. Here’s the pn Crossover Tube kit (qty 4) 190-5973.
The Replacement crossover tubes PN 190-5973

Here’s the carnage from the first front caliper.

Removing the pistons
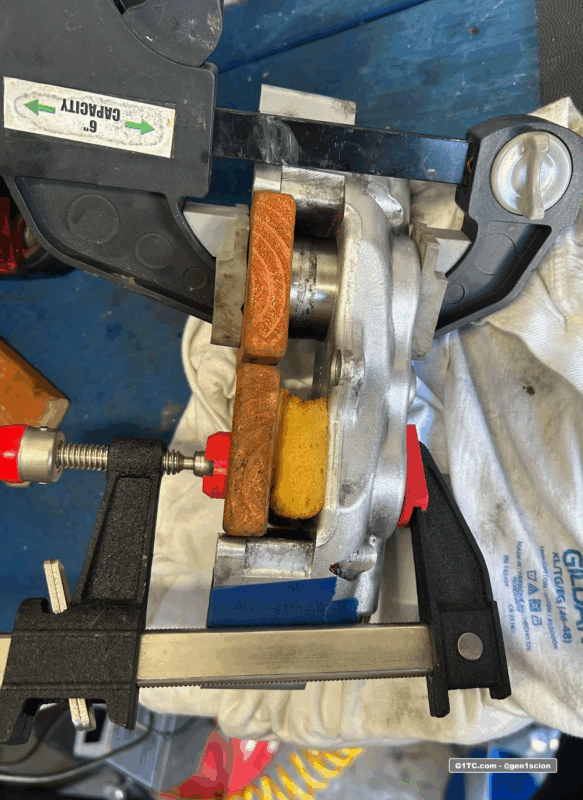
The pistons were mostly seized. I cleared the corrosion off the seams as best as possible, then I soaked it with WD40. I blocked off the bleeder bolts and the blew air into the caliper half, knowing they probably wouldn’t come out evenly (at the same time). Sure enough one popped out first, then I was faced with removing a single piston. I put the removed piston back in to seal that hole and clamped it (shown below). This is the rig I used to prep for removing the other piston. I used clamps and wood blocks. On the target piston, I used a cut up sponge so that I can get movement on there, but still clamp it down. The goal here was to inject air into the caliper, and work the piston back and forth to break the seal.
Here’s video of me actually breaking it free
Here’s a video of me breaking the other piston free. I had to bump my PSI up to 100PSI and that seems to work better:
Piston removal tip
When you air out the pistons, they are seized and most of the time don’t come out at the same time. So remove 1, then clean off all the corrosion on the piston and inside the cup, and the seal. Re-insert it along with the seal (lubricate it with some WD40) but don’t push it all the way down, just enough to seal that side, clamp it, then proceed with pushing out the other seized caliper. This way, the first piston is easier to remove when done. It’s already at the top of the stroke and it’s clean from corrosion and debris.
Here’s an example:
Cleaning the piston:
I discovered a small burr/nick on the piston cup edge, damage from previous owner. I had to knock this carefully with a round file:
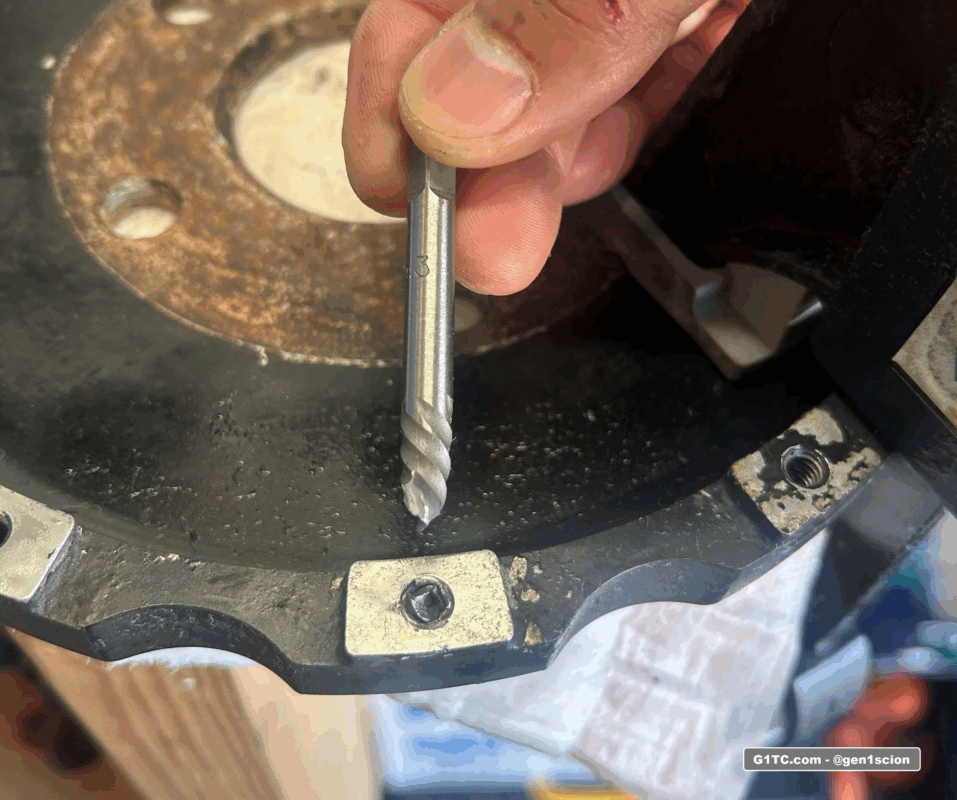
Driver Caliper – Removing a sheared bleeder bolt
The driver’s side caliper bleed bolt sheared also. I tried to take it out the same way as the passenger one above, but It was being stubborn. This was my first attempt to get it out, with no luck.
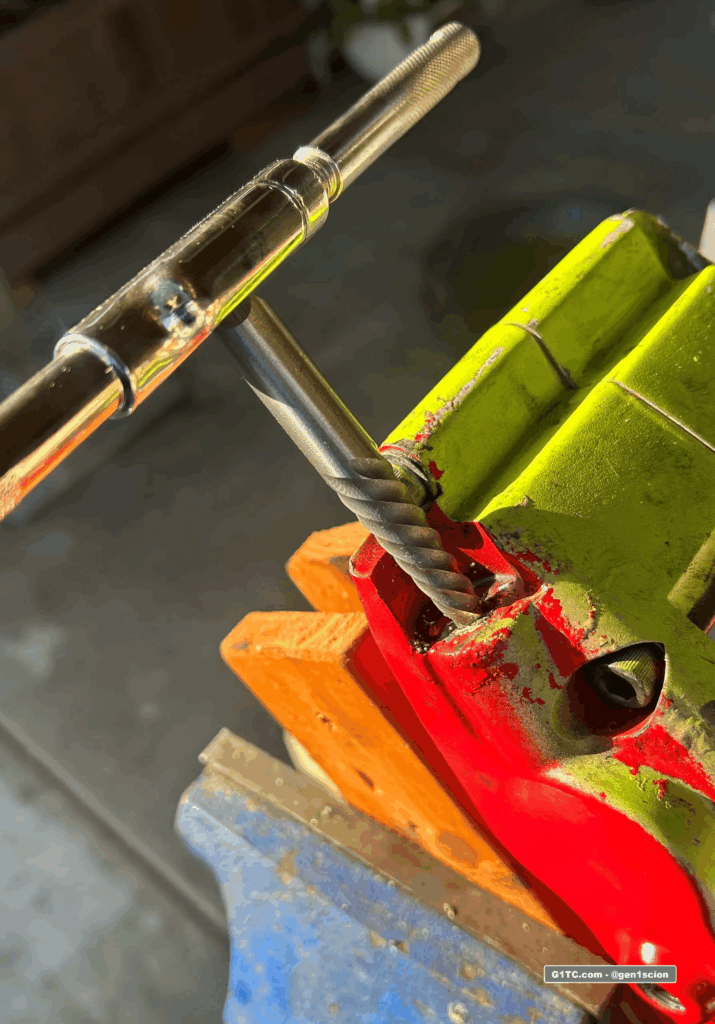
I cleaned up the surface area so I have a better idea of what I was working with. I went to Harbor Freight and bough a different style extractor bit with more flutes in a smaller area. I soaked it in PB Blaster and this 2nd time around used some heat. Got it out finally, phew!
I now have both front calipers fully disassembled and stripped of powder coat. I ordered new brake pads so I can proceed with the test fit. I’ll test fit and check all the clearances including rotor straightness before re-powdercoating them.


NOTE: THIS IS A RUNNING BLOG – Meaning I will publish this for now and continually update it as I make progress with this restore/upgrade. I’m doing this to keep track of my progress. Thank you for following me!