Removing the throttle body
-
Unplug the battery
- Remove the air intake box
-
Unplug the MAF sensor
-
Unbolt the EGR check valve from the mount
-
Unplug the hoses from outside working your way towards the throttle body, take your time
-
Clamp the coolant send and return lines with pinch pliers
-
Unplug the throttle body wiring harness
-
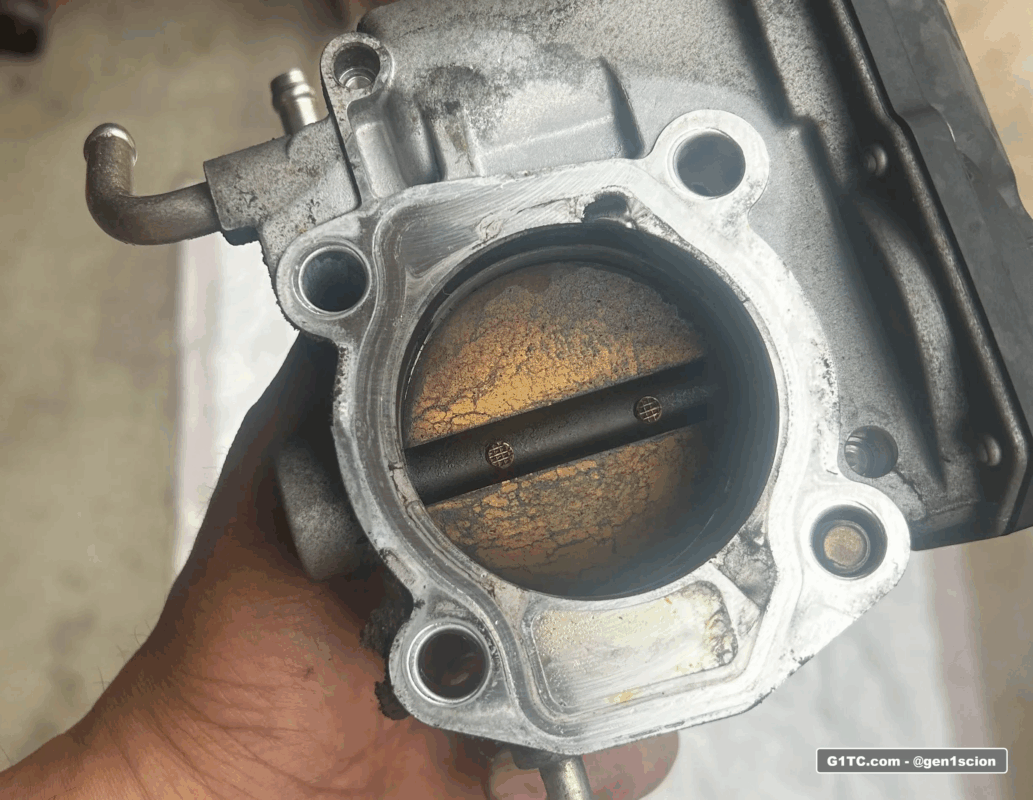
Remove the four 10mm bolts of the throttle to intake manifold
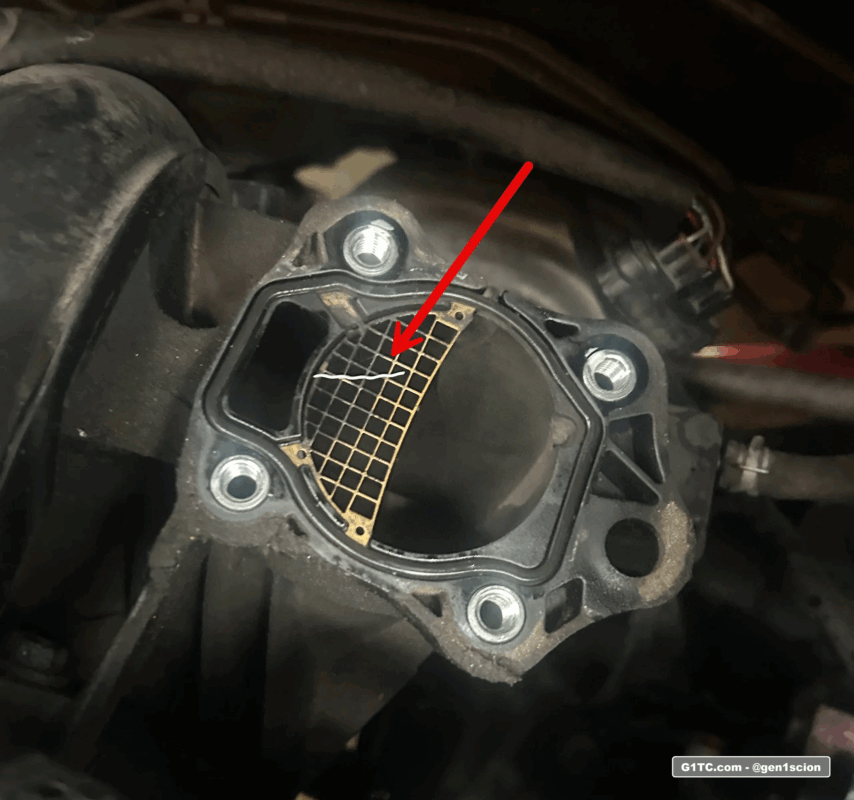
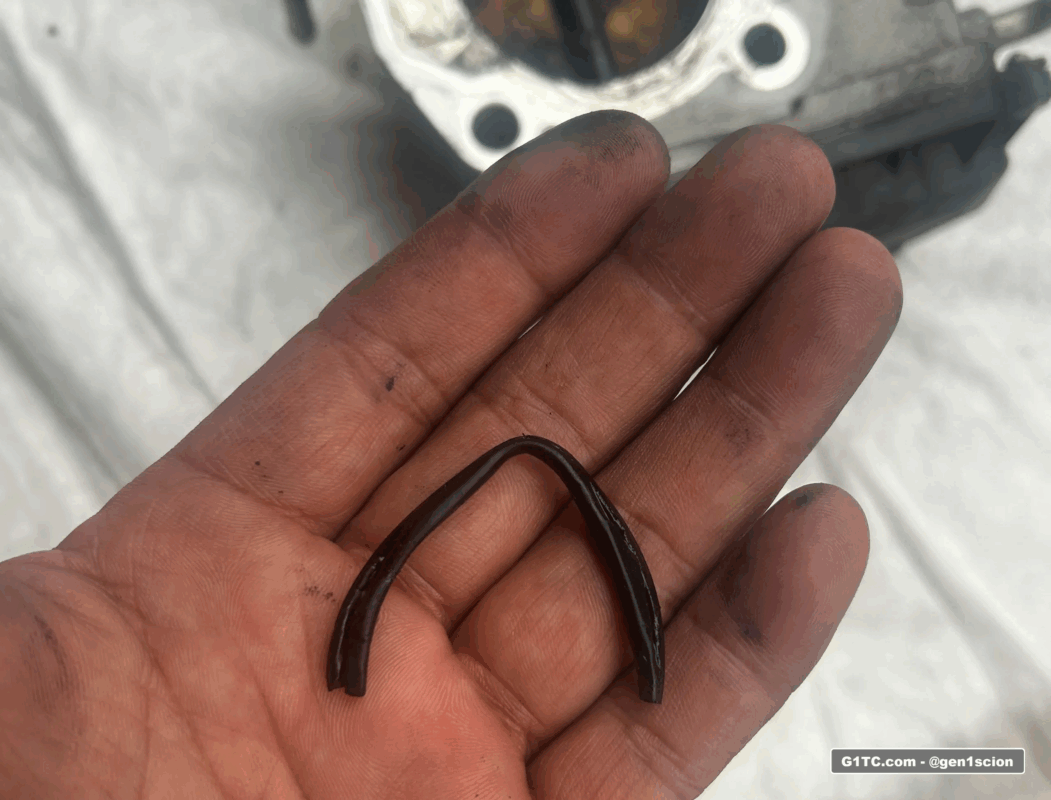
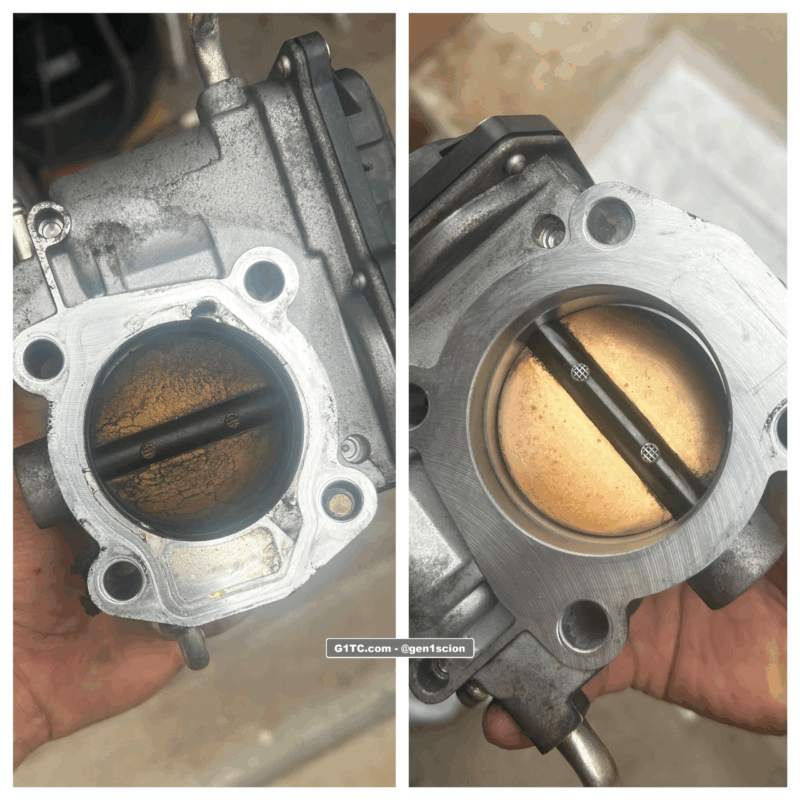
I found debris
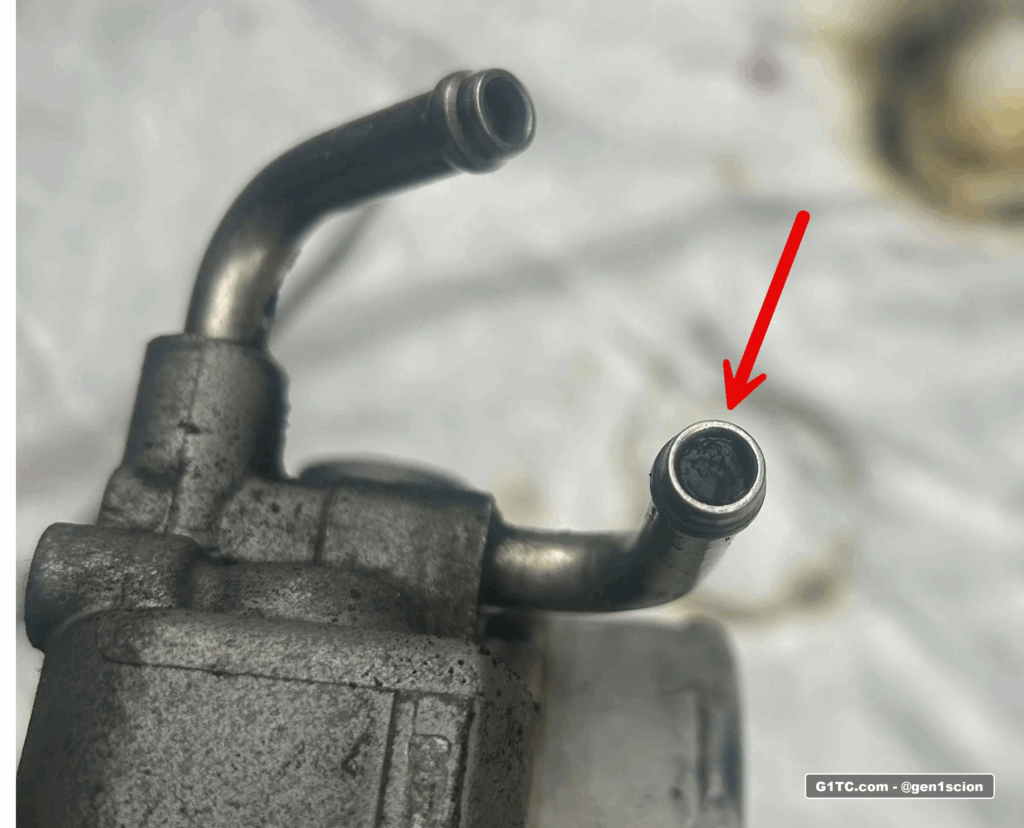
I discovered a blocked coolant line
Throttle Body Cleaning Tips and Tricks for DIY Mechanics
DIY throttle body cleaning is one of the easiest and most effective maintenance jobs you can do to restore drivability. A dirty throttle body can cause rough idle, hesitation, poor throttle response, and even stalling. This guide focuses on proper throttle body cleaning by removing the throttle body completely, not just spraying cleaner down the intake pipe.
Why Remove the Throttle Body for Cleaning?
Removing the throttle body allows you to thoroughly clean carbon buildup that forms around the throttle plate, bore, and idle air passages. These areas are critical for airflow control and are often missed during quick spray-only cleaning. For best results, DIY throttle body cleaning should always involve full removal.
Tip 1: Disconnect the Battery Before Throttle Body Cleaning
Before starting, disconnect the negative battery terminal. This protects electronic throttle bodies from damage and prevents check engine lights. Disconnecting the battery also helps the ECU relearn idle properly after cleaning the throttle body.
Tip 2: Label Vacuum Lines and Electrical Connectors
During throttle body removal, you may encounter coolant hoses, vacuum lines, and electrical connectors. Take photos or label everything. Incorrect reinstallation can cause vacuum leaks, rough idle, or fault codes—common mistakes during DIY throttle body cleaning.
Tip 3: Use Throttle Body–Safe Cleaner Only
Always use throttle body cleaner, not brake cleaner or carb cleaner unless clearly labeled safe. Harsh cleaners can damage internal coatings and seals. Use a soft brush or microfiber cloth when cleaning a throttle body to avoid scratching the bore.
Tip 4: Clean the Throttle Plate and Bore Thoroughly
Carbon buildup collects on both sides of the throttle plate, especially along the edges. Gently open the plate and clean the bore, plate edges, and idle air passages. This step is critical for fixing rough idle after throttle body cleaning.
Tip 5: Be Careful with Electronic Throttle Bodies
If your vehicle uses an electronic throttle body, avoid forcing the throttle plate open. Move it gently by hand and never spray cleaner directly into the motor or electronics. Improper handling can damage the throttle body and create new problems.
Tip 6: Replace the Throttle Body Gasket
A worn throttle body gasket can cause vacuum leaks after cleaning. Always inspect the gasket and replace it if there’s any flattening or damage. This simple step ensures your throttle body cleaning job delivers real results.
Tip 7: Allow the Throttle Body to Fully Dry
Before reinstalling, let the throttle body air dry completely. Residual cleaner can cause hard starting or unstable idle immediately after cleaning.
Tip 8: Perform an Idle Relearn Procedure
After reinstalling the throttle body and reconnecting the battery, the ECU may need to relearn idle. Let the engine idle without accessories, then drive normally. Some vehicles require a specific throttle body idle relearn procedure for best results.
Final Thoughts on DIY Throttle Body Cleaning
Proper throttle body cleaning can dramatically improve idle quality and throttle response, especially on higher-mileage vehicles. Taking the time to remove and clean the throttle body correctly turns a simple DIY job into a long-lasting fix.