Introduction
This article describes how to replace the AC Clutch on the 1st Gen Scion TC running the original OEM 10S15C Denso AC condenser. According to the clutch kit details, this condenser was only on 2005-2006 Scion TCs. This will not work for aftermarket and replacement condensers. Verify and troubleshoot first, before ordering the $99 kit. See sections below.
Symptoms
-
Your AC turns on and blows, but never gets cold.
-
You no longer hear the “click” when you turn on your AC.
-
You drive around aimlessly hoping it will get cold, but it never does.
Troubleshooting
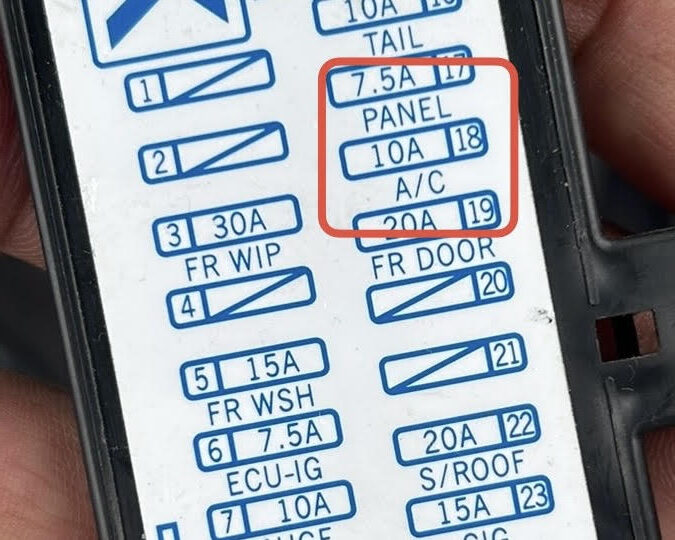
1. Check the fuse by the interior knee bolster. Position 18, 10A. It’s labelled as “A/C”
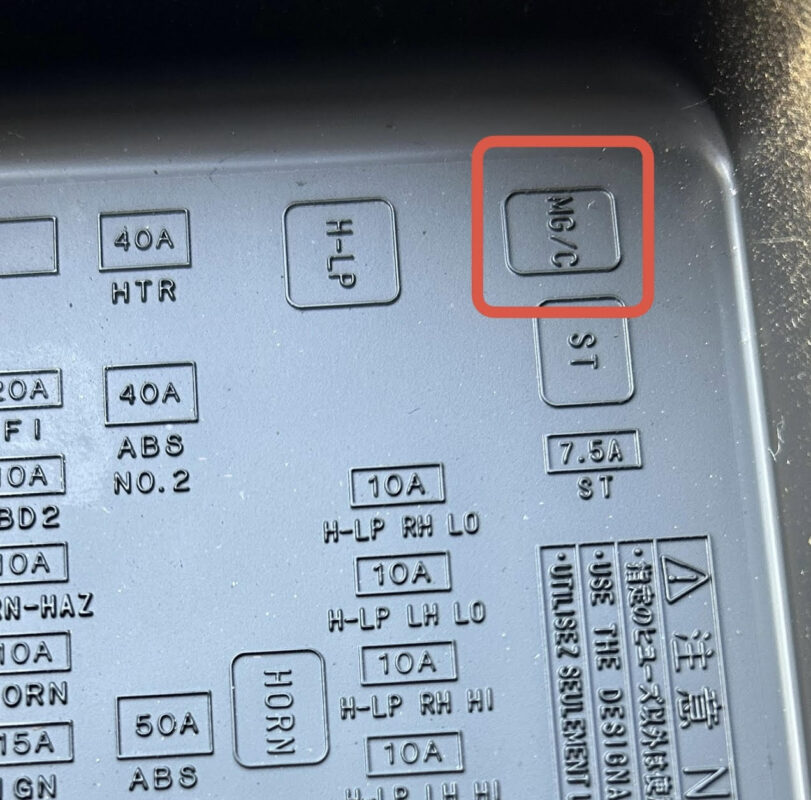
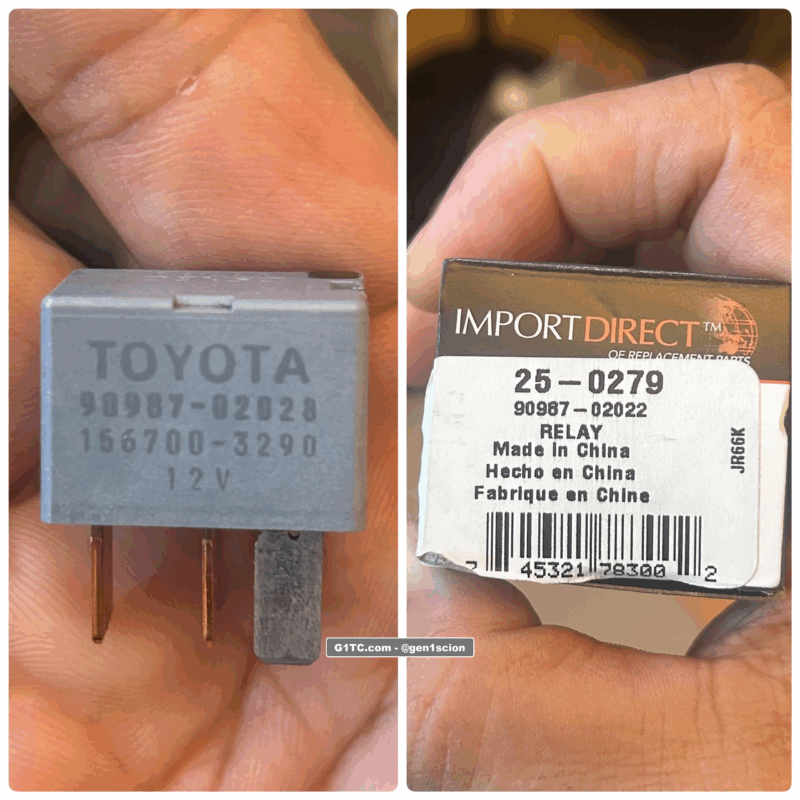
2. Check the relay in the engine bay. It’s labelled as MG/C (Magnetic Clutch)
I didn’t have a spare relay, so I simply bought one from Oreilly’s (cross reference Denso p/n 90987-02028) tested in the parking lot, and returned it. Ghetto I know, but so is your mom.
3. Check voltage at the harness. You should be getting 12v at the harness when you press your AC button.
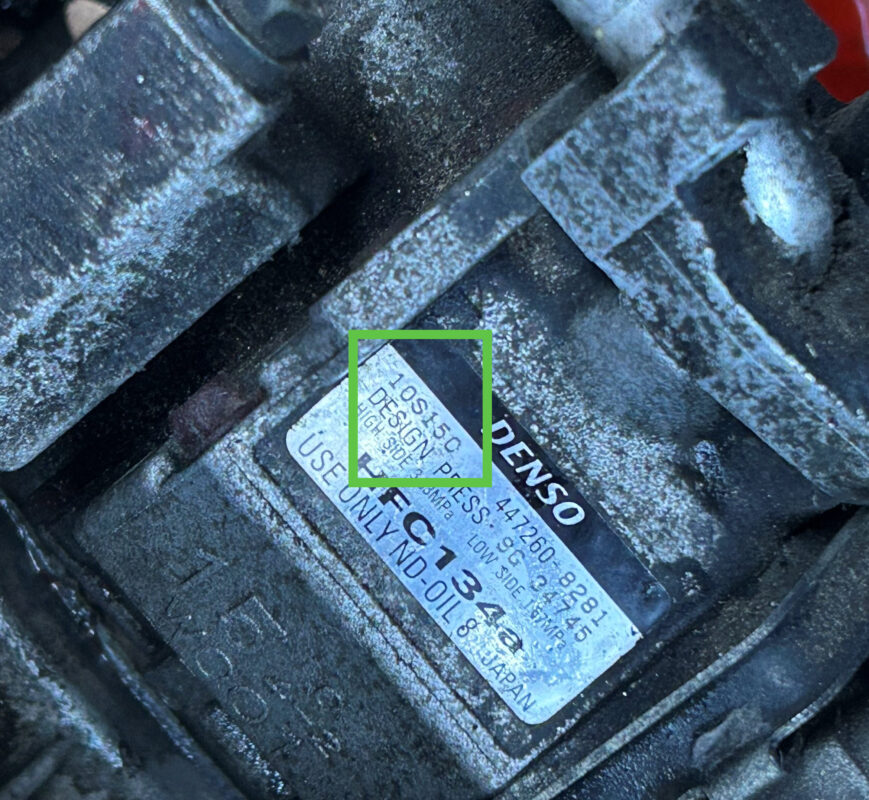
Verify you have the 10S15C Denso
Verify which one you have before buying the kit! This might not be easy, you’ll have to remove the alternator. OR you might be able to get under it and peek at the AC Condenser label with a pen mirror. You’re looking for p/n 10S15C on the Denso AC Condenser. I snapped this photo while doing my water pump & serpentine belt service so that helped.
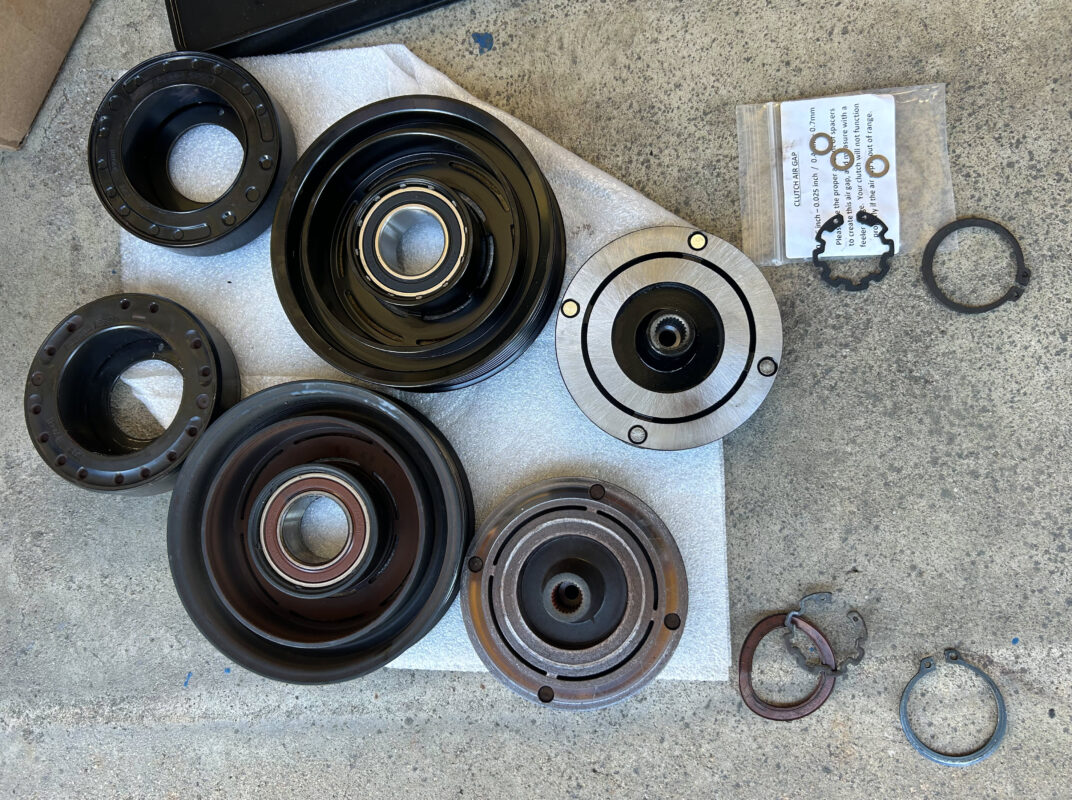
Here’s a link to the repair kit on eBay, $99. I haven’t seen this for sale anywhere else, but I’m sure other places may have it. Everything is included in the kit:
-
(1) Hub – front plate
-
(1) Bearing – already pressed-in
-
(1) Pulley
-
(1) Electromagnetic Coil
-
(1) Set of hardware – Snap rings, spacers, bolt
 Edit Image
Remove & Replace the AC Clutch
1. Jack your car up. Disconnect your battery
2. Use a 19mm to loosen the tensioner nut, and unhinge the serpentine belt.
3. Disconnect the battery
4. Remove the undercarriage cowling, and the side cowling in the passenger wheel well so you can have more room to work with
5. Unplug the AC Condenser (power harness)
6. Remove the pulley bolt, carefully remove the pully assembly.
7. The hardest part is removing the two snap rings, there is an outside and inside snap ring. It’s hard to see and access these clips given the angle you’re working at. When I first approached this, I tried using 45 and 90 degree snap ring pliers but it was just a bad angle, and the 2nd snap ring is super deep in the assembly. The video below describes this better:
 and rotate down so you can have direct line of sight to the snap rings") Edit Image
Edit Image
8. Solution – Unbolt the AC condenser mount bolts, and rotate the condenser down, so you can see inside better. DO NOT DISCONNECT the actual hard lines to the system. We will simply unbolt the AC condenser from its mount, rotate it about 45 degrees so we can look straight into the pulley assembly. LEAVE EVERYTHING ELSE CONNECTED, DO NOT DEPRESSURIZE the system.
9. Reinstall in reverse order. Make sure the inside snap ring fits into the groove shown above.
10. Start with one washer/space and measure the gap.
11. Get a feeler gauge and shim the clutch spacing to according to spec. You may have to do this a few times to get the spacing right. I landed on .022 inch gap using 2 washers.
 Edit Image
12. Put your car back together in reverse order. When reinstalling the serp belt make sure all pulleys line up and the grooved pulleys have the entire belt on. Here’s the belt orientation just in case:
 Edit Image
13. Start your car and test your AC, you should now hear it “click” when you press the AC button.
Helpful tools used in this installation