If you are doing the DIY LED cluster conversion mod, this article will show you how to setup a test cluster so you can practice soldering before the actual mod.
The original DIY Cluster conversion guide thread on ScionLife
Give this article a read on ScionLIfe, it’s the original DIY cluster LED swap mod thread:
Use the ScionLife article for disassembly and assembly of your gauge cluster. I won’t go over that here.
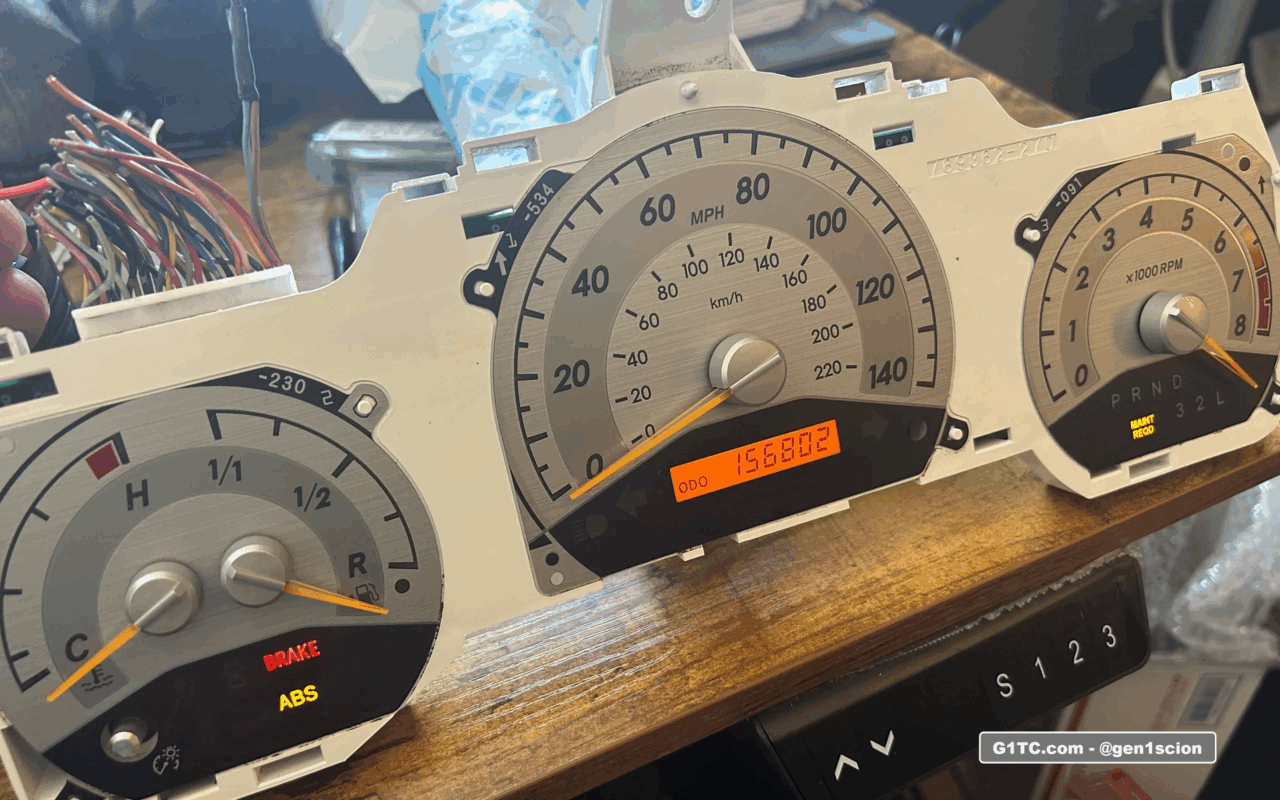
Buy a donor cluster, wire it up for testing
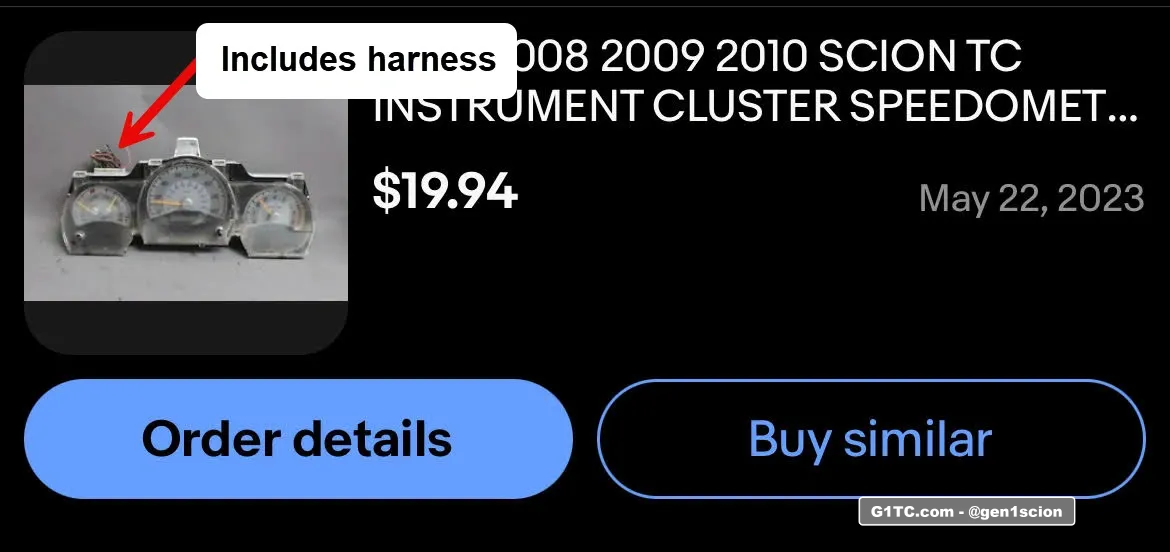
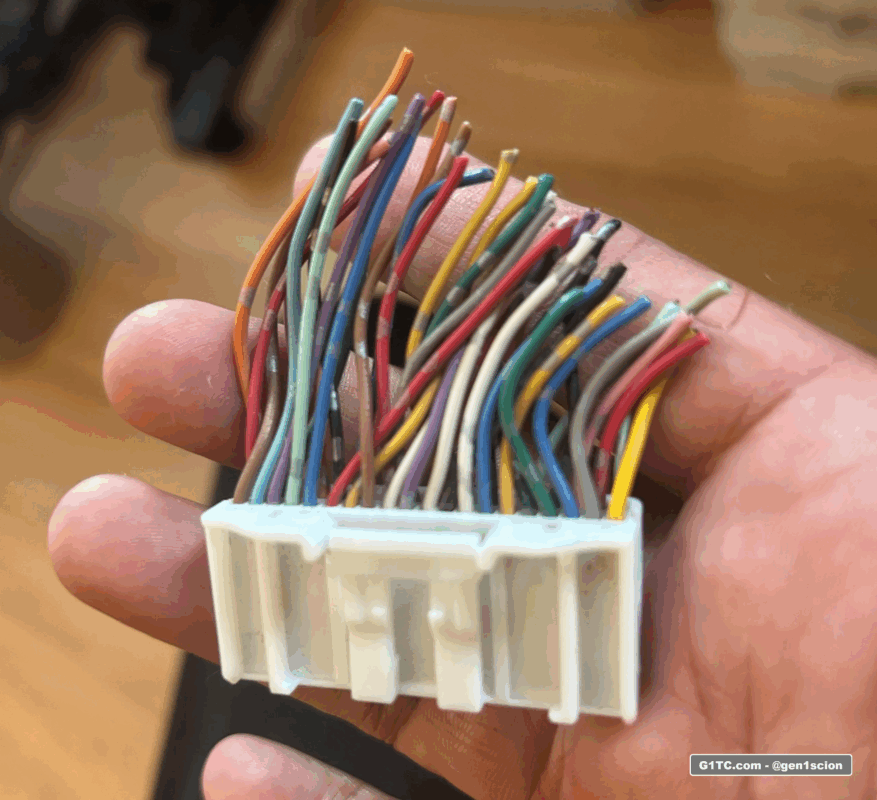
I source a donor cluster from eBay or the junkyard. Make sure to get one with a snipped harness, I’ll show you how to wire it up.
We’ll tap into this harness with a 12v battery so we can do bench testing (we don’t have to keep putting it in the car to test).
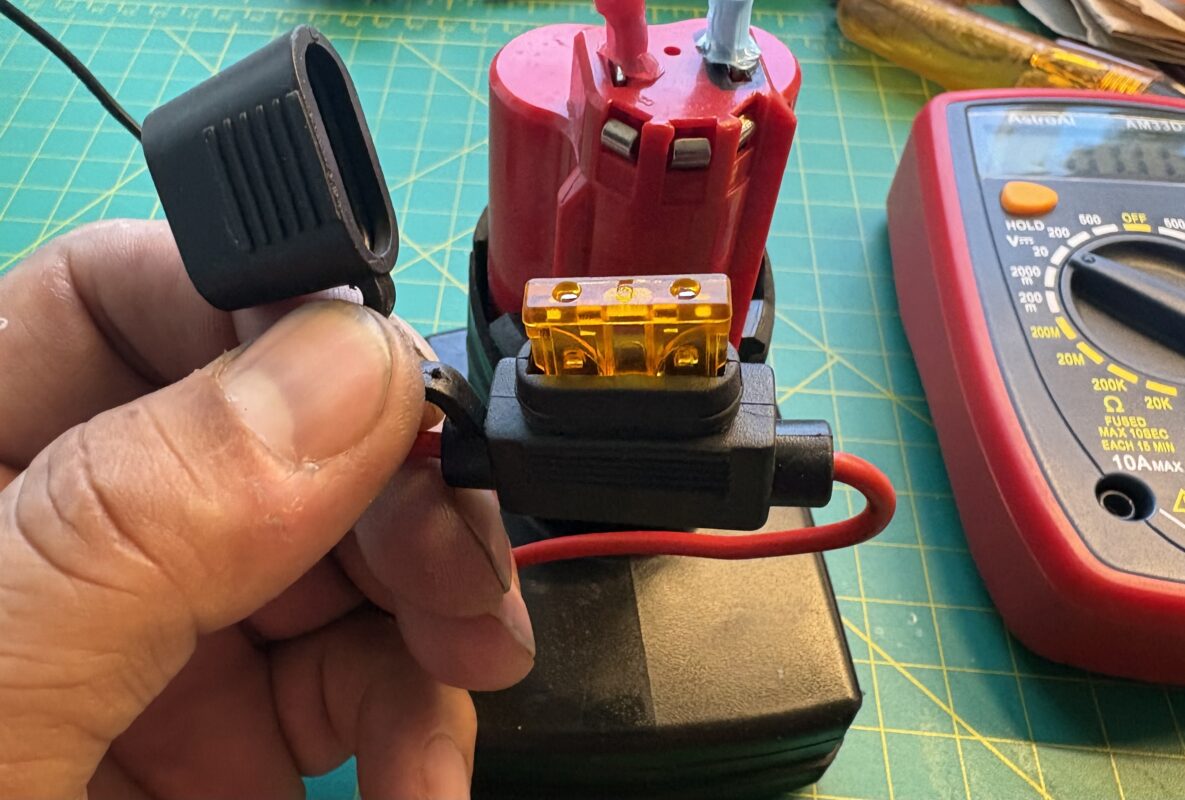
Here’s my 12v bench testing setup
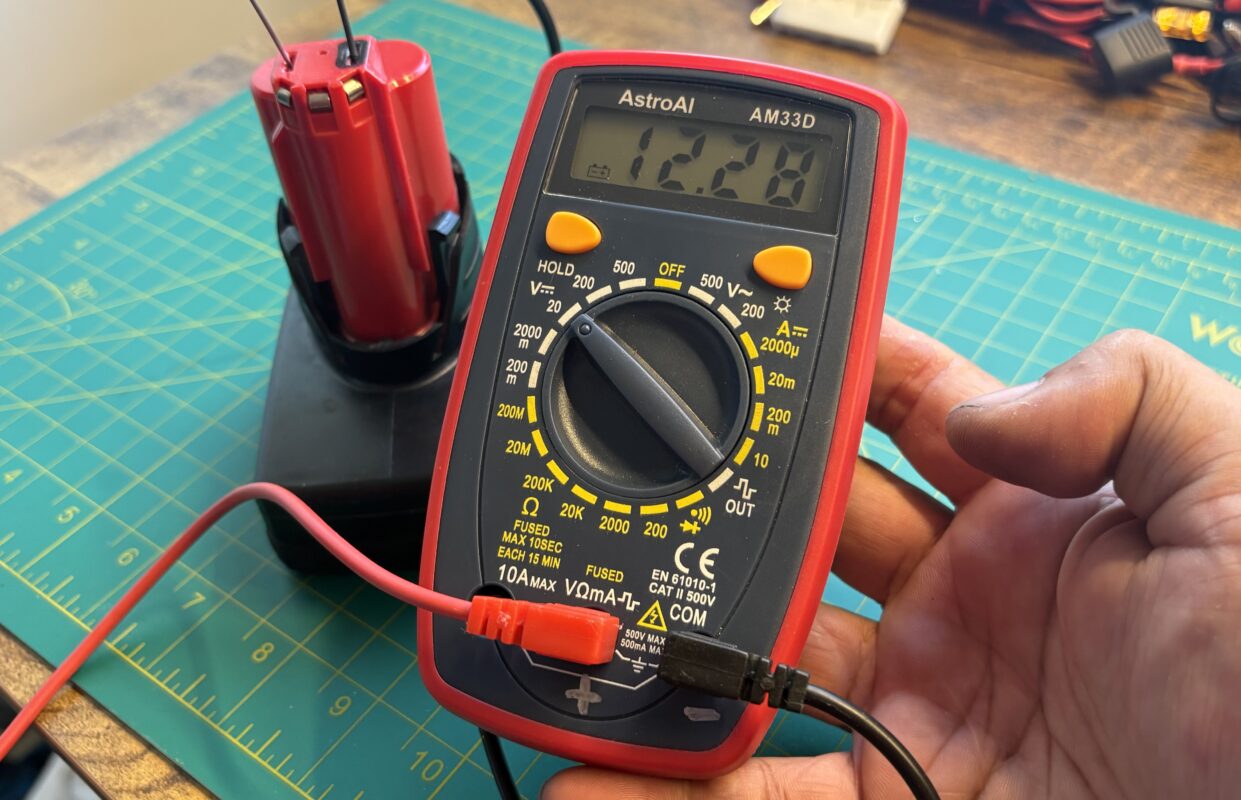
I use a basic M12 battery and an Astro multimeter with fine needle probes. Nothing fancy and it works well.
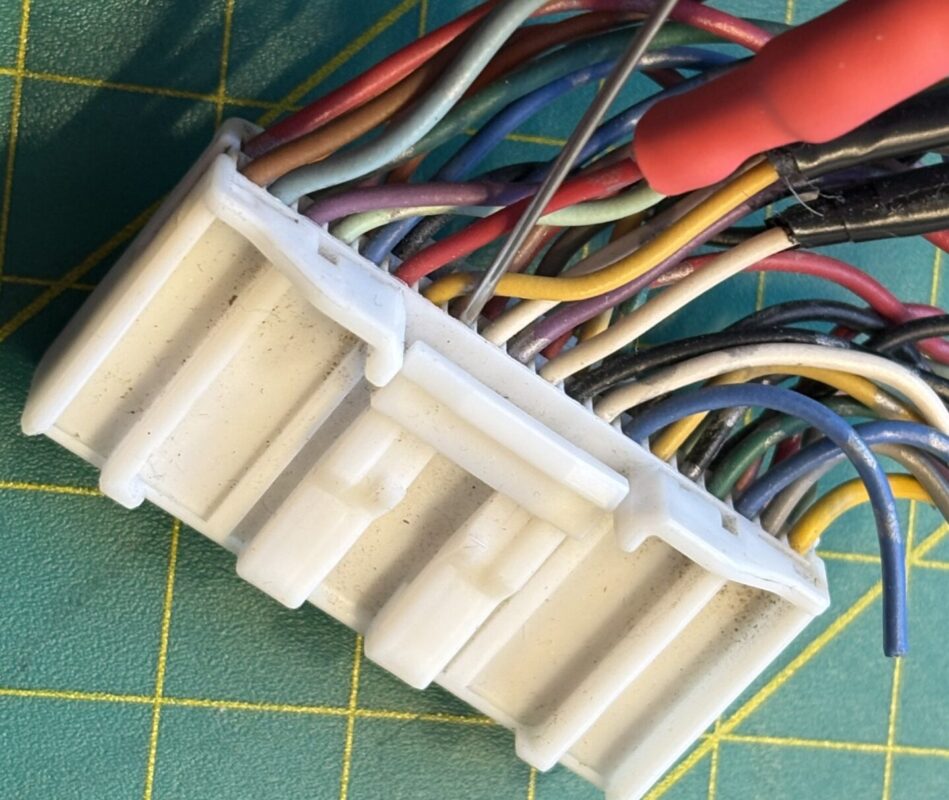
It’s a great setup for getting behind harnesses to test, even when plugged in.
Dont forget to setup an inline fuse. Here I’m using a 5amp fuse.
Wiring Diagrams
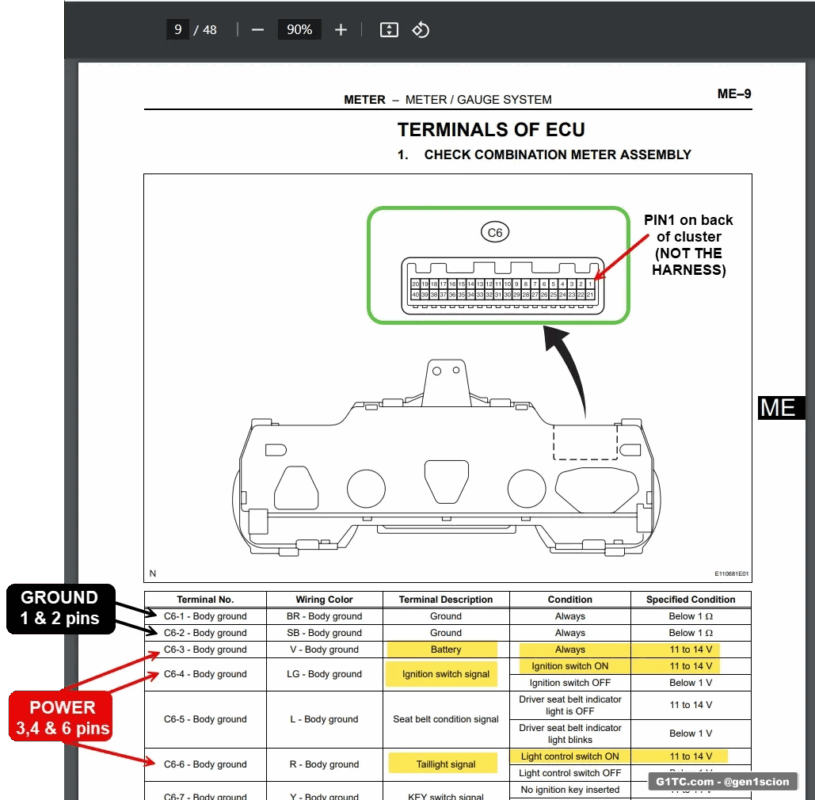
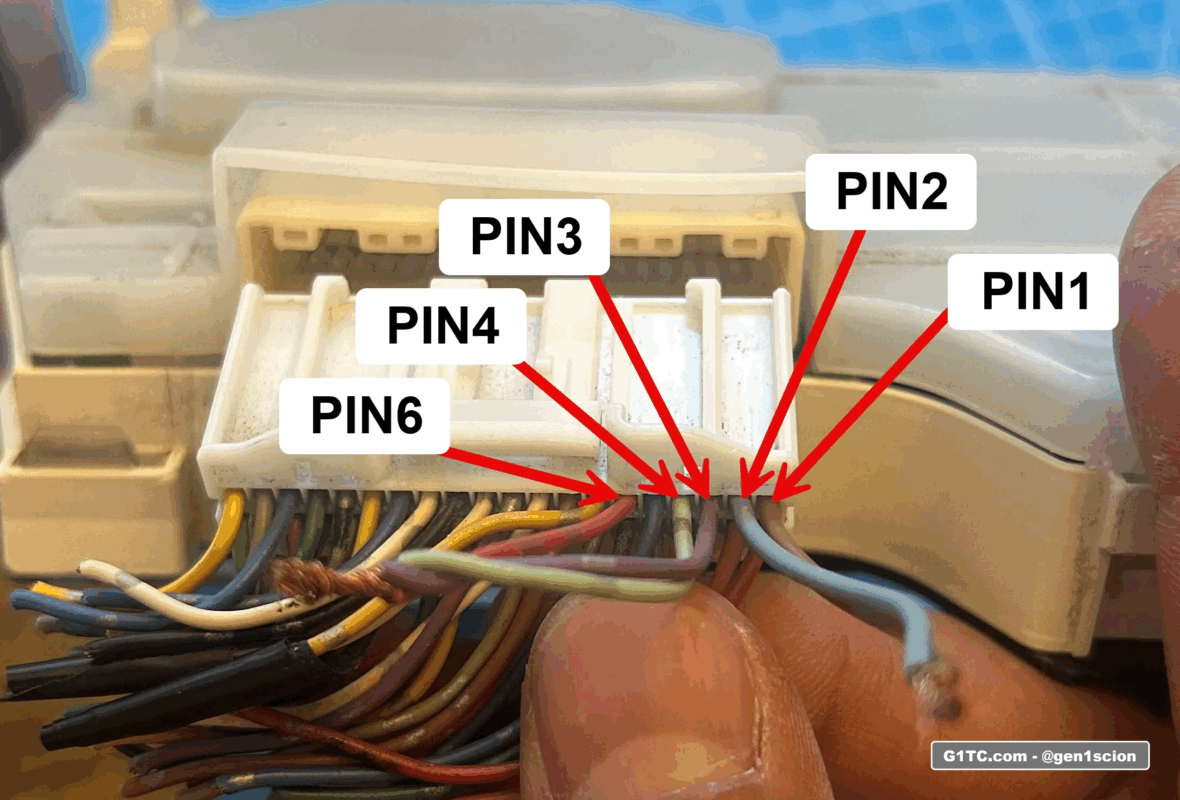
GROUND PINS 1 and 2
These two wires will go to the black terminal of your 12v battery
POWER (12V) to PINS 3, 4, and 6
What you are doing here is simulating powering ON the car, specifically these conditions:
-
PIN 3 – the always on 12v power
-
PIN 4 – the ignition switch is ON
-
PIN 6 – the light switch is ON (this essentially lights the cluster up)
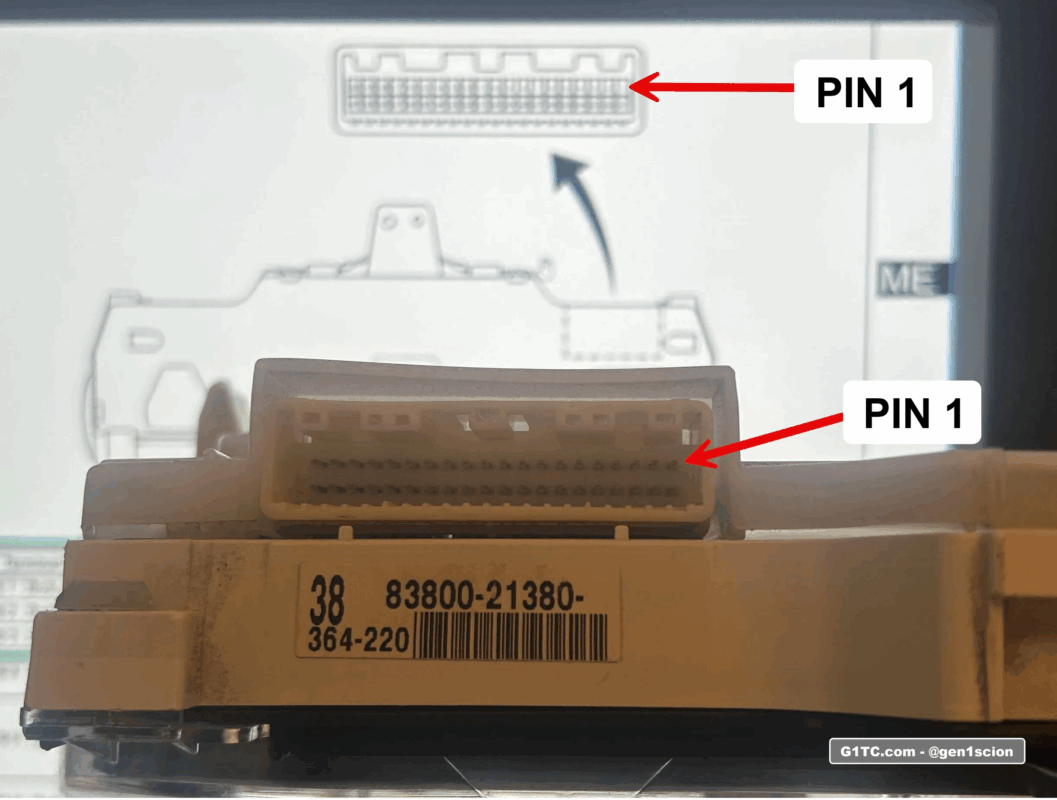
These photos should help you:
Here’s a video explanation and demonstration
Congratulations, you’re ready
Now that you’ve got a test cluster, you can start practicing your soldering. Important cluster notes
- You can’t just swap a cluster in, the mileage from your car will not xfer over or vice versa
- With a donor cluster you can practice your soldering, setting needles to zero, and the LCD color swap (if you decide to do that too)
- When you setup the test rig use a 12v battery and fuse the power side.
Links to my other DIY Cluster gauge articles
- How to wire up a test donor gauge cluster
- DIY LED cluster swap mod amber to white 2005-2010 Scion tC
- Changing colors on the gauge face using transparent wrap
- LCD color / change using polarizer film, and LED swap
- Black Cat Custom carbon fiber style gauge faces
- OEM style red needle swap
- AC Unit LED swap modification
- Changing the LEDs in your window and lock switch controls
Links to soldering tools and accessories
-
Adjustable heat soldering tool kit complete with extra tips, solder, flux, etc. You can use this for the DIY Cluster LED swap too, very handy to have
-
Butt connectors that melt solder to the connections, I really like these
-
Heat gun with melting shield, great for melting the butt connectors above. You can get in tight spots without heating up neighboring parts
-
Tube shrink wrap, I use this stuff all the time to cover up raw wire soldering and to water proof butt connectors
-
Mini fuse taps, these come in handy if you want to piggy back off existing HOT or switched AC power from the fuse box near the driver kick panel