This article is part of the DIY LED Cluster swap mod – I describe how to change the color of your LCD trip computer in addition to how the color change the characters to black or white using polarizer film.
This process can likely be used for other LCD trip displays, assuming they use a polarizer also.
The original DIY Cluster conversion guide thread on ScionLife
Give this article a read on ScionLIfe, it’s the original DIY cluster LED swap mod thread:
Use the ScionLife article for disassembly and assembly of your gauge cluster. I won’t go over that here.
Important
You only need to do this if you want to have the option to reverse negative your text. You have to pick one for the install, you can’t go back and forth. I choose to remove the polarizing film so I can see my options before deciding.
Wire up your cluster
This article also assumes you have your Scion tC gauge cluster wired up on a test bench. Learn how to wire up your cluster using this article
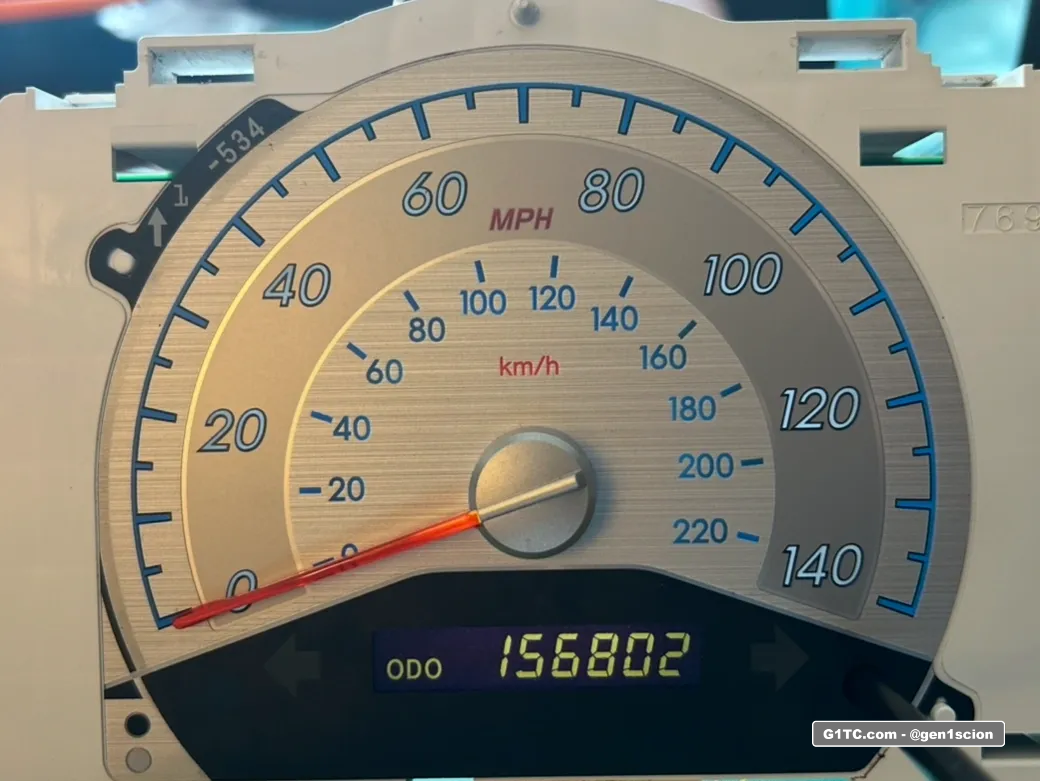
Example of White on Black
This is done by swapping to a white LED (instead of amber). The stock polarizer is left in tact.
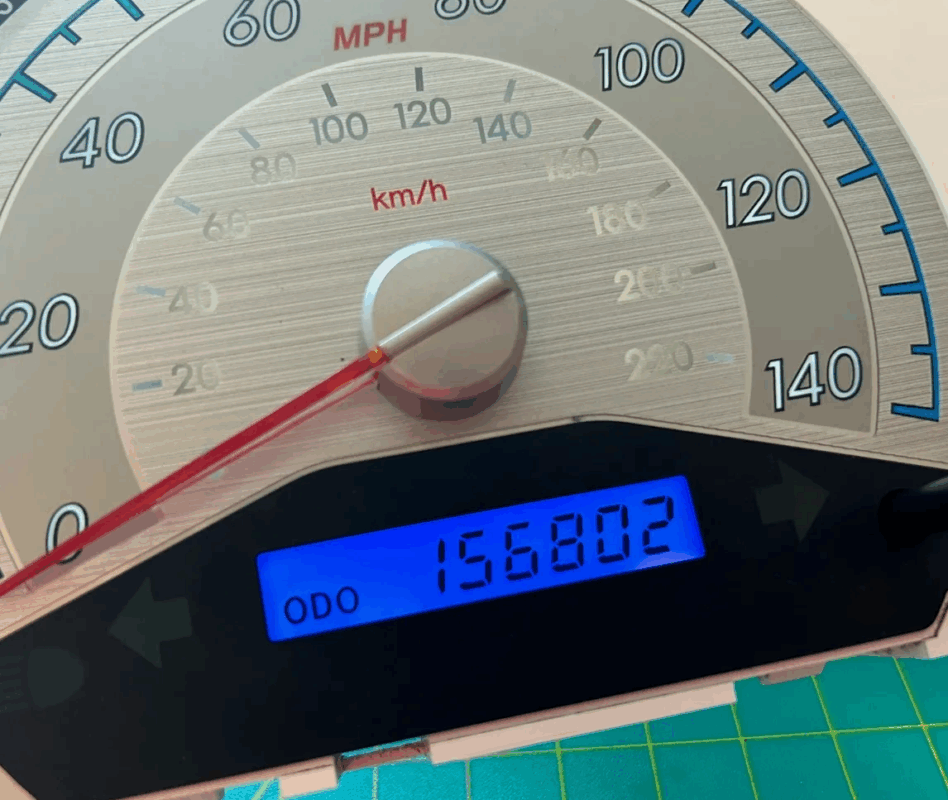
Example of Black on Blue
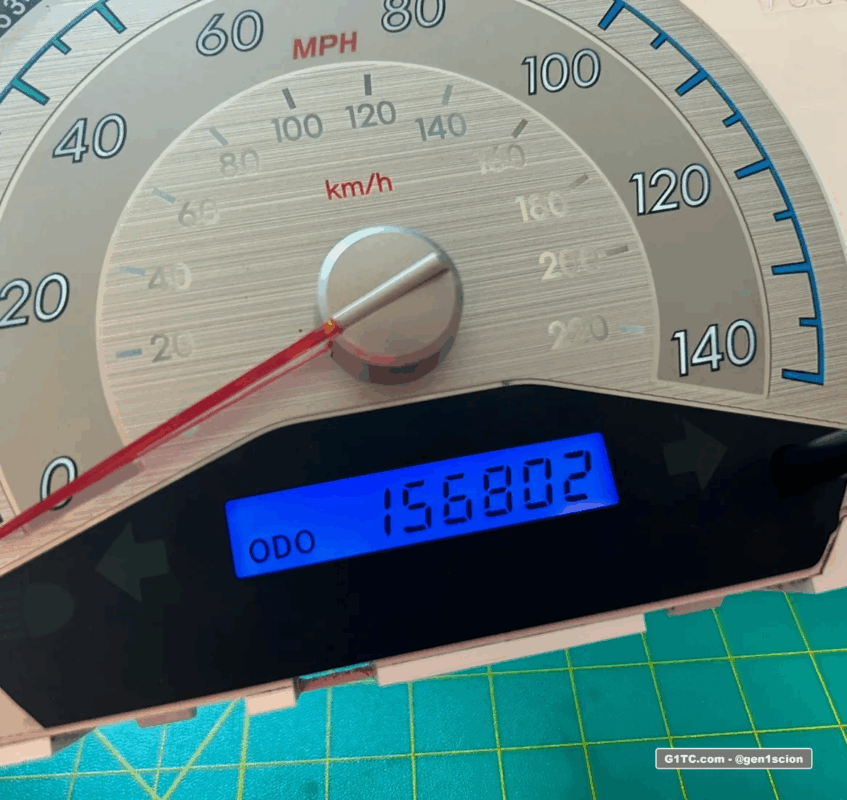
This is done by
- Swapping to a blue LED
- Removing the existing polarizer file
- Applying new polarizer film. More info below.
How I did it
Taking the polarizer off is a slow and steady process. The color change itself is done with your choice of LEDs soldered in behind it. By default it is amber backgound with black lettering, I’m going to change that. I will be changing this to blue background with black lettering (shown above).
Leave the LCD in the housing for stability. Catch an edge with a razor blade and start peeing black SLOWLY.
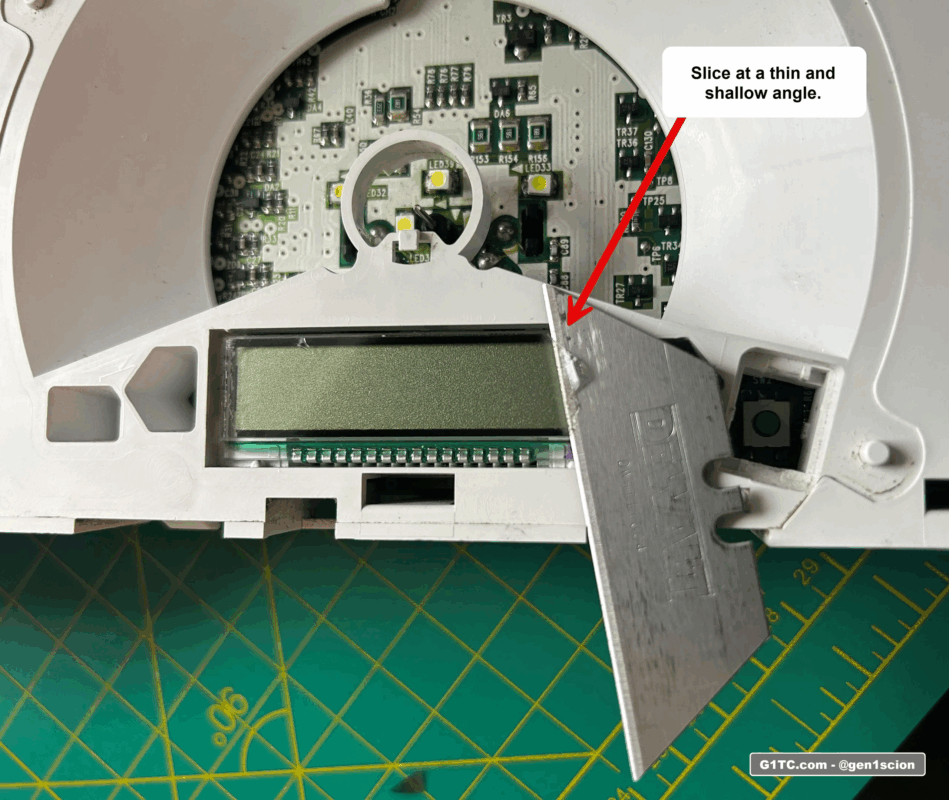
Use a little heat if needed
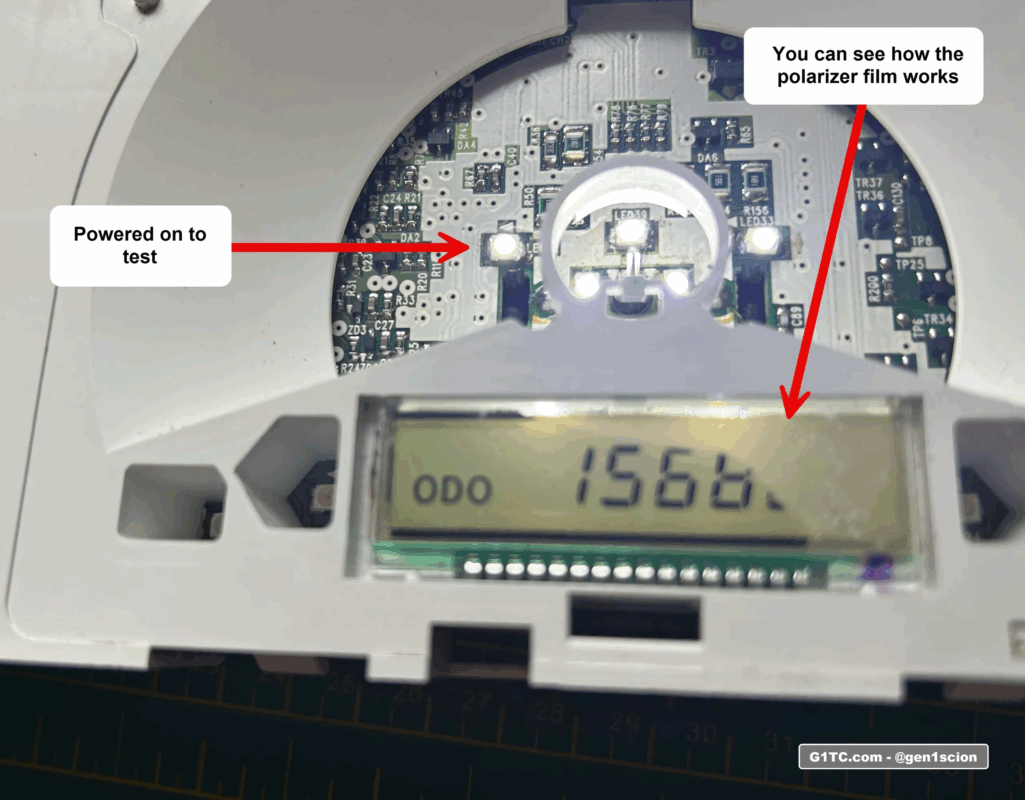
Don’t torch the display just use a little bit at a time. The photo below shows me testing to the cluster to see where I’m at. You can see here the polarizer is what makes the lettering actually visible on the LCD.
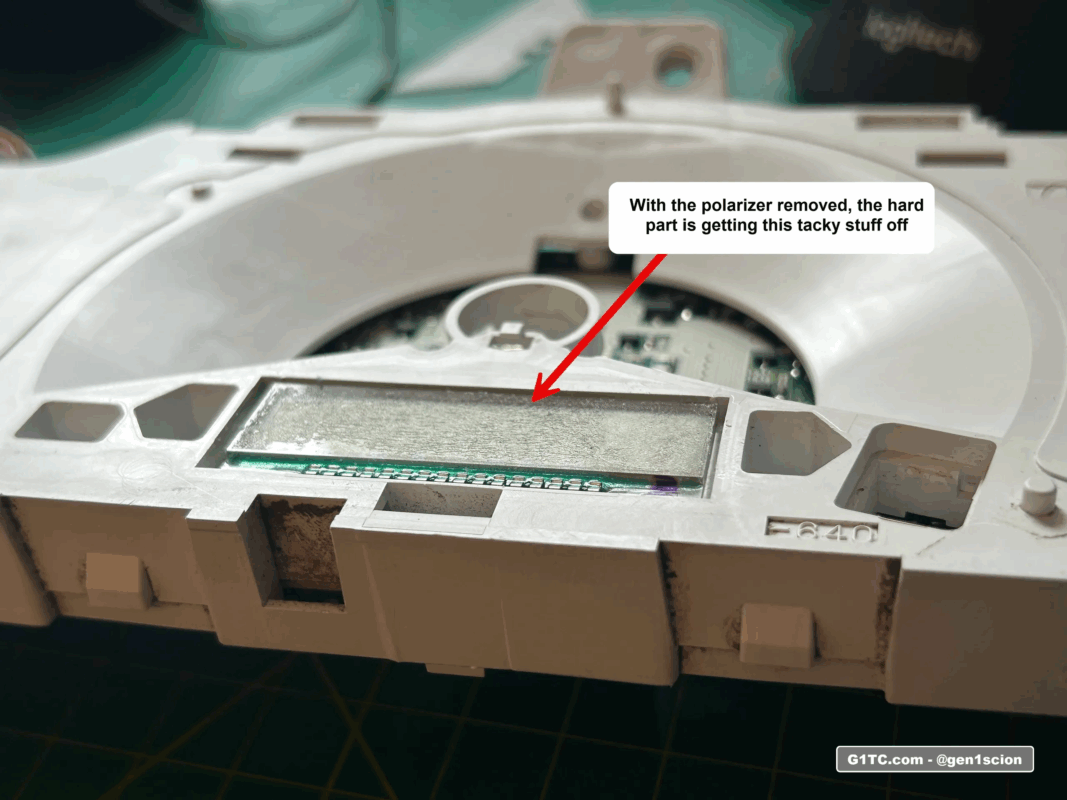
After taking off the film, you’re left with a sticky goo you have to remove too. Take your time here don’t press down too hard on the LCD as you rub it off.
Change the color of your LCD
Dissemble the cluster, carefully remove the LCD from the housing to access the LEDs behind it. You’ll be soldering in these LEDs to change the color:
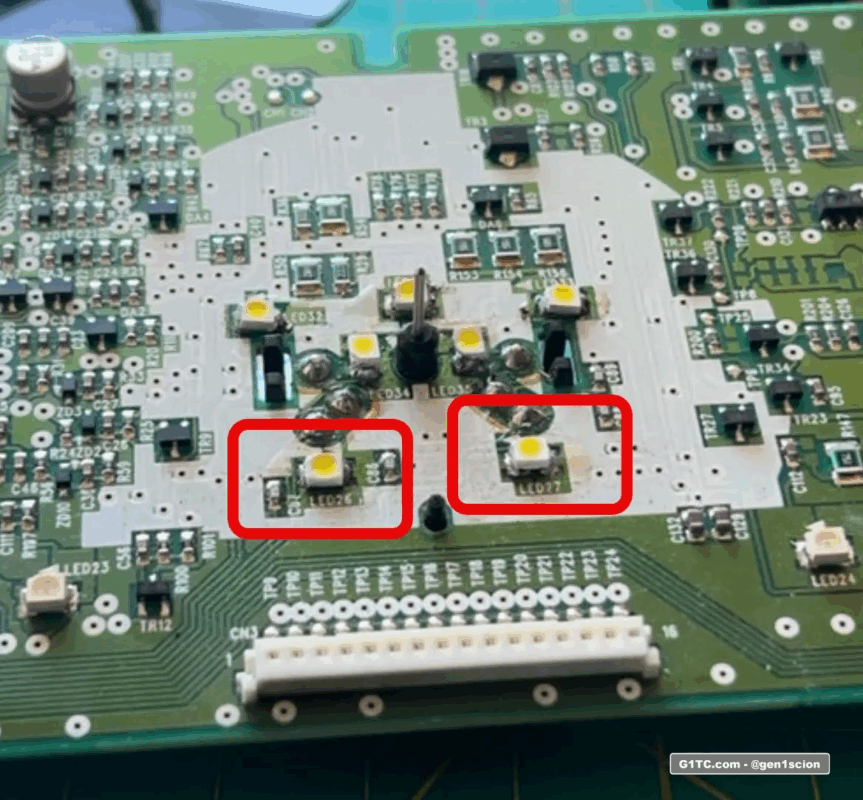
Here’s a link to an assorted pack of PLCC2 LED colors on Amazon. I used the blue from the pack, but I’ve also seen people change their display to red, green, or purple.
Using this LED mod (plus the polarizer) you can rotate, it cut at that angle, then install it on the LCD glass. I wish I took a video of this, but I dont have one.
Here’s the jist:
1. With the stock polarizer removed, power on the cluster
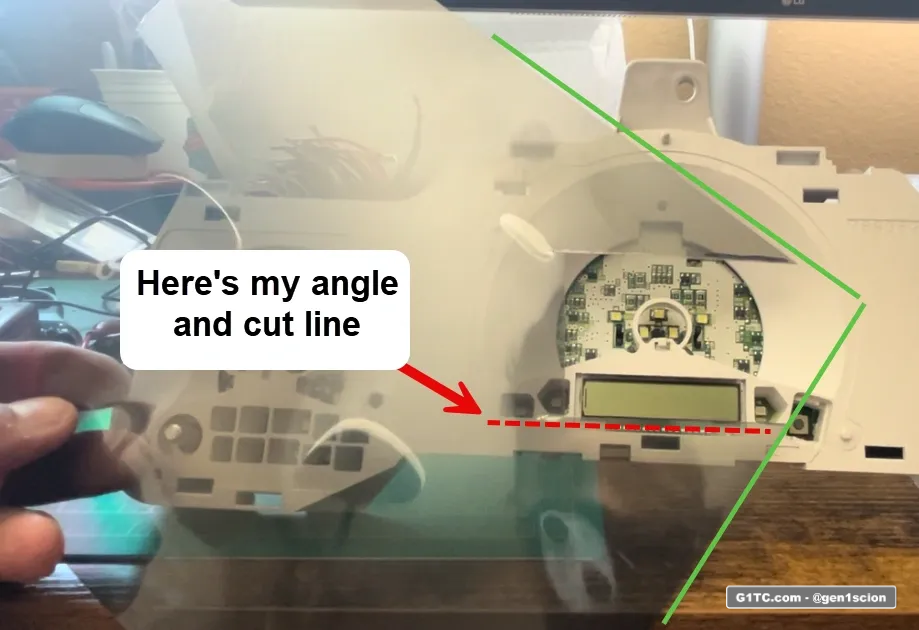
2. Hold the polarizer up to the LCD glass, and rotate it, you will see the colors shift as you rotate the polarizer sheet. Find the color scheme that you want, and mark the horizontal. That’s the direction you will make your cut.
3. Cut and apply the polarizer at the new angle.
Here you can see the polarizer sheet overlayed onto the LCD display. The RED LINE shows how I will cut and install the polarizer film.
Here’s my final LCD color way
Links to my other DIY Cluster gauge articles
– DIY LED cluster swap mod amber to white 2005-2010 Scion tC
– AC Unit LED swap modification
– Changing the LEDs in your window and lock switch controls
Links to soldering tools and accessories
-
Adjustable heat soldering tool kit complete with extra tips, solder, flux, etc. You can use this for the DIY Cluster LED swap too, very handy to have
-
Butt connectors that melt solder to the connections, I really like these
-
Heat gun with melting shield, great for melting the butt connectors above. You can get in tight spots without heating up neighboring parts
-
Tube shrink wrap, I use this stuff all the time to cover up raw wire soldering and to water proof butt connectors
-
Mini fuse taps, these come in handy if you want to piggy back off existing HOT or switched AC power from the fuse box near the driver kick panel