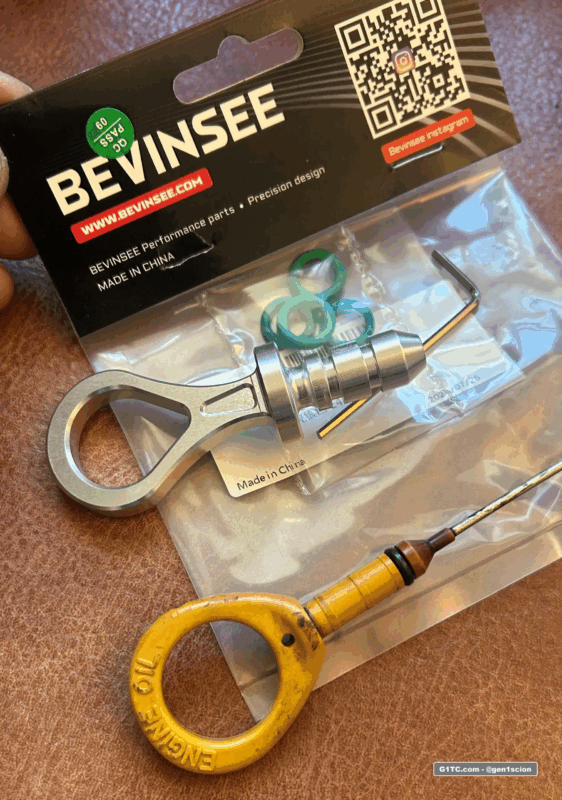
In this article I’ll show you how I modified a $12 aluminum dipstick handle to fit the 2005-2010 Scion tC. This mod is just for looks. You can use this thought process for any car really. I purchased this billet aluminum handle knowing it would need some fitting.
TLDR: Full 24min mod video on YouTube
Tools Used
You’ll need a wide array of hand tools here, assuming you don’t work at a machine shop. Here’s everything I used:
- Bench Grinder
- Table Vise
- Hand files (large and small)
- Dremmel with metal cutting bit
- Sand paper
- Power drill
- Digital Calipers
- Drill bits, I use Stroton drill bits, in metric. So 1.5mm, 2mm, 3mm, etc.
- Rubber washer, painters tape, scrap leather
- Doorman Roll pin assorted pack (you will use the 5/64″ roll pin)
- Starter punch
- Roll pin hammer (or any small hammer)
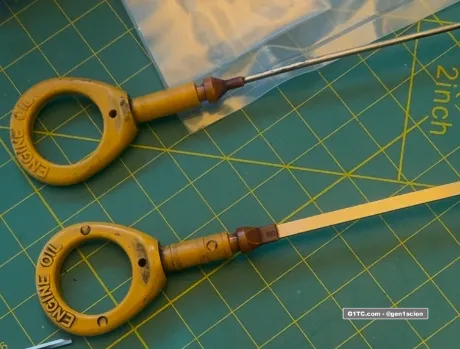
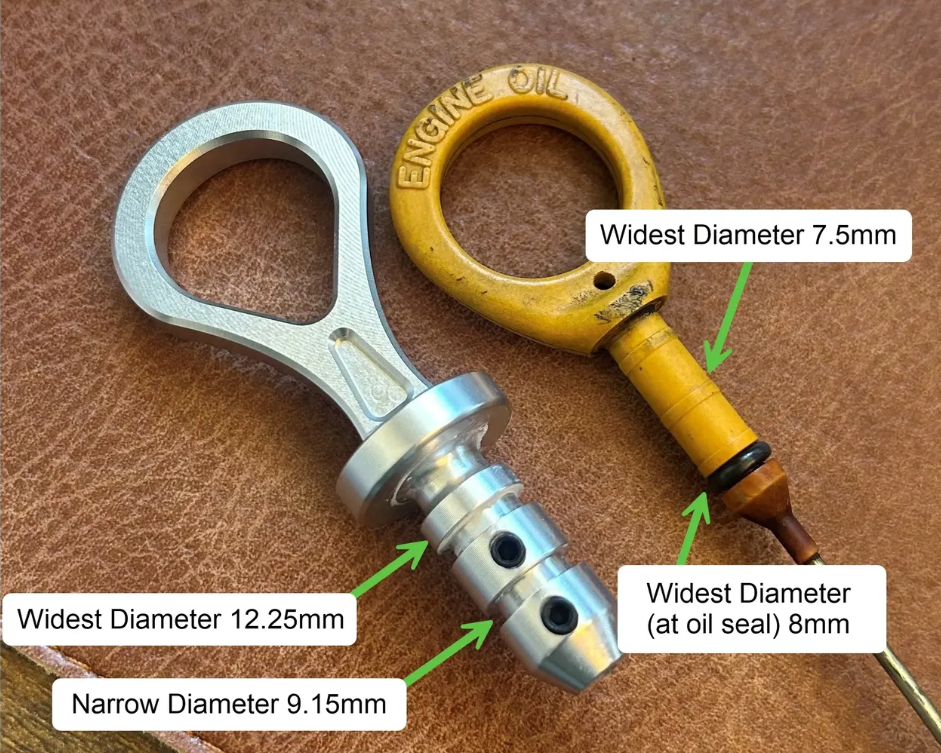
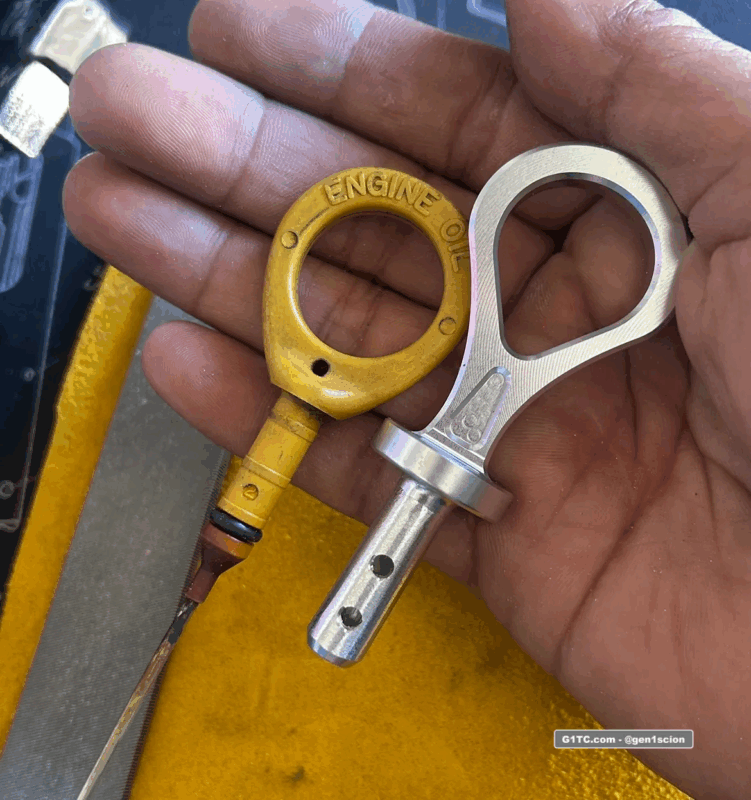
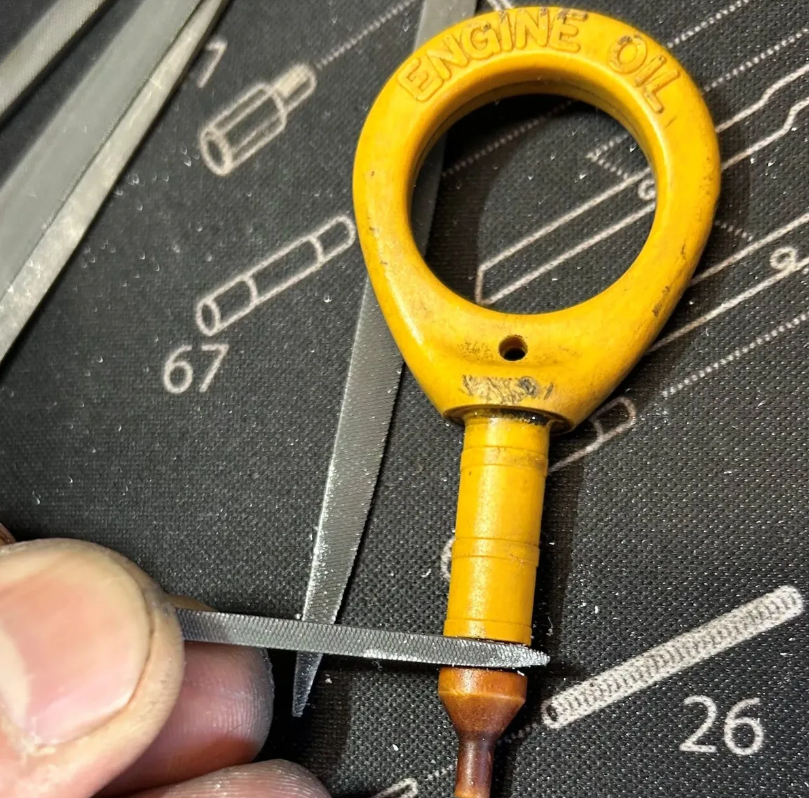
There are two oil dip stick variants
There are 2 variants, my 2006 has the rounded stick. The other stick you see here (flat bar) is one I pulled off a 2007 at the junk yard. This DIY is for the rounded stick. You may be able to find other ways to mount the flat stick.
Measure first
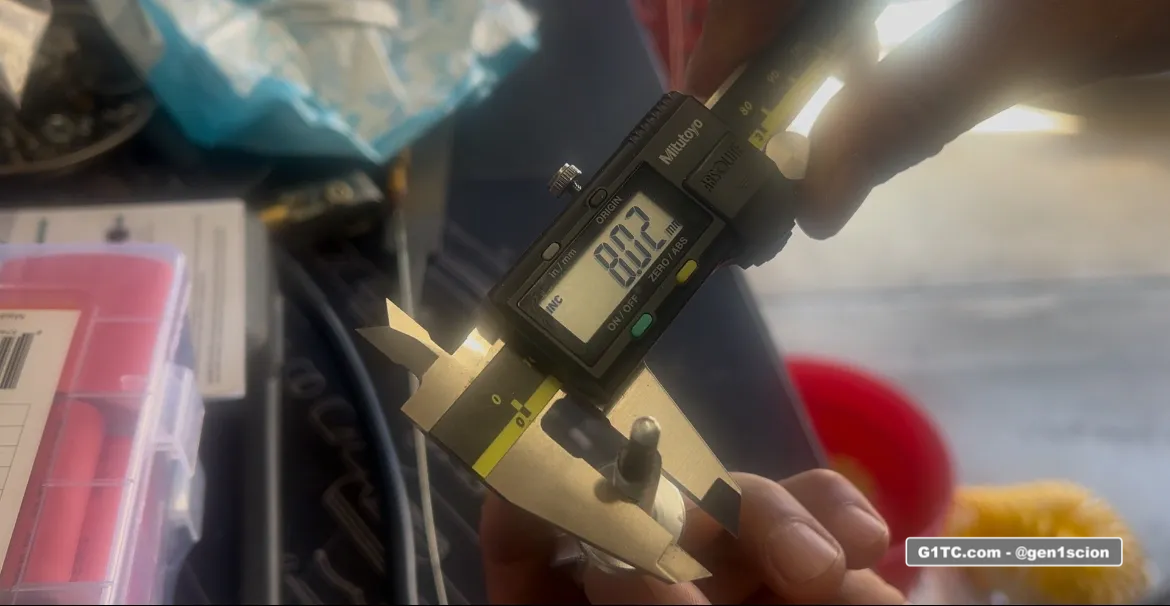
Here are my measurements, yours may differ. The point here is we need to take off all the aluminum material and get the shaft down to 8mm in diameter to match the OEM dip stick (at the oil seal), then we will reduce it more from there, little by little. Remember, you can always take off material but you can’t add. So heir on the side of caution with your install.
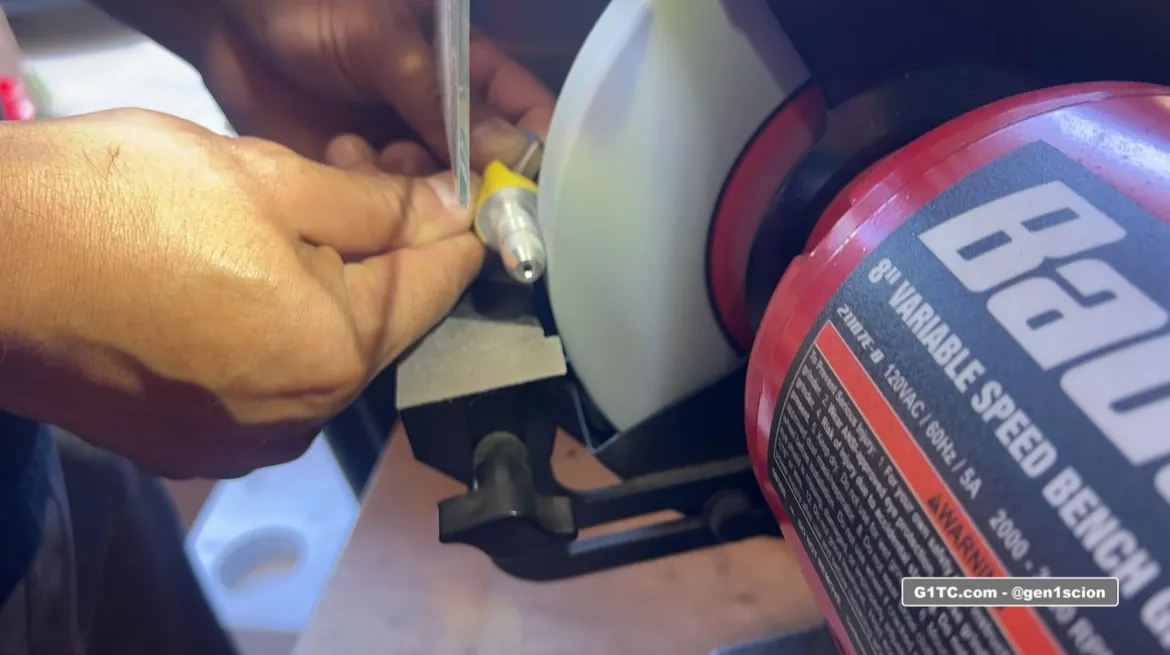
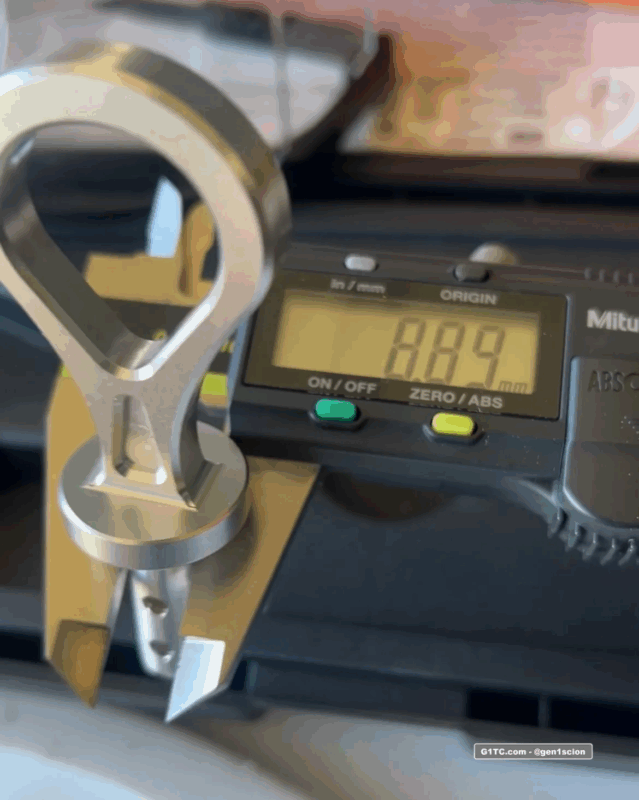
For a bit more precision from here, I took the remaining material down at the table vise.

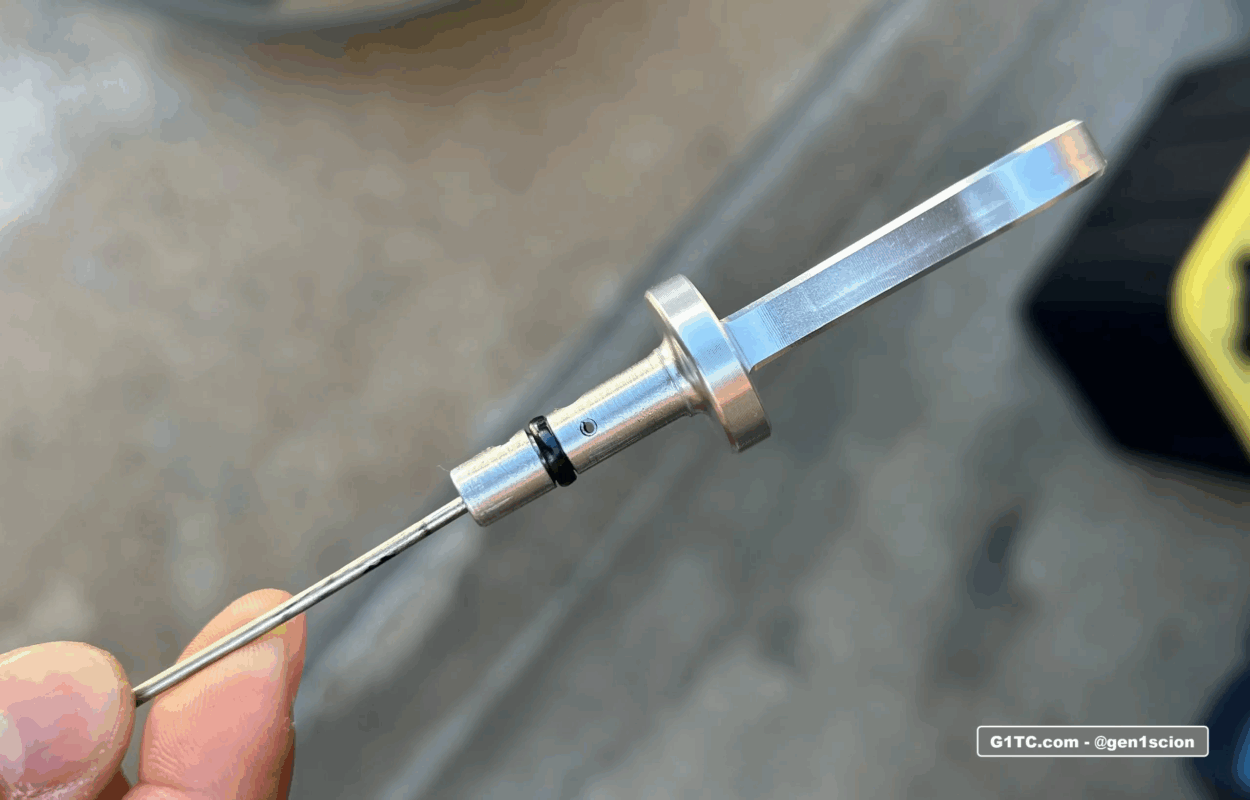
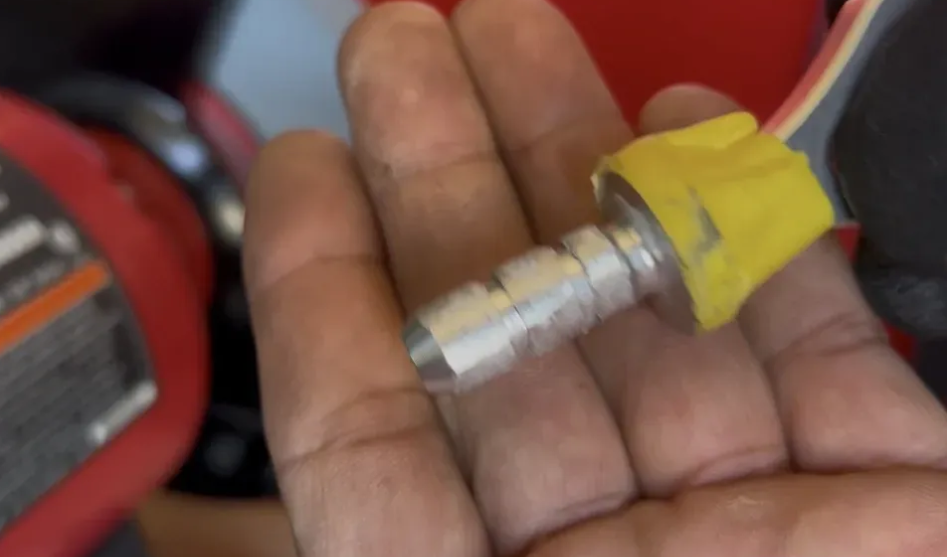
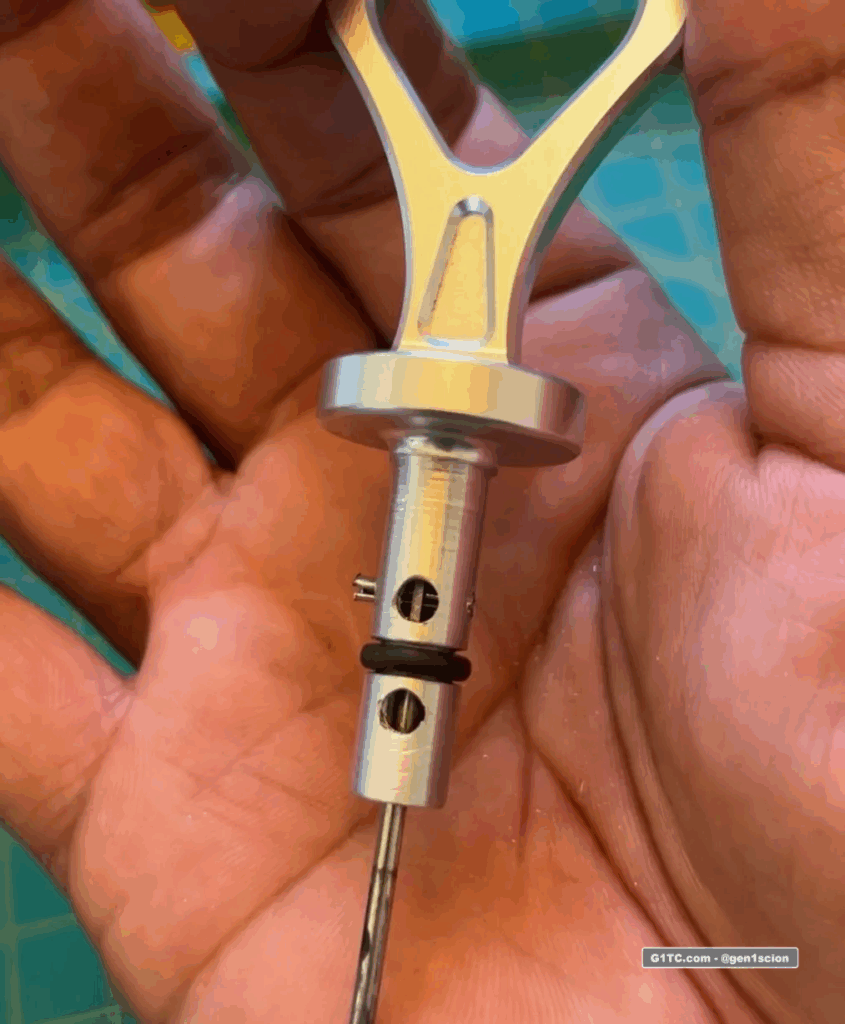
Quick stop to assess where I’m at. Here is the new profile of the aluminum handle (8.89mm) compared to the OEM one
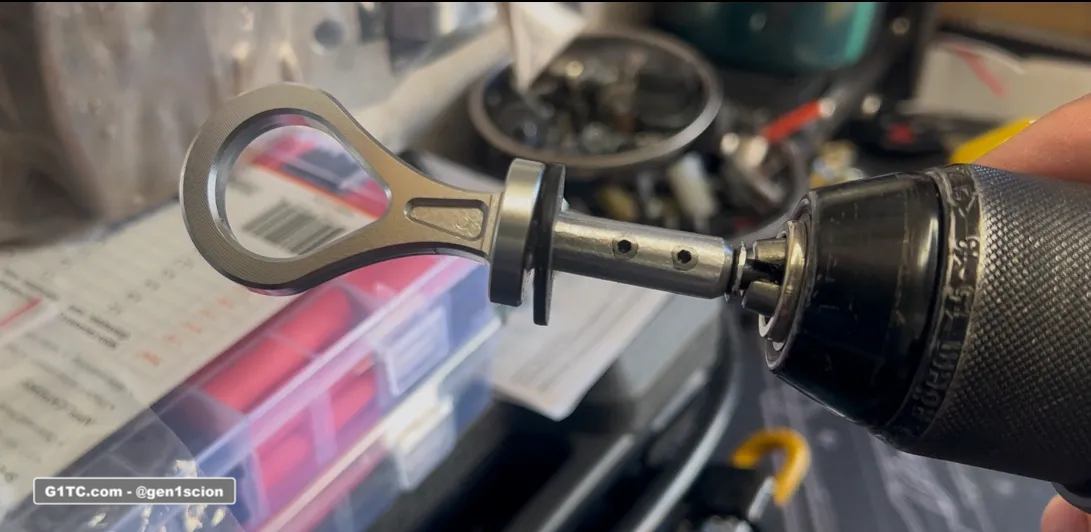
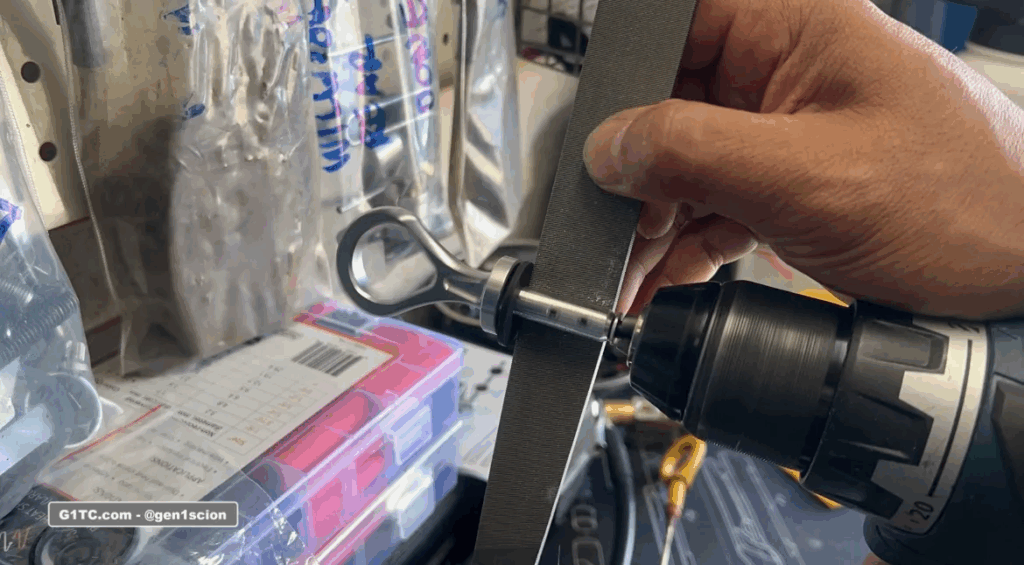
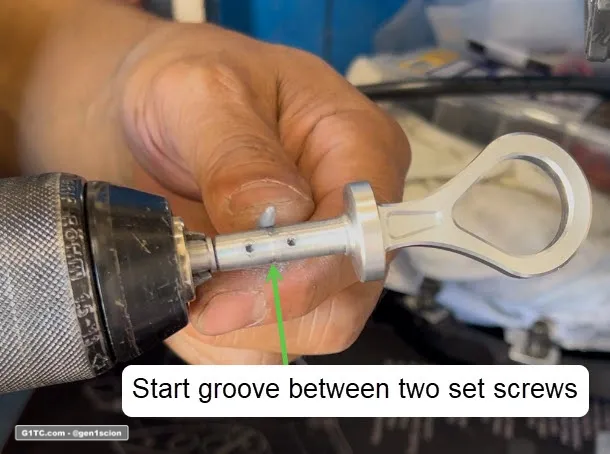
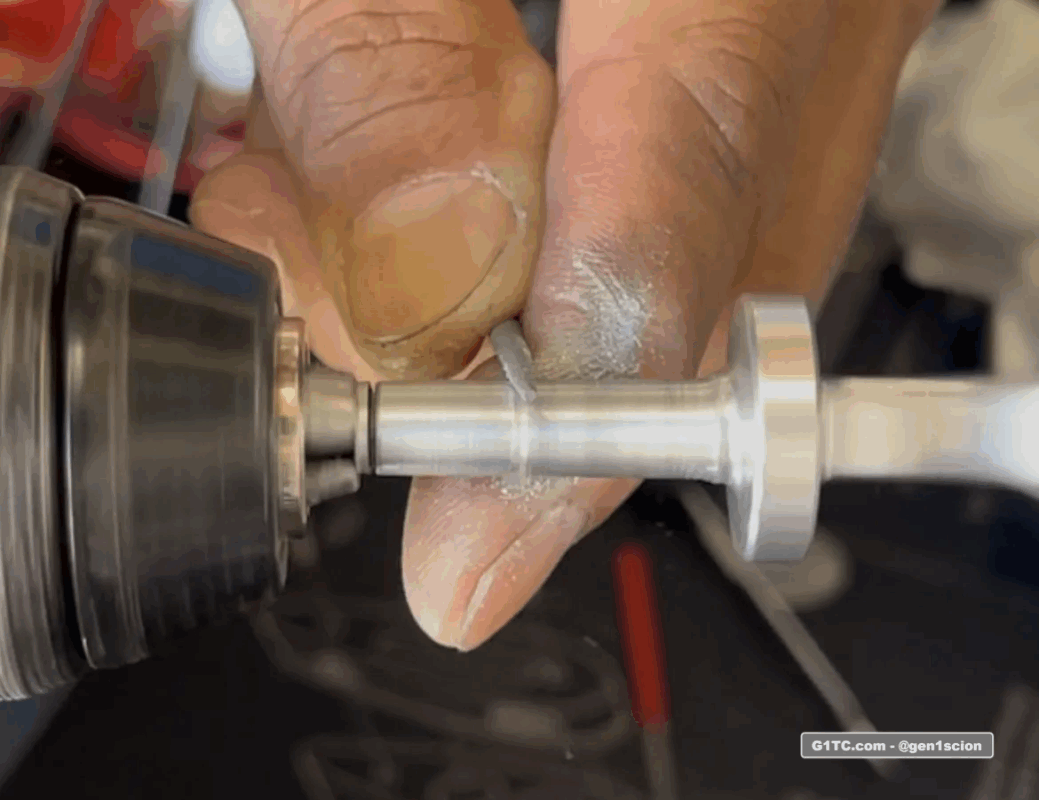
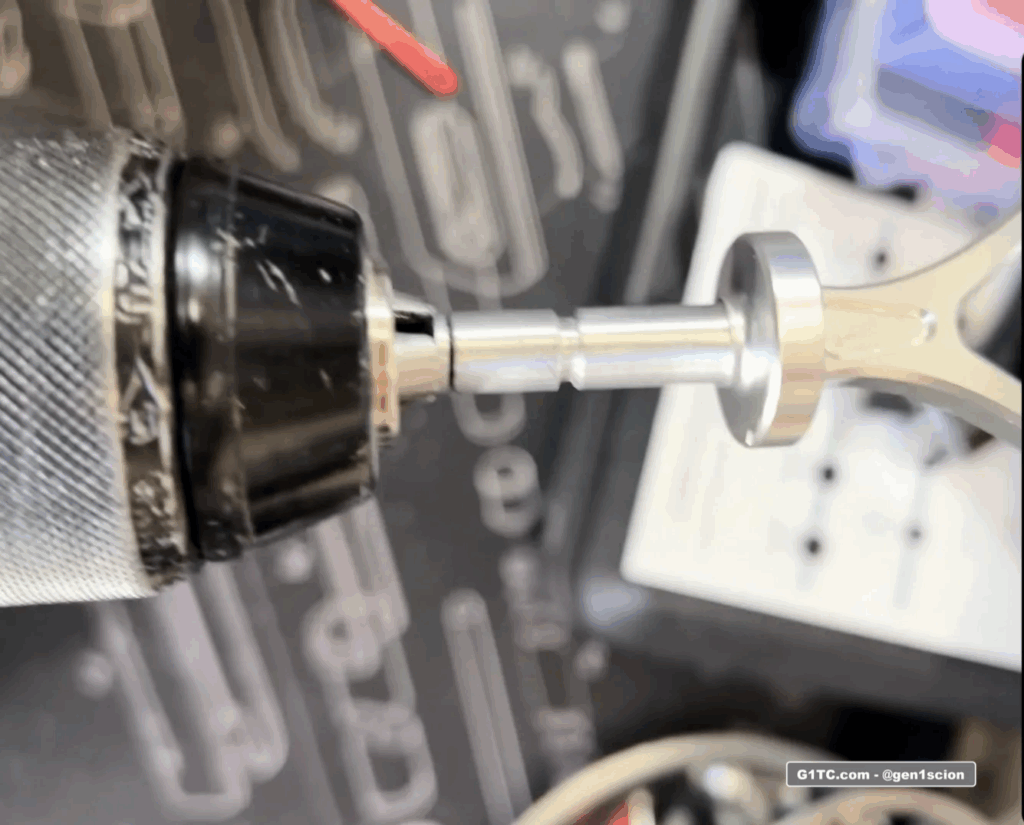
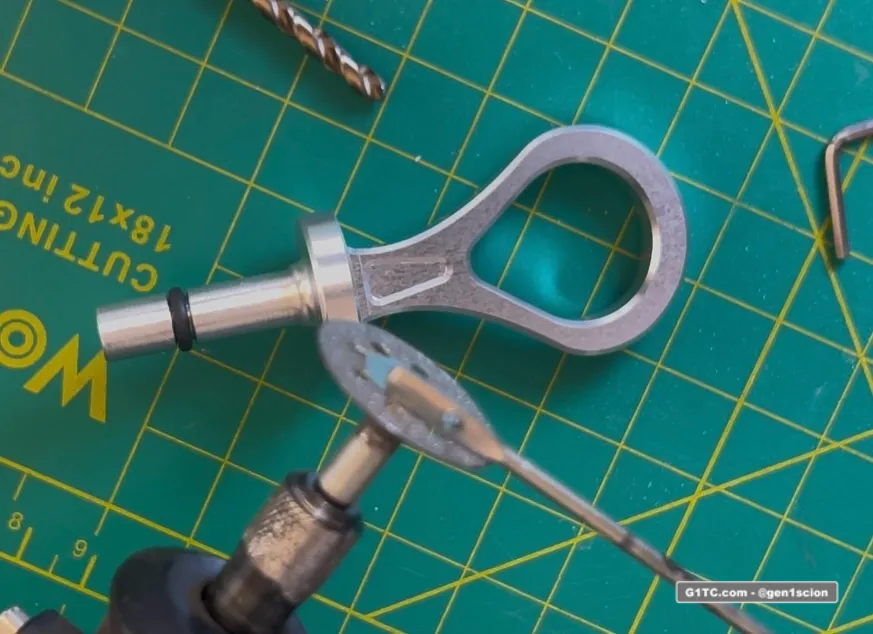
From 8.89, I decided to take it down by hand again. But this time I want to spin the workpiece. I used a rivet, secured it using the provided set screws, and chucked up the handle. MAKE SURE IT SPINS WITHOUT WOBBLING. It worked out nice.
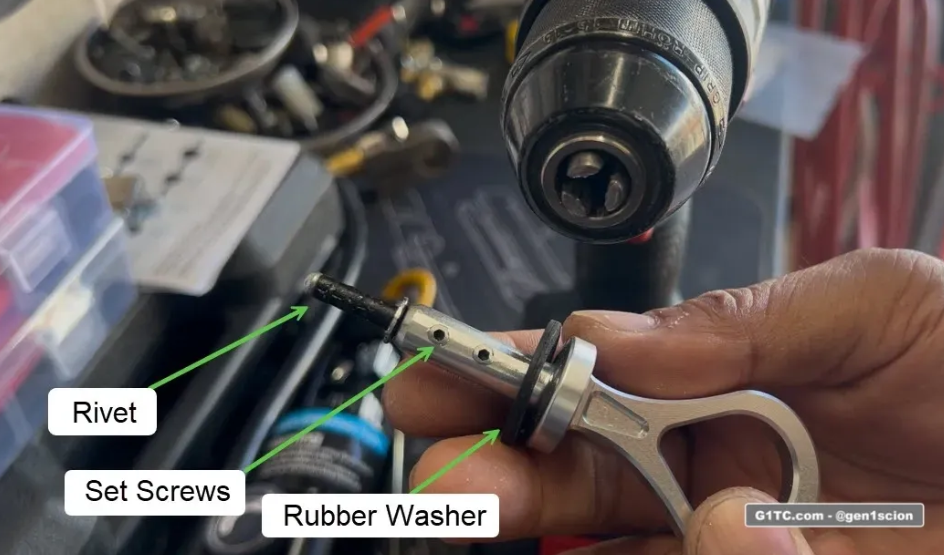
Using the makeshift lathe setup above, I took the diameter down from 8.89mm to 8.0mm
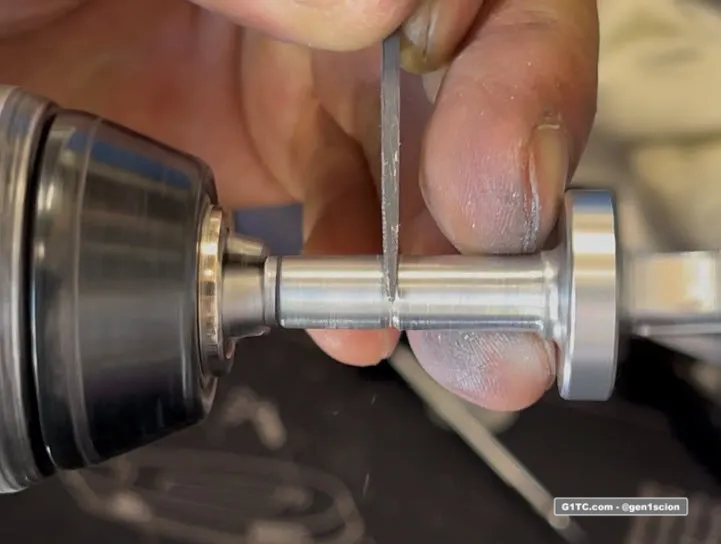
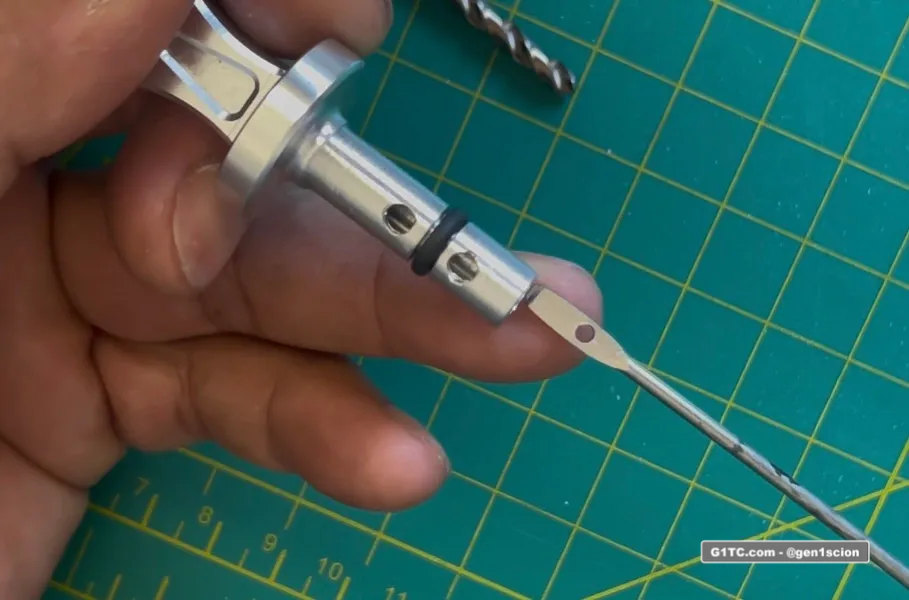
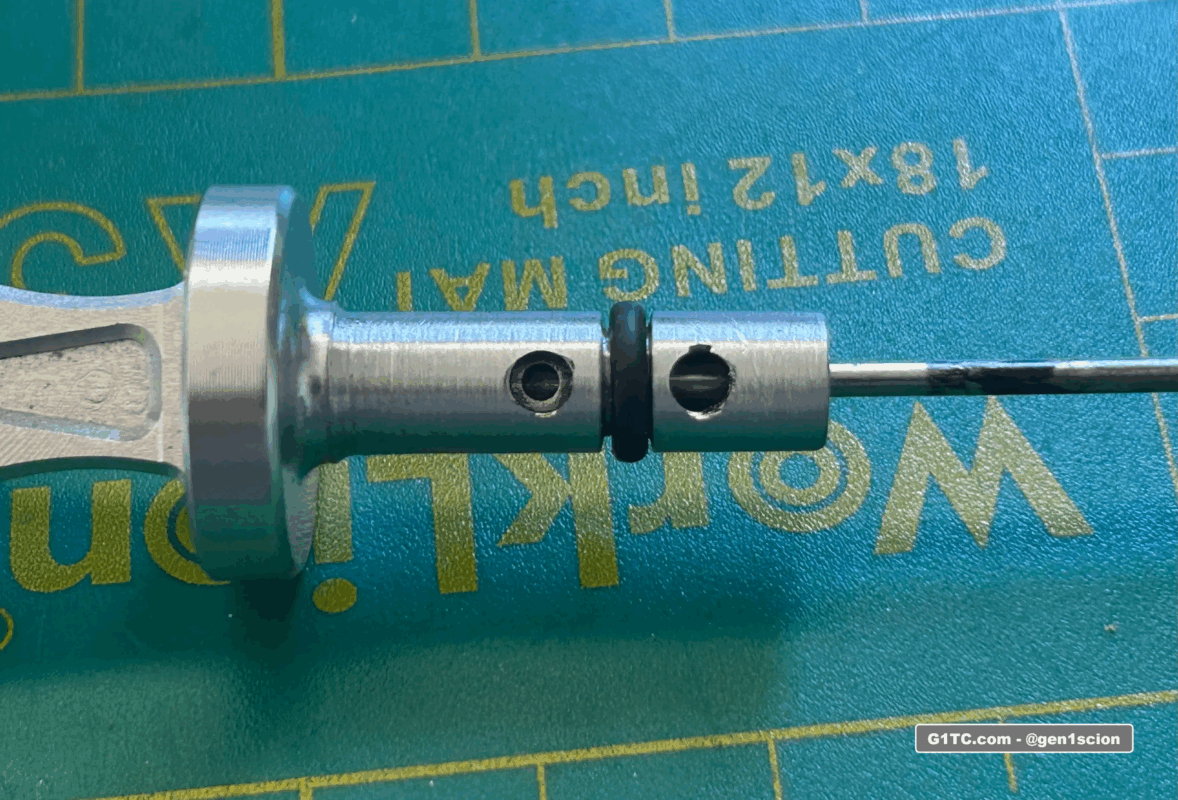
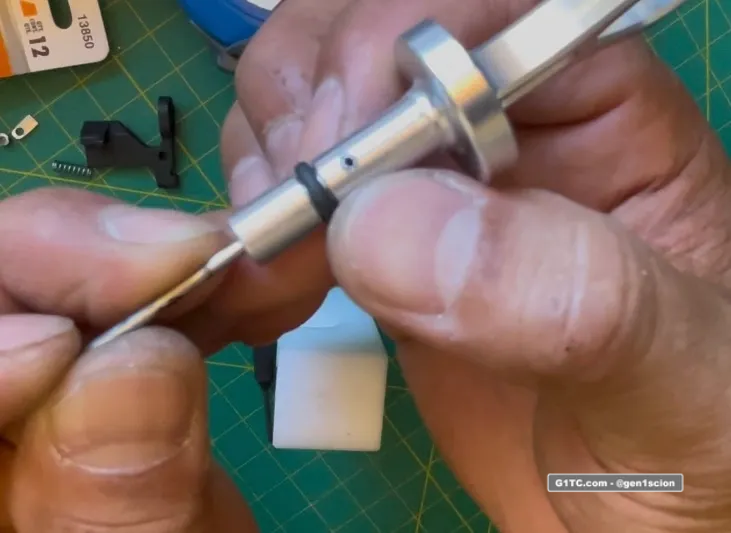
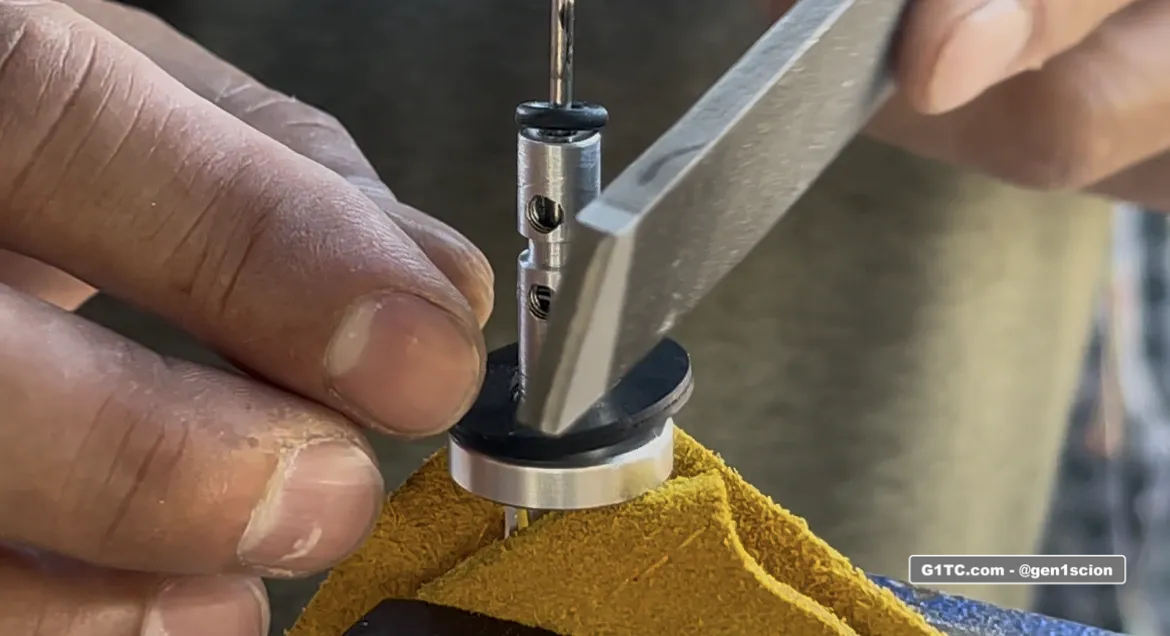
Now it’s time to cut the groove for the oil seal
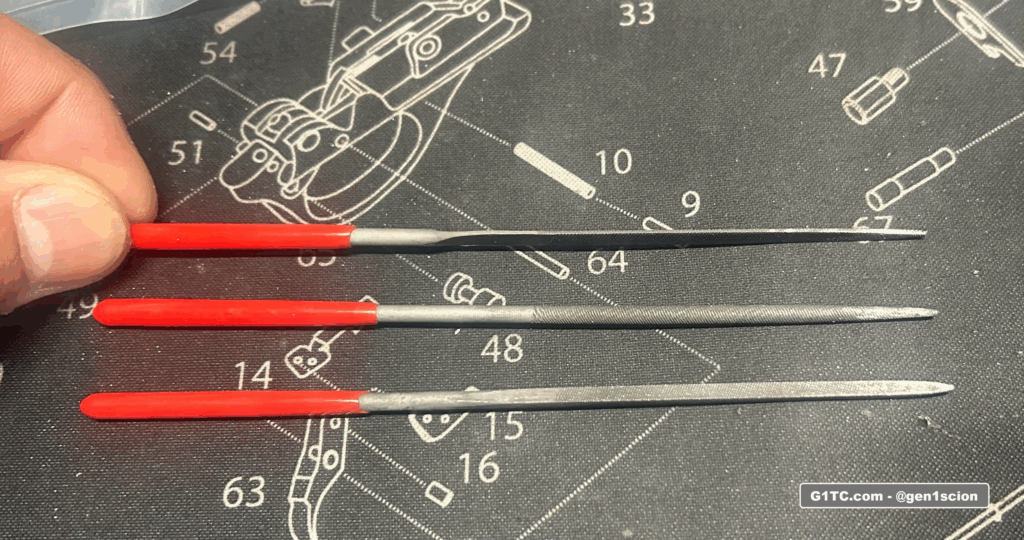
Don’t remove the rivet, I’ll use the same setup to cut the channel for the oil seal. You’ll need a small set of files for this process. The channel is a square cut, not rounded. This is so the seal doesn’t roll out when you insert or remove the oil stick.
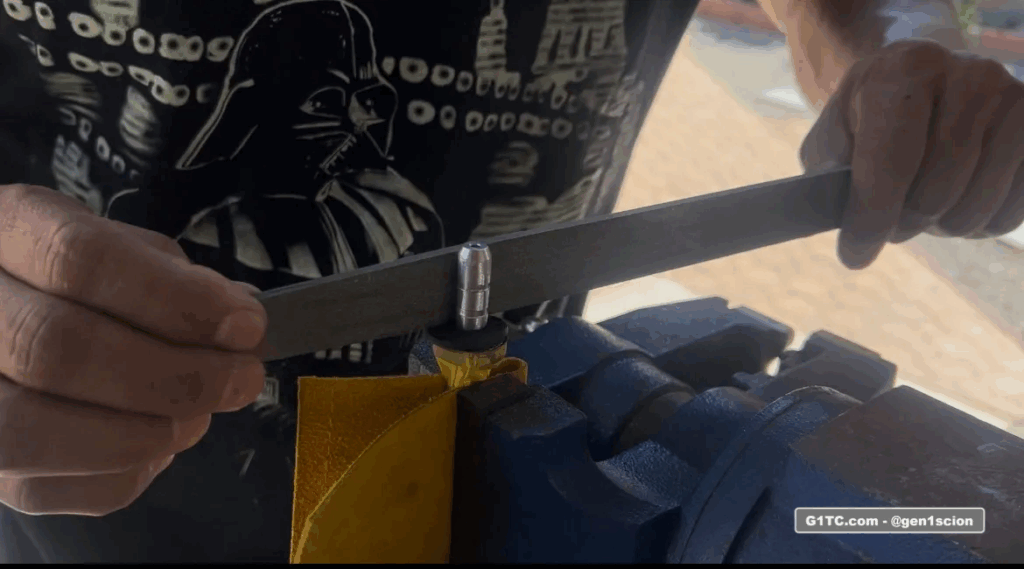
Here are the 3 main files I used for this process – one with a sharp edge, one rounded and one squared.
Use the sharp edge to start the cutting the line, use the rounded one to start a wider groove, use the square one to square it off once you have enough room to fit in the groove.
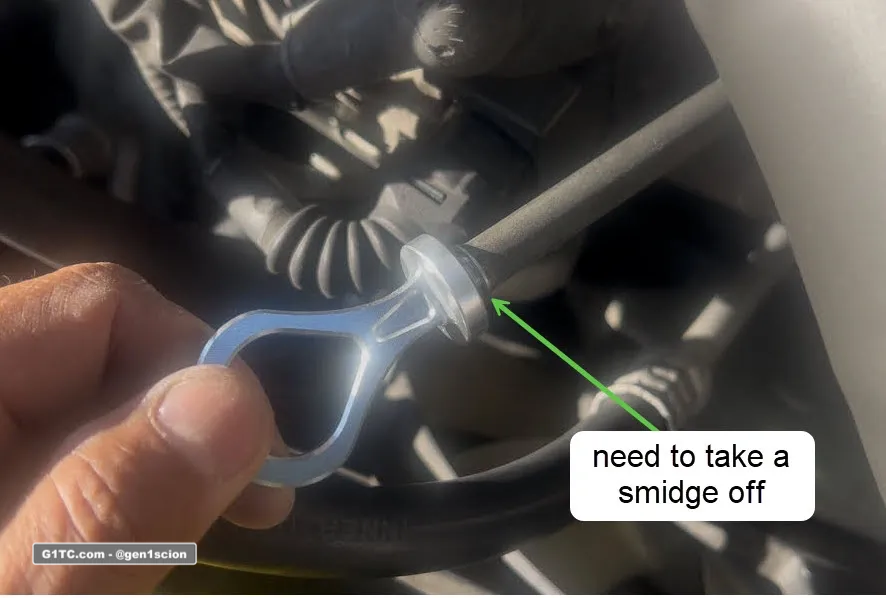
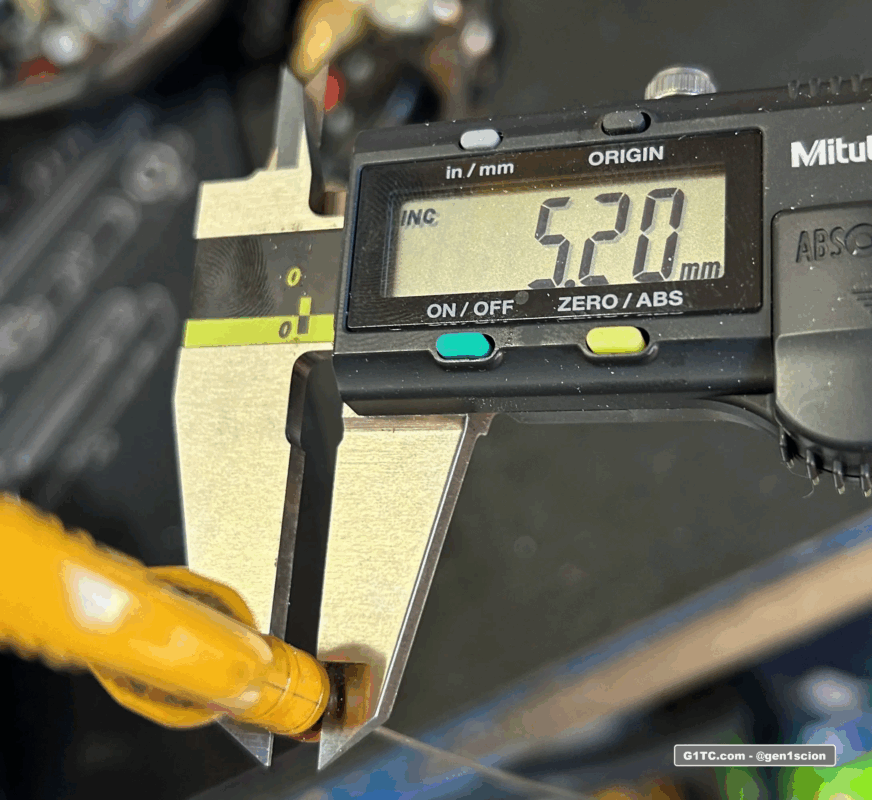
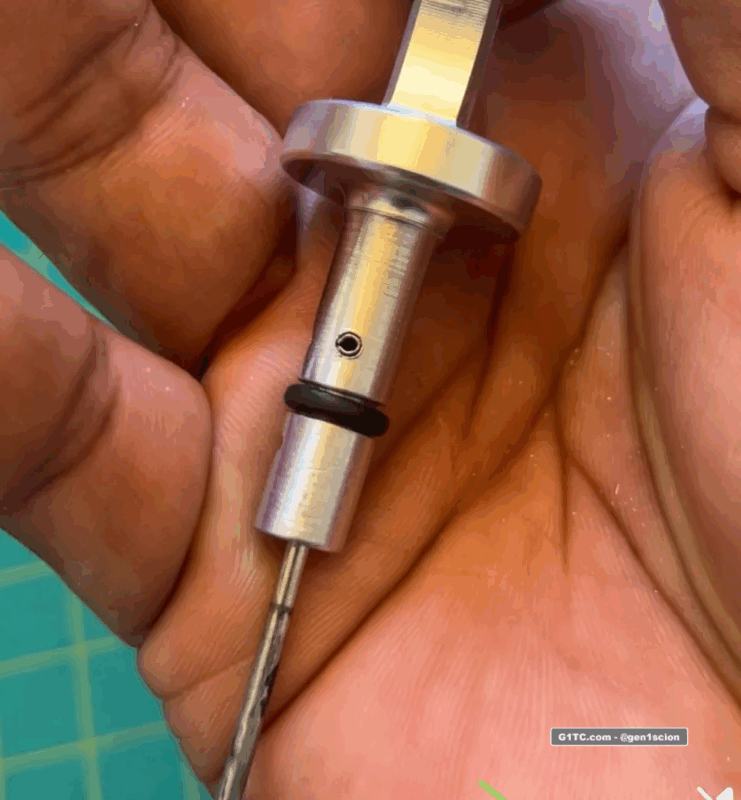
Here’s our target diameter at the oil seal channel, 5.2mm. Remember we want to leave some room for error, in the end I took mine down to 5.7mm
Here’s the target file and width:
I cut oil seal channel between the two set screw holes. Start by scoring a line with a sharp corner edge of the file.
Keep going back and forth between files until you get the groove wide enough for the square file.
Fold sand paper, and run it along the groove to soften the edges and the channel.
I took the diameter down to about 6mm and then from here it was back and forth:
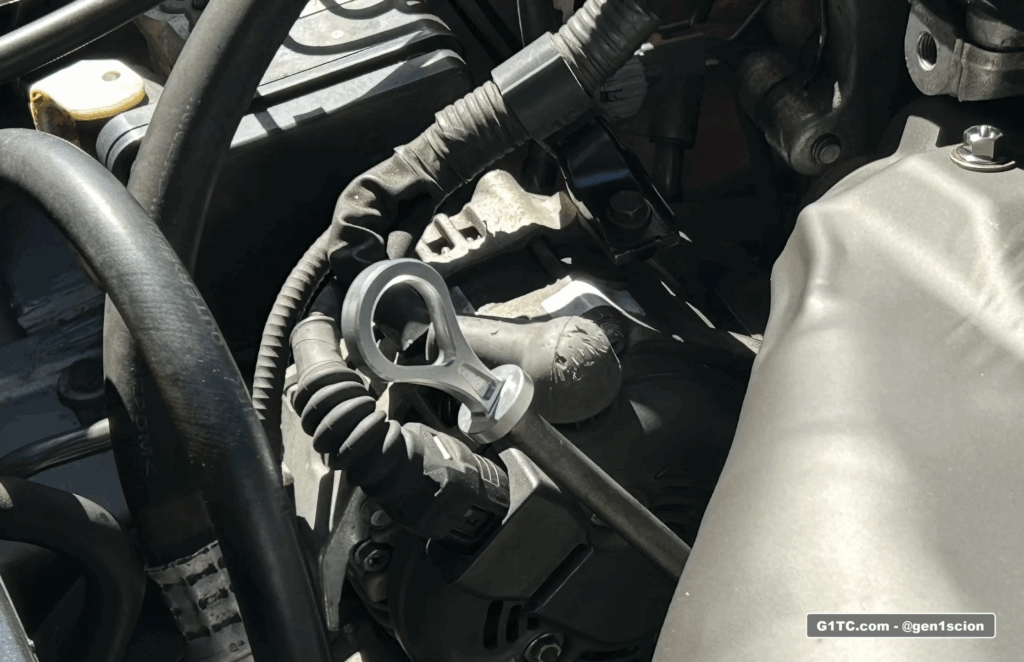
1. Clean out the channel and use some oil for lubricant, install the seal, test fit on the car. Likely, it’s too tight.
2. Remove the oil seal, take a little more off, sand paper rough edges, clean, repeat test
3. Repeat this process until you get a nice SNUG BUT TIGHT push with the handle into the dip stick receptacle. We want a tight fit. We will let the heat from the engine reform the seal to the new groove.
Measure and mount the actual stick portion
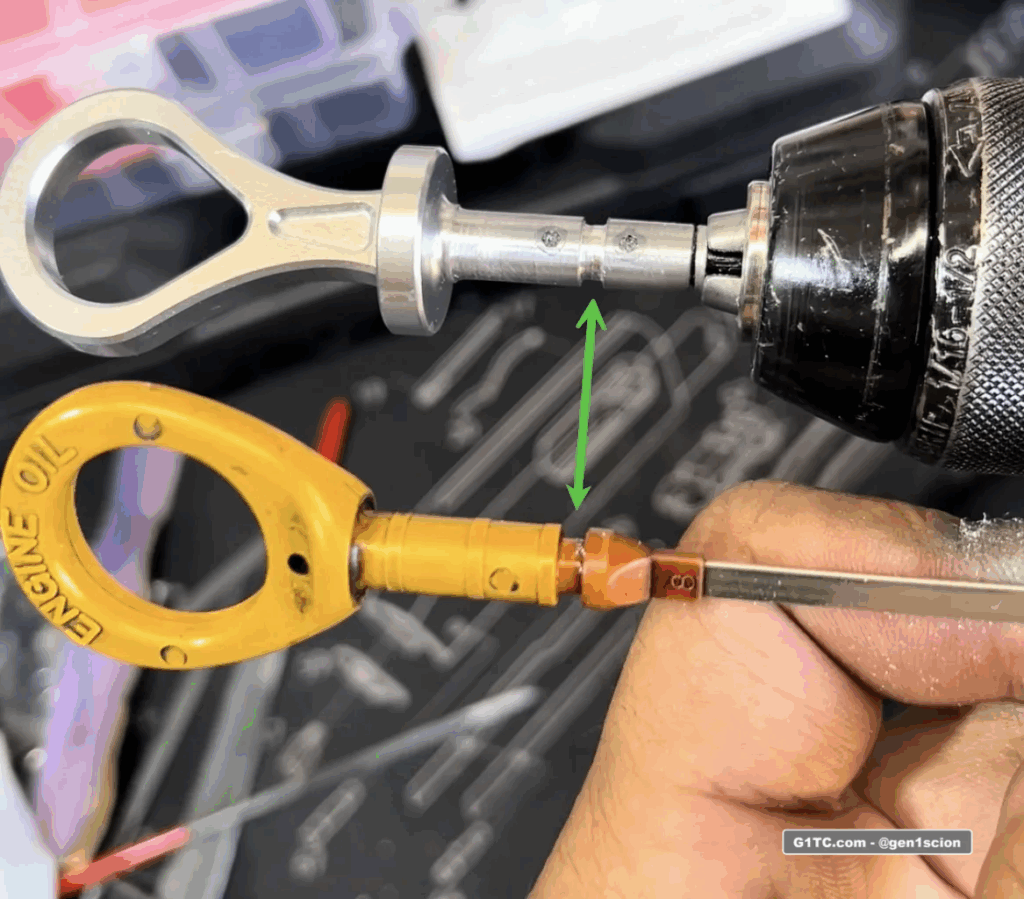
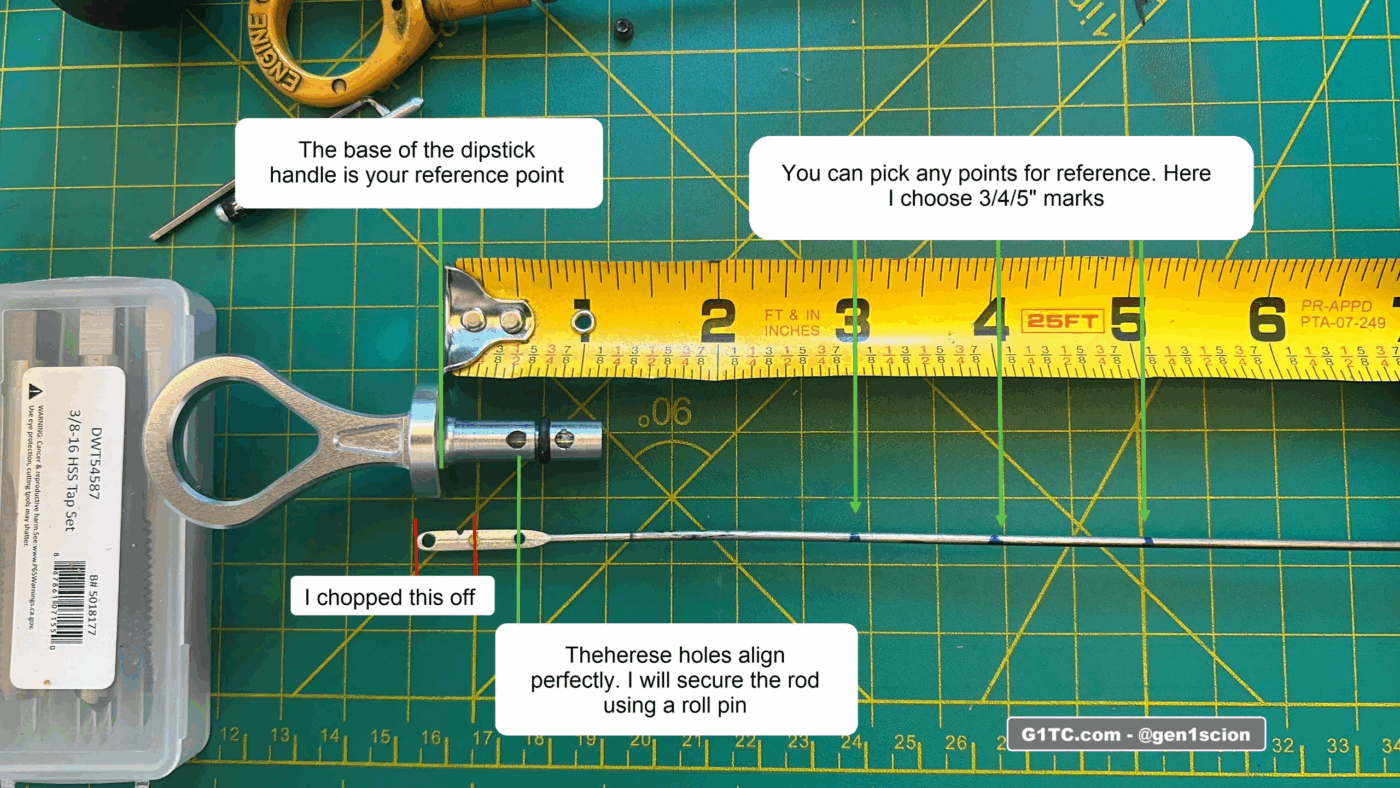
Now we need to mount the stick. We need to make sure the stick measures oil the same way the OEM one does.
To do this we just take 2 reference points 1) the base of the handle 2) any point on the stick (I ended up using 3 marks at 3″, 4″ and 5″). Measure and mark from the base of the OEM handle to any reference point marks.
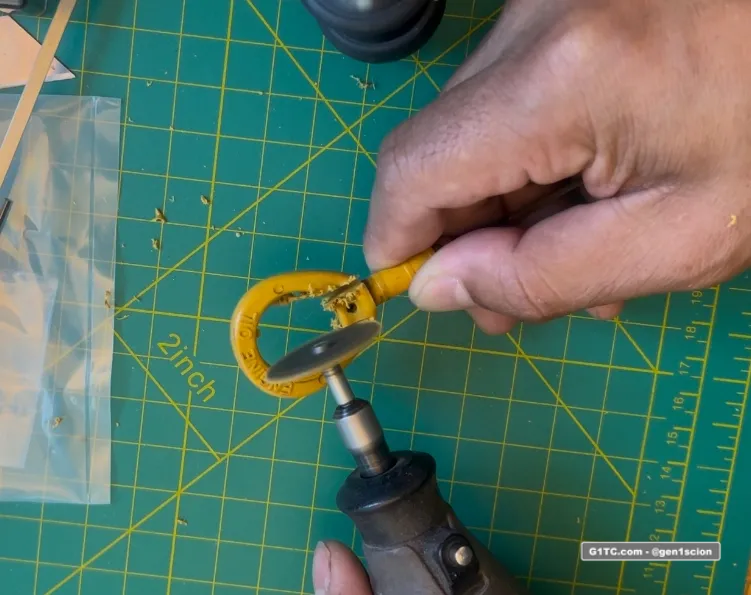
Now cut the yellow part off. I had to cut the hoop off first, then slice off the shaft.
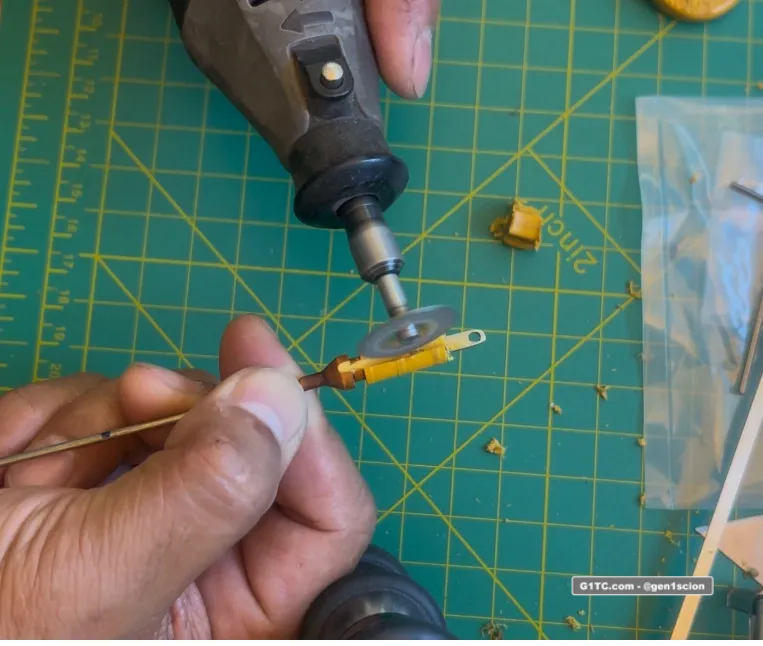
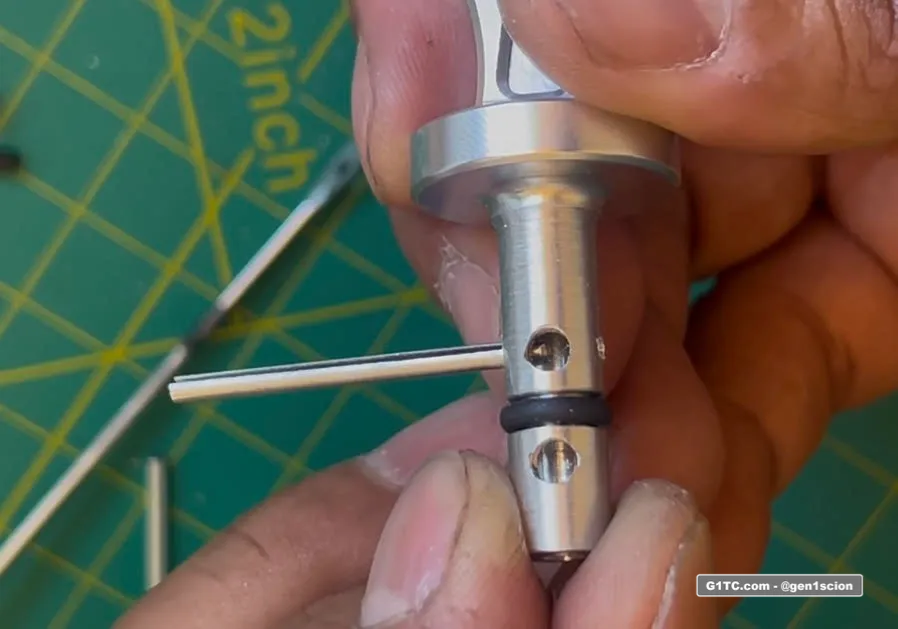
Now let’s see what we have to work with. Below you’ll see the reference marks and the alignment of where the new handle should be. The red marks show what I had to trim off the stick. There is one hole that aligns perfectly, and I will use that to secure the rod in the aluminum shaft, using a roll pin. The size you need is 5/64″ roll pin. I got an assorted set from AutoZone/Orielleys it’s DOORMAN Part #13850
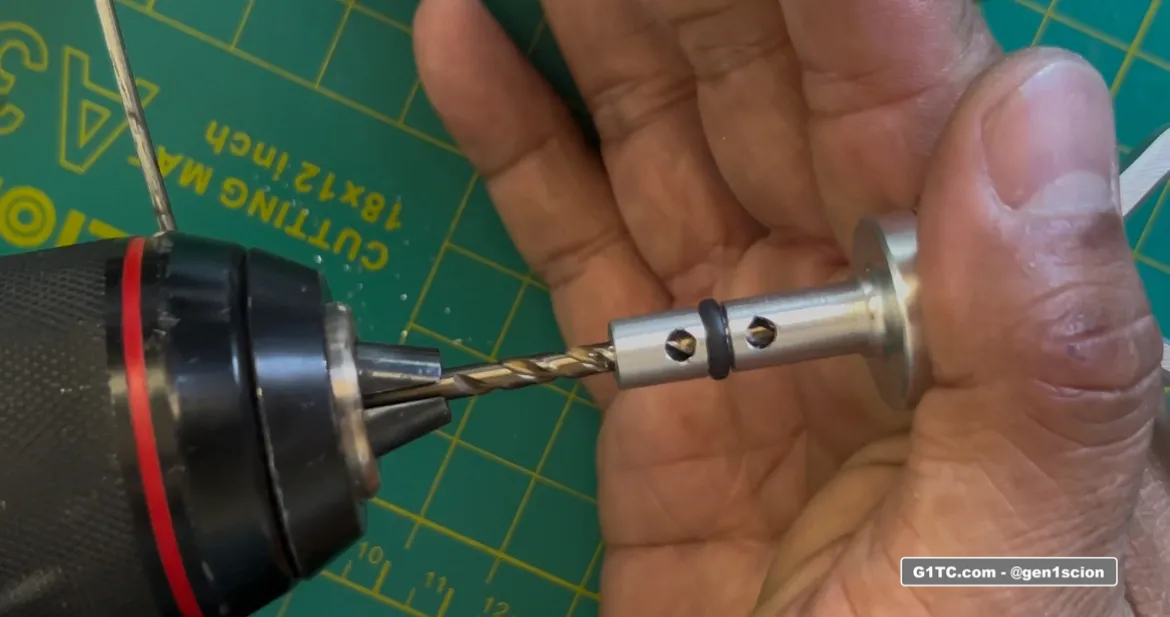
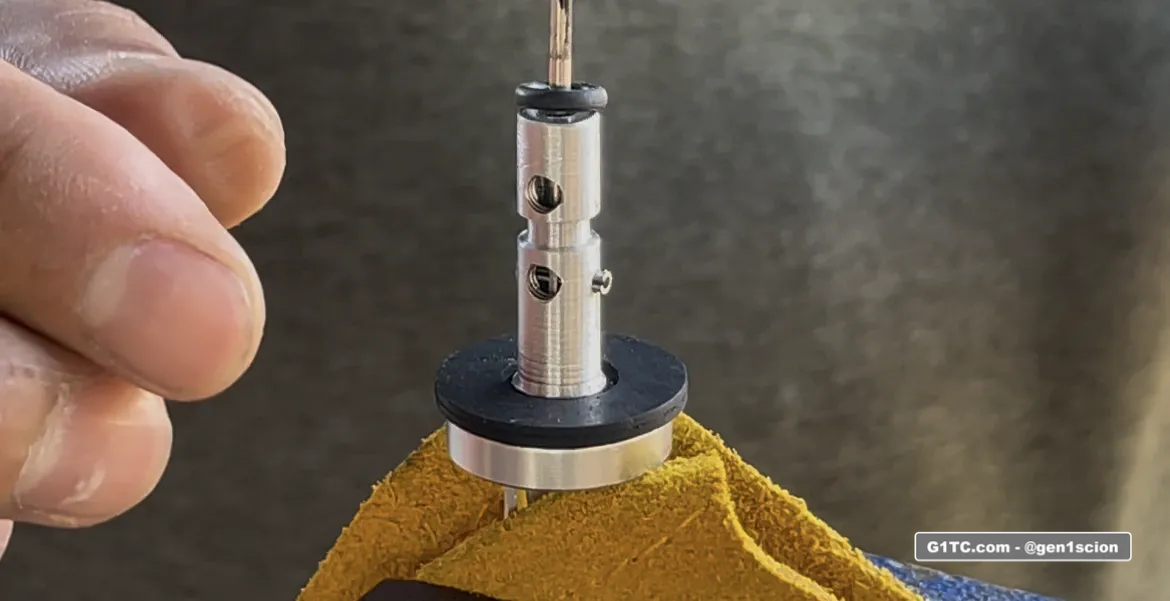
Now we must bore out the shaft. Remember, the inside diameter of the oil seal channel I have at 5.7mm. So, I will use a 3.5mm drill bit to bore out the shaft. I used this Stroton metric drill bit kit, it comes with half sizes. That leaves me very thin wall only about 1.1mm of metal. Keep in mind I’m doing this by hand so there’s little room for error.
Using a 3.5mm drill bit, I had bored the shaft to widen it, to accept the flat part of the rod.
You may have to take some material off the flat rod to get it to fit into the 3.5 mm bore. Shave off very little.
When you finally get it in, it should lineup like this:
Now, we rotate the handle 90 degrees and we need to use a 2mm drill bit to drill a hole in the side, and that will be used to punch a roll pin through one handle side, through the rod hole, and then through the other handle side. We are basically pinning a “T” through the handle.
Use a starter punch to mark the side of the handle
Using a 2mm drill bit carefull drill a new hole through the side. This should give you a better idea of how it’s all aligned. You will be cutting through both sides.

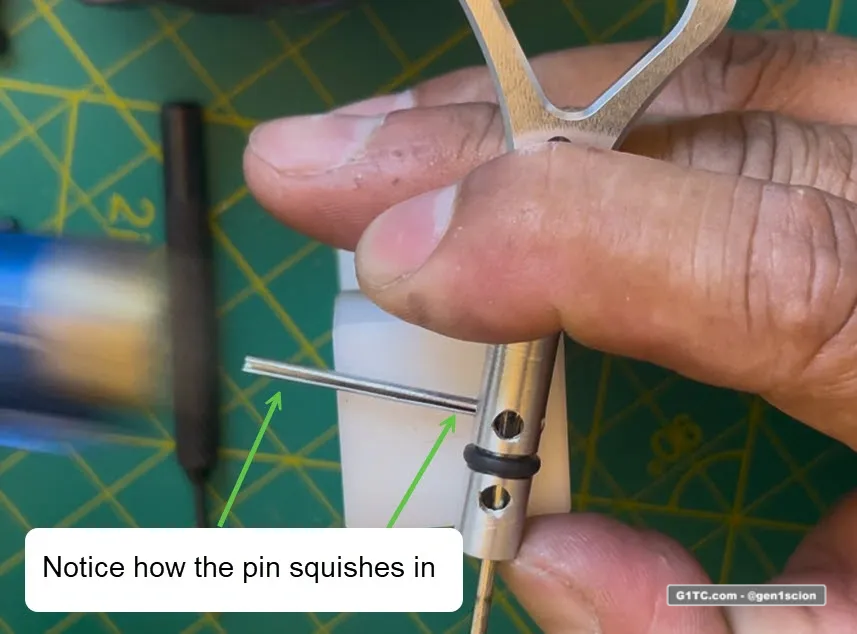
Once you have the hole drilled through both sides, work the 5/64″ roll pin through both sides FIRST so that it squeeze the roll pin thinner. Remember we need to get this through the rod hole. We’re essentially threading the rod hole like needle with this pin. We don’t want to break the hole.
So the idea here is you are “pre-fitting” the roll pin to the holes you drilled
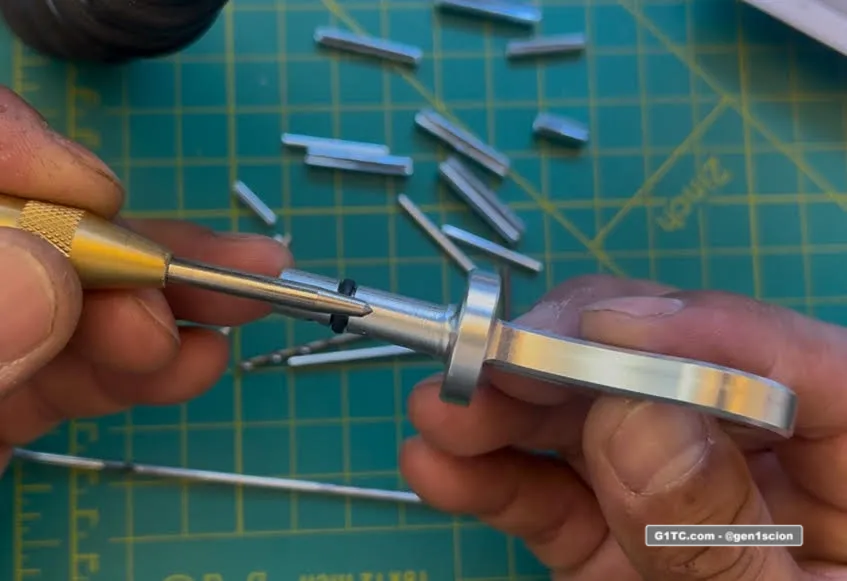
After the roll pin is all the way through you need to take it out, use a roll pin punch and block to back it back out.
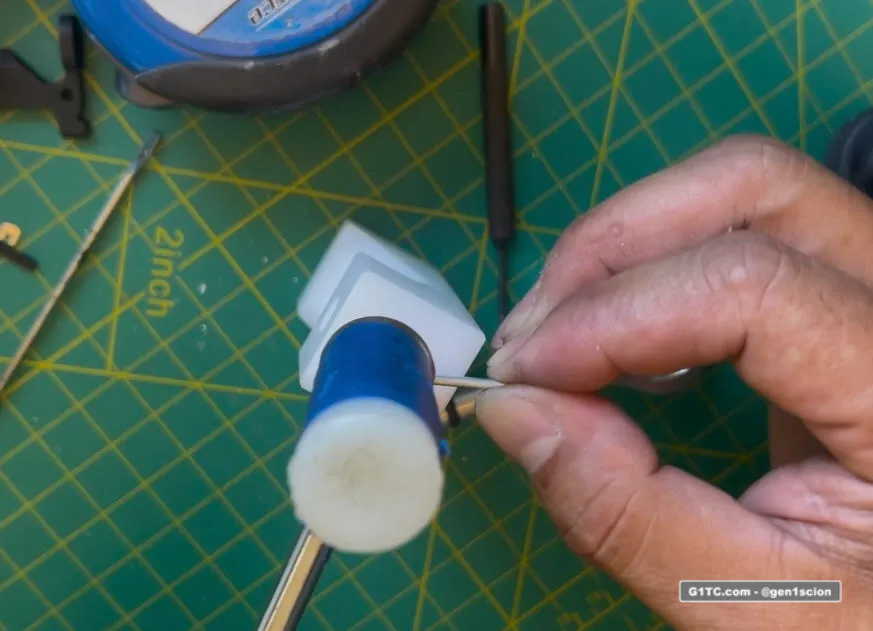
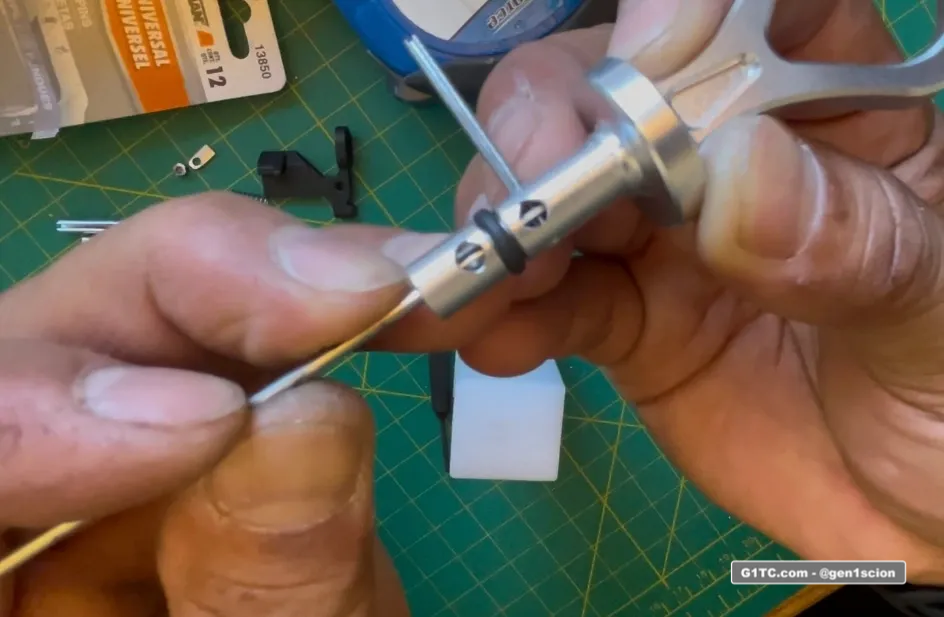

Final step, put it back in the vise and shave off the roll pin protrusions flush to the shaft.
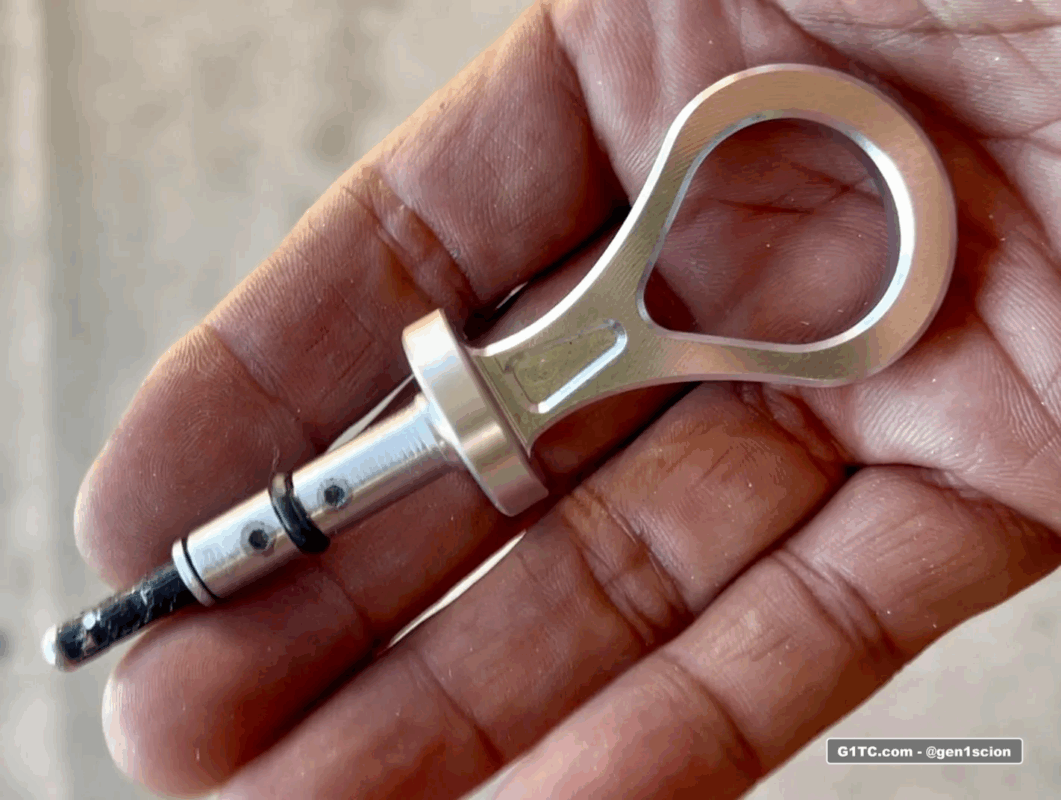
Final product
I think I will eventually fill the void with black epoxy. For now, this is done.