The original DIY Cluster conversion guide thread on ScionLife
Give this article a read on ScionLIfe, it’s the original DIY cluster LED swap mod thread:
Use the ScionLife article for disassembly and assembly of your gauge cluster. I won’t go over that here.
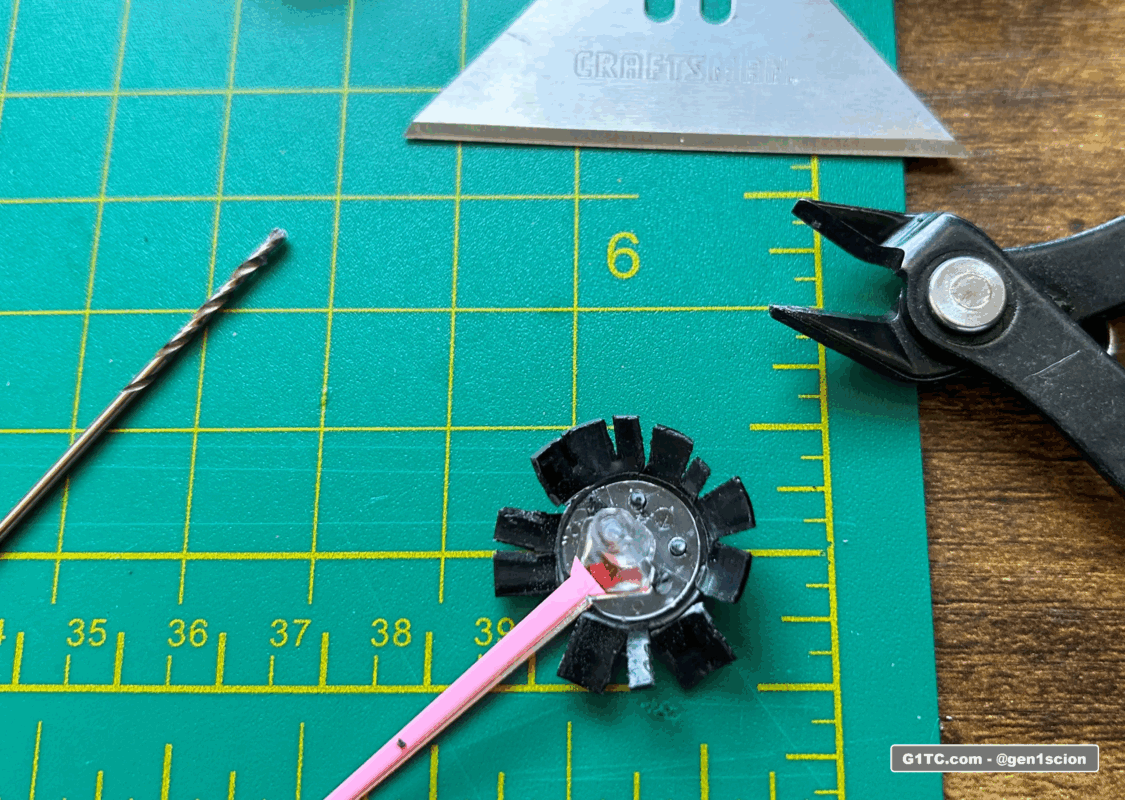
Tools and materials used
Background
This is a continuation of the LED DIY cluster swap mod. When I first attacked the needles, I scrapped the old amber paint off the back of the needles and painted them red with Testors Stop light red TES1105TT, what you would use to paint the brake lights on model cars.
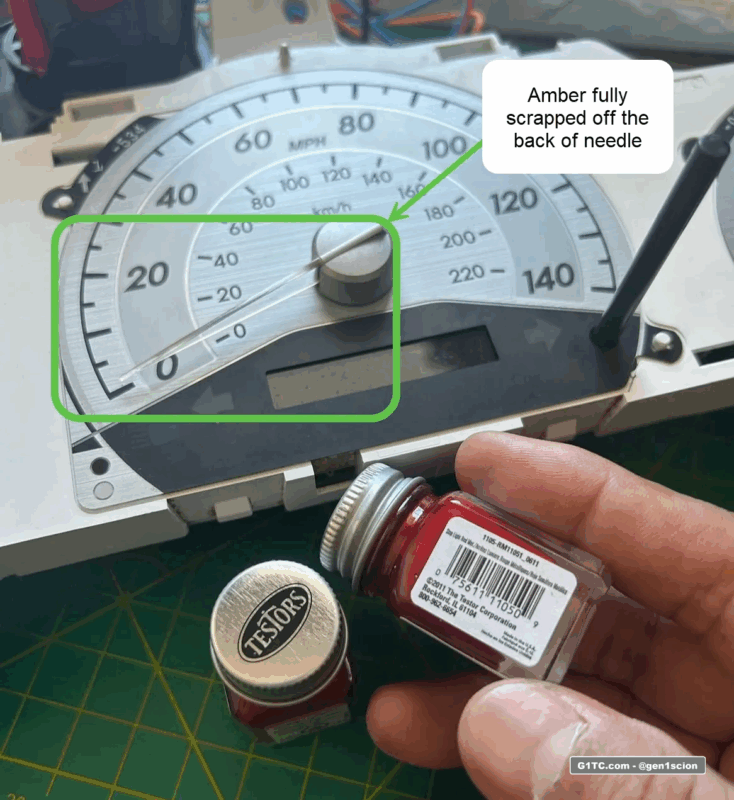
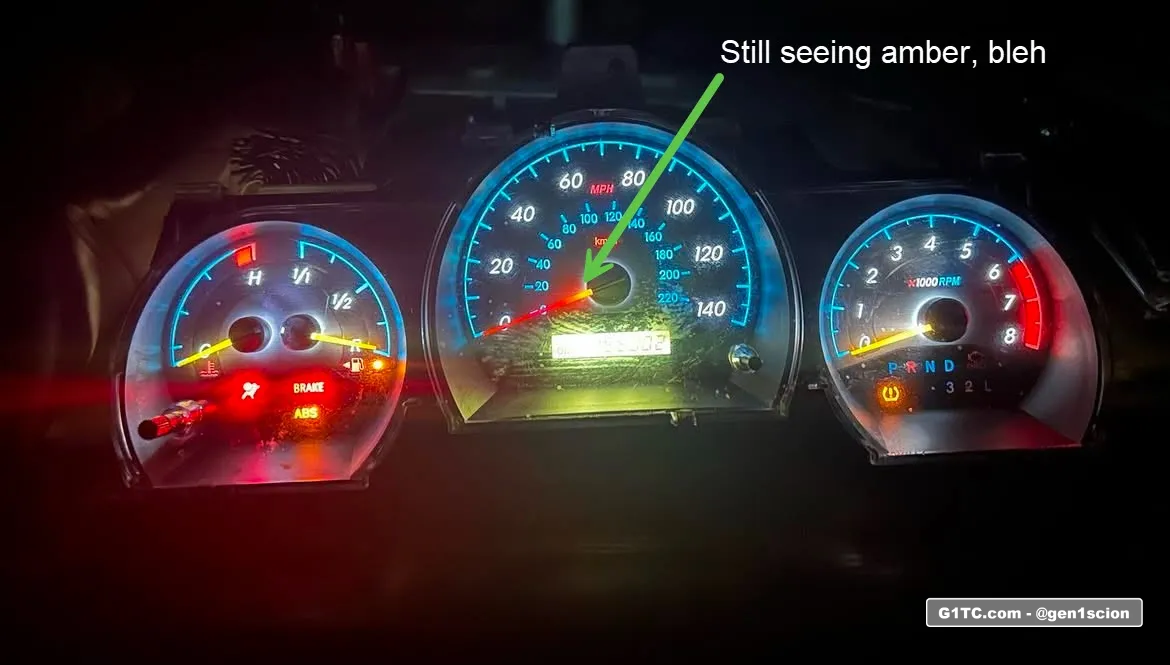
At first glance the paint job seems ok. It’s a nice deep red.
Testing them out
I setup the needle in my spare cluster purchased from eBay. As you can see below the needle color is blotchy and you can still see remnant amber toward the inside of the needle. I could have done a better job scrapping it off by completely disassembling the needle from the housing. If you decide to paint the needles for your DIY, advice would be to take the whole needle out of the housing to scrape all the amber paint off.
What about ACTUAL red needles?
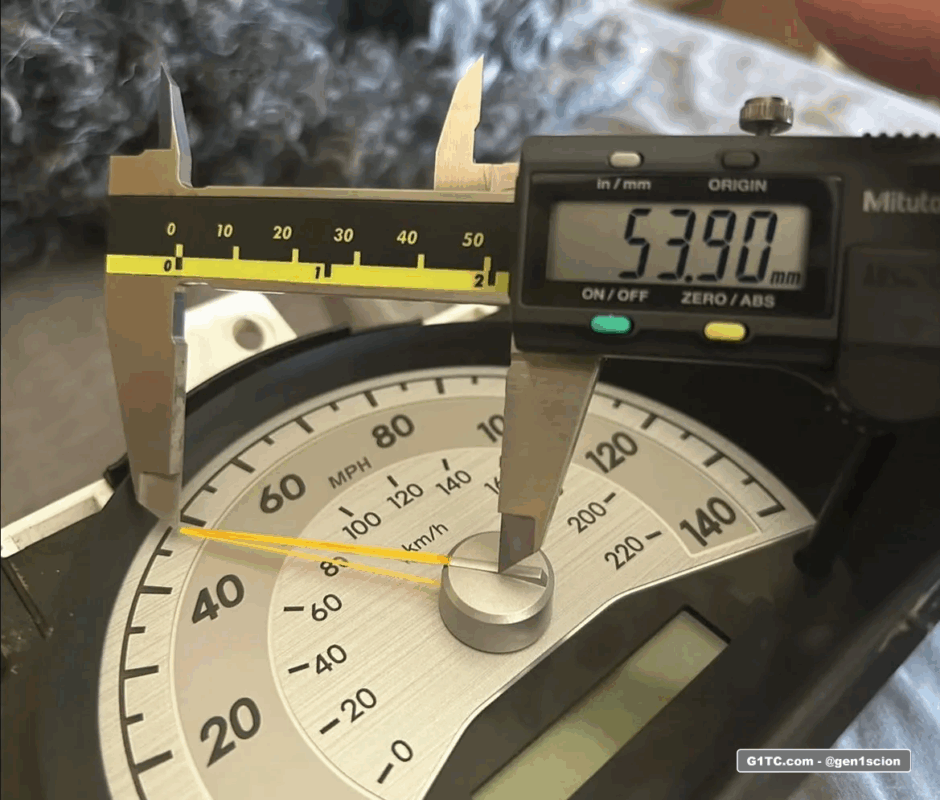
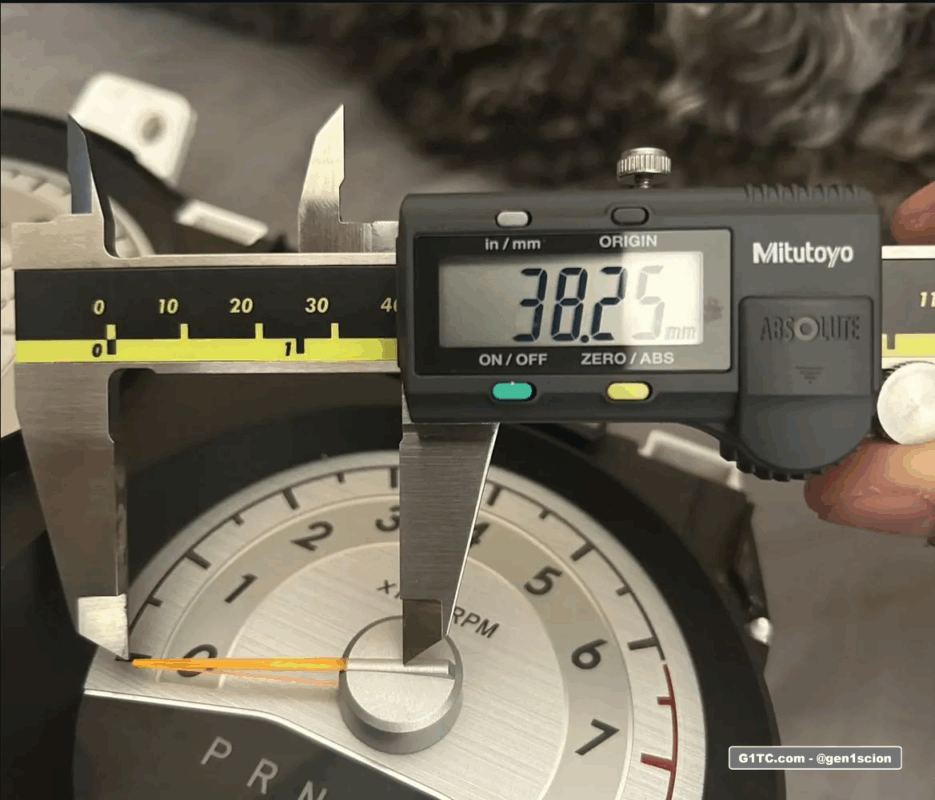
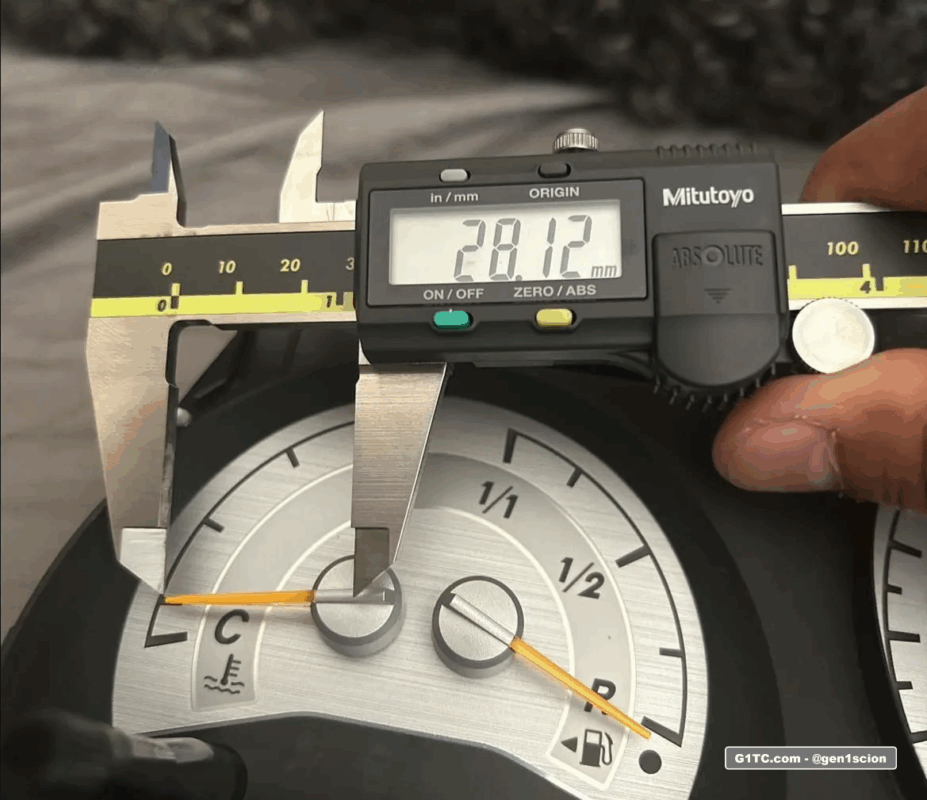
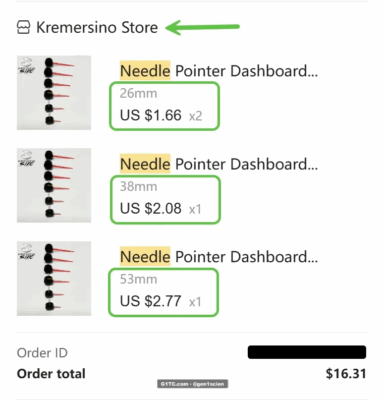
How am I going to fix this? Why not swap in OEM (actual) red needles from another car? Never been done before. I’m up for the challenge. So, I took out my digital caliper and measured the needle lengths (from center of dial). Here they are below for reference:
Search Internet for OEM needles, landed on AliExpress
Here’s the order and the store I bought them from on AliExpress. You can search also but these were cheap af. You’re looking for a shop that allows you to pick needle sizes. There’s a bunch, just search.
The needles arrived in 2 weeks
Swapping the red needles into the silver housings
This is uncharted territory for me, but I love this kind of stuff.
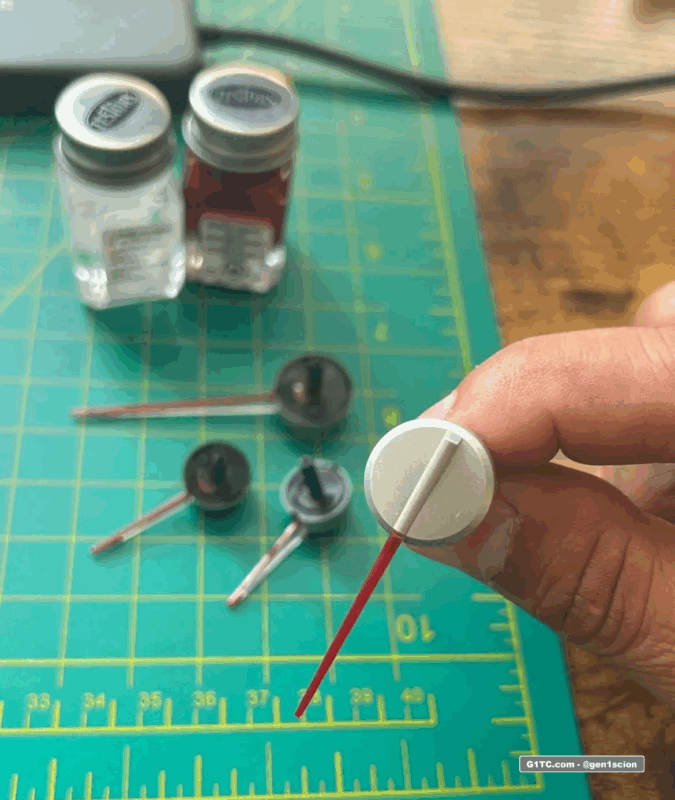
The main goal will be for the red needle to sit at the same level as the OEM (amber) needles. You have to keep the stems from the silver housings.
I used Superglue, but I made sure to use the GEL type super glue because it’s thicker and you can set the needle in better. Regular super glue just drips too fast.
Here’s another video I uploaded
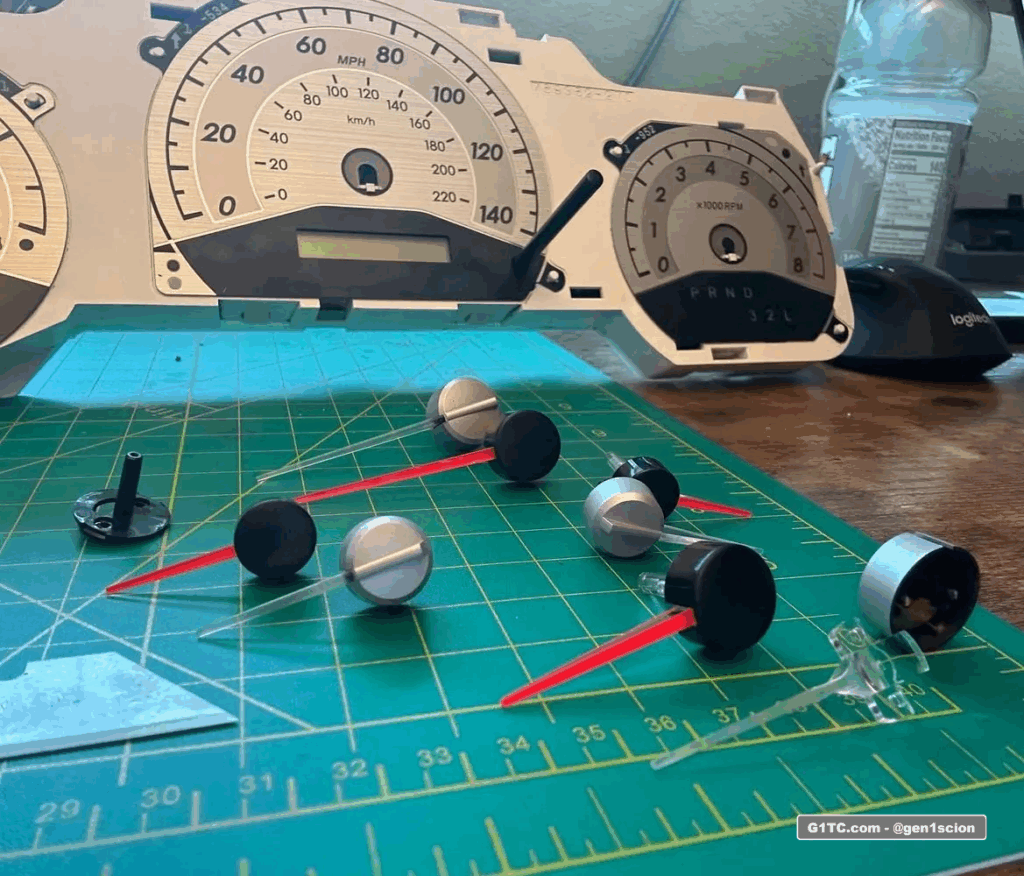
Here are some still photos describing the operation. This is specific to the needles I bought. Yours may vary. You will have to do some trimming. Take your time and think it through.
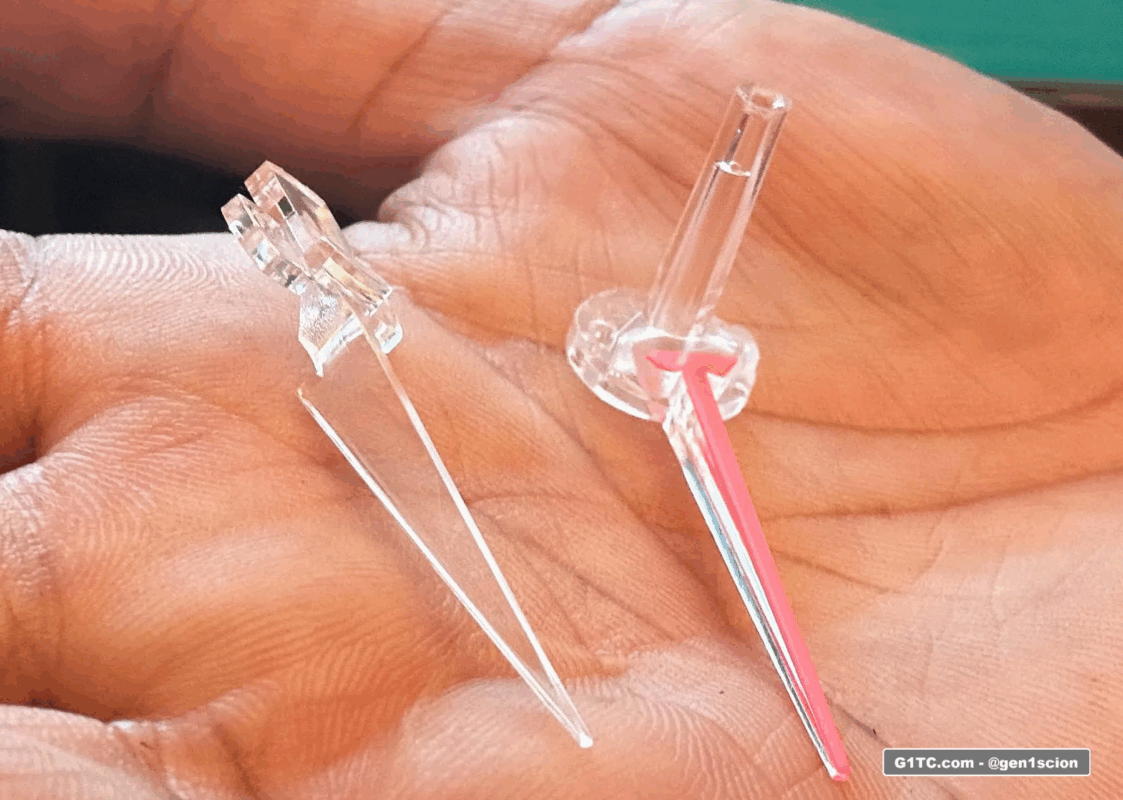
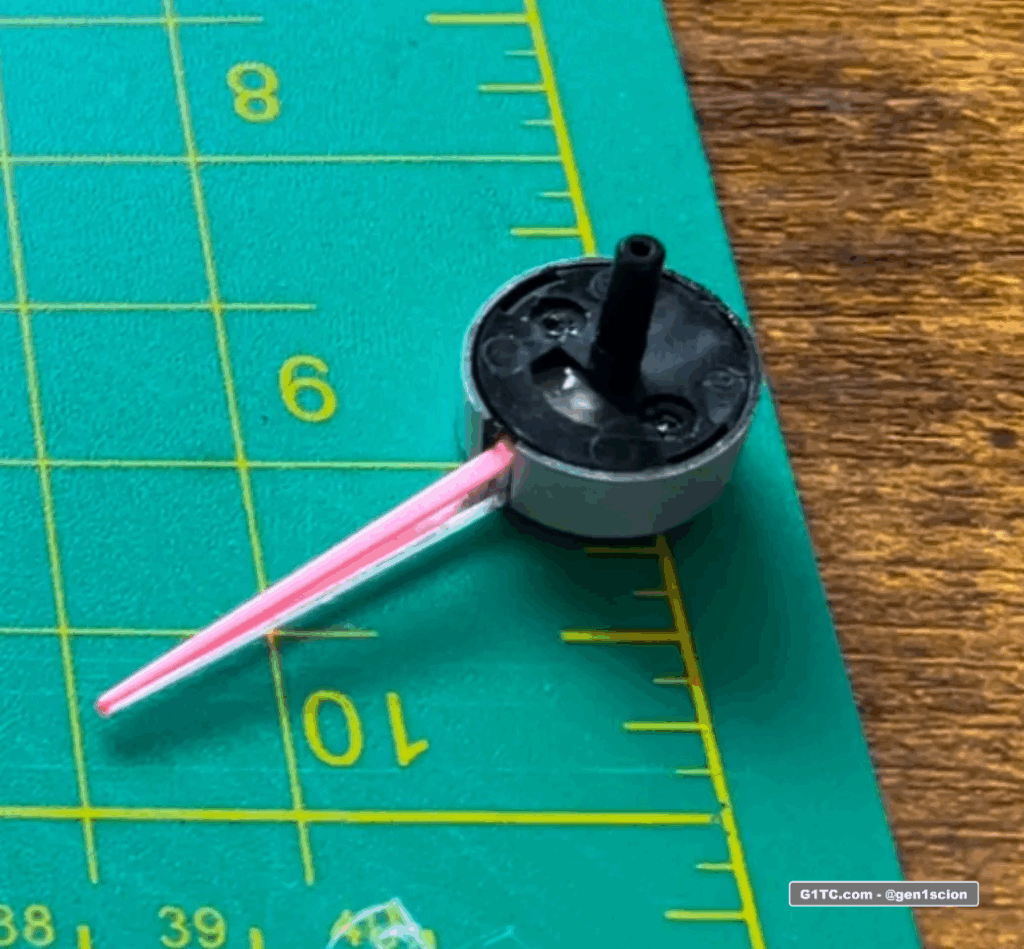
Disassemble the OEM Needles
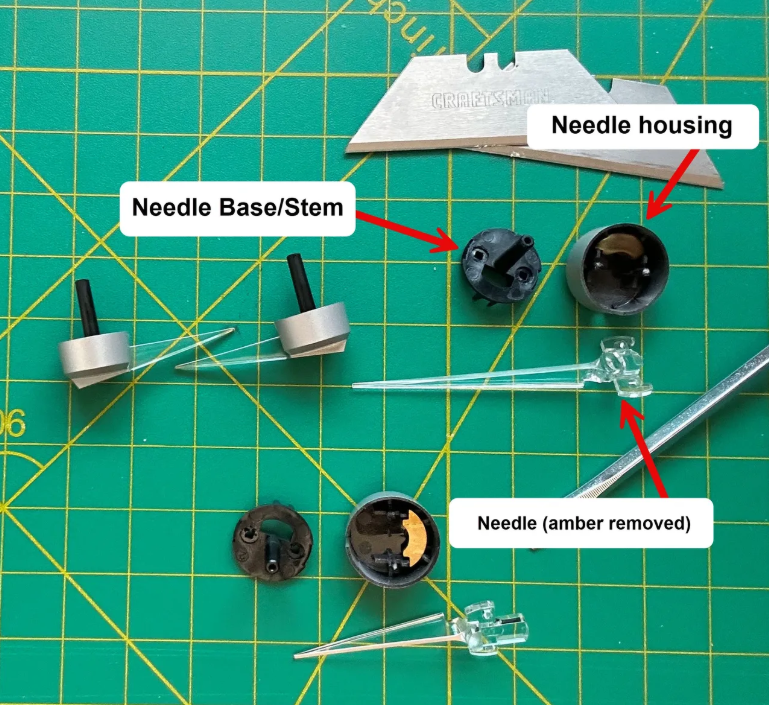
Disassemble the replacement needles
I literally cut them open, I’m not using the housing on the replacements so here’s the damage
IMPORTANT – Trim everything to fit first. Stage everything. Once you’re sure it all fits, then do the glue.
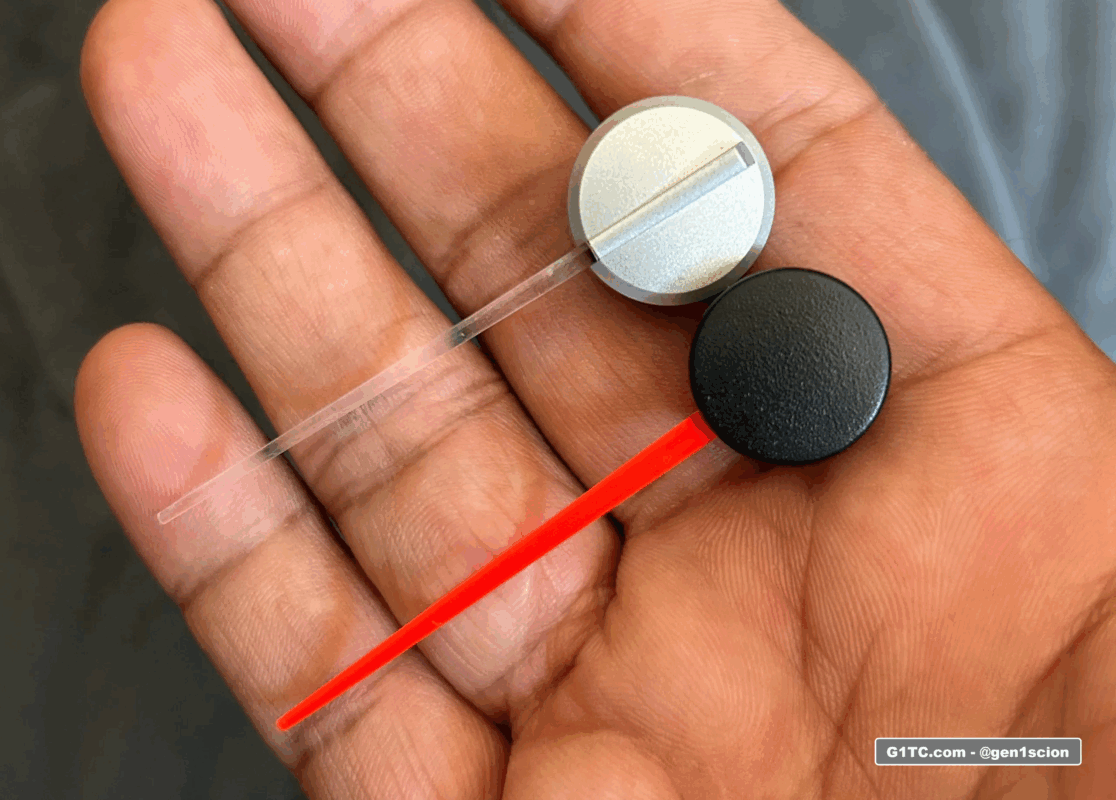
Have a close look at the parts your working with and get an idea of what you’ll need to do to make the swap.
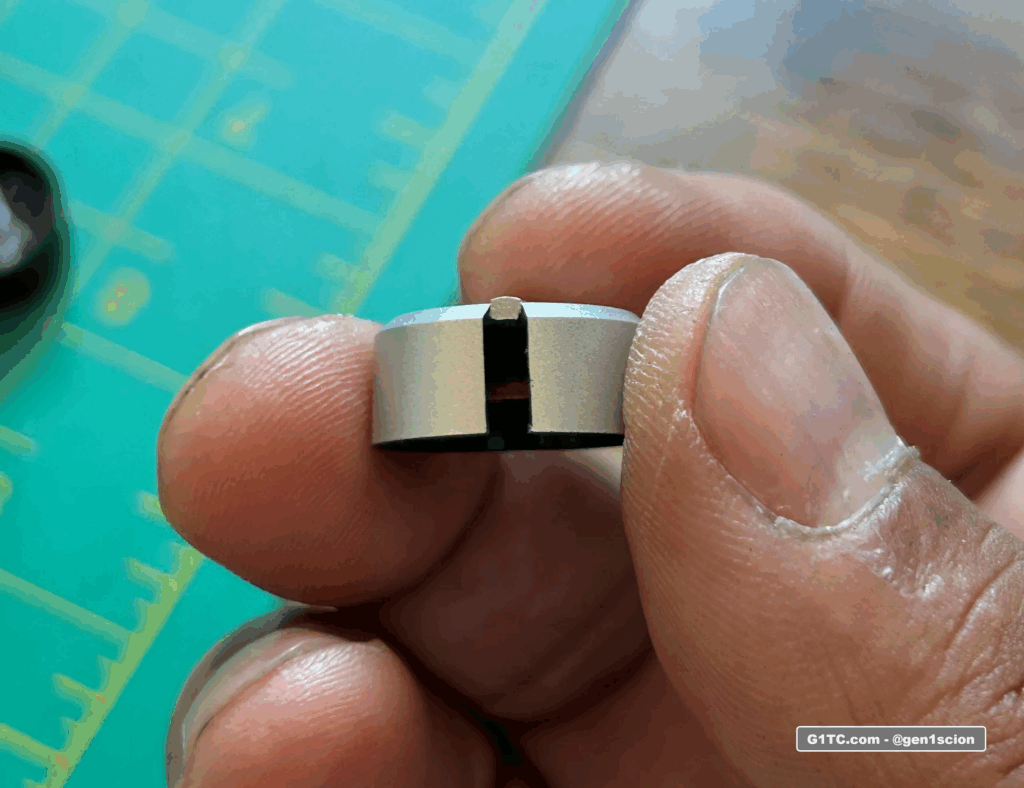
Widening the Scion housing notch
I discovered the replacement needles were wider than the Scions. I had to widen the cutout on the needle housing. YMMV here. Do your best.
Trim a tiny bit off, then measure. You’re looking for a tight fit.
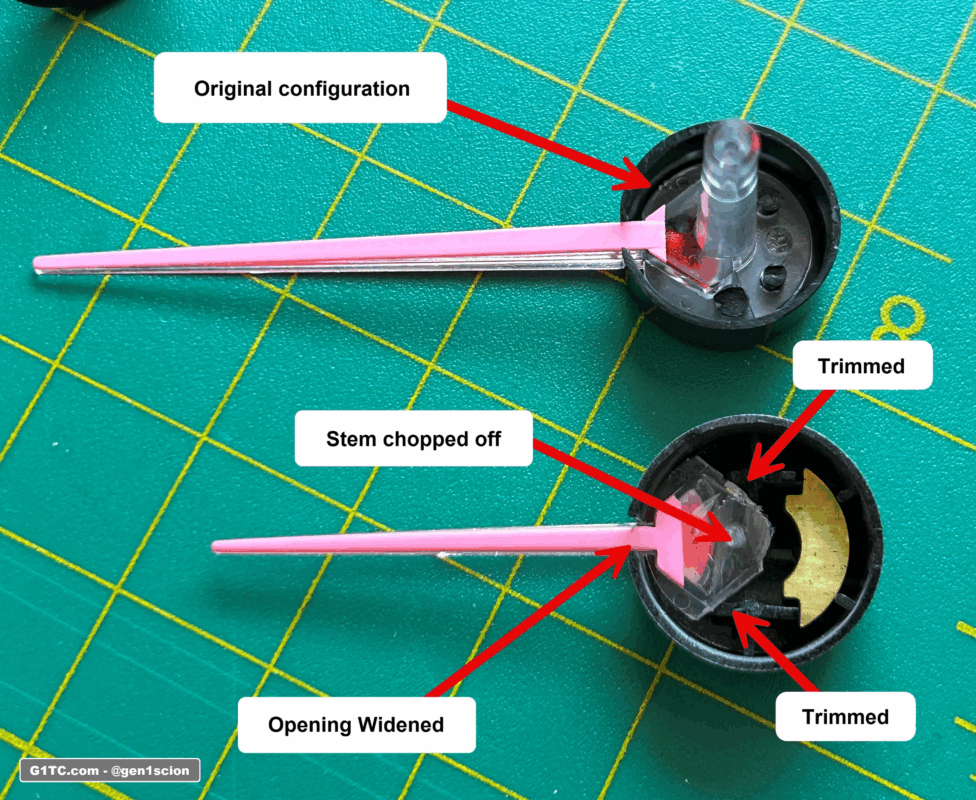
Below is closeup of the actual mod. Replacement needle on top. The bottom needle shows the edges trimmed, the stem chopped off staged inside the OEM
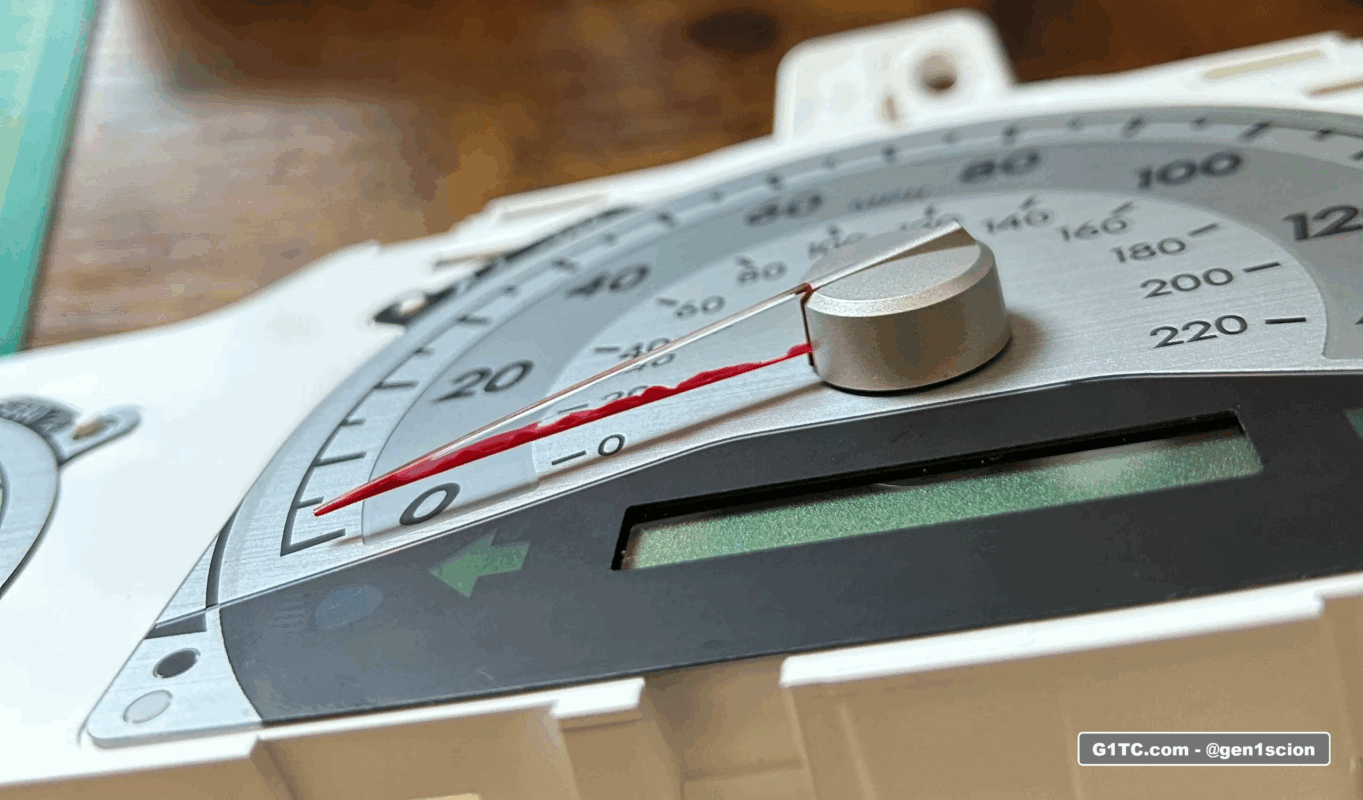
Now assemble and glue everything
Make sure the base doesn’t stick out past the rim housing, it should be flush (like it originally was). Trim more if you have to. If everything looks good staged open it up, glue the needle into the housing then glue the stem into the housing. Check your needle alignment make sure it sets straight both looking down at it, and looking across (you dont want the needle to scrape the gauge face when it sweeps).
Install and Zero the needles
I made a video on this already, see below
Final assembly pics
Here’s the final look of the gauges. Lots of work but worth it, IMO. Attention to detail!

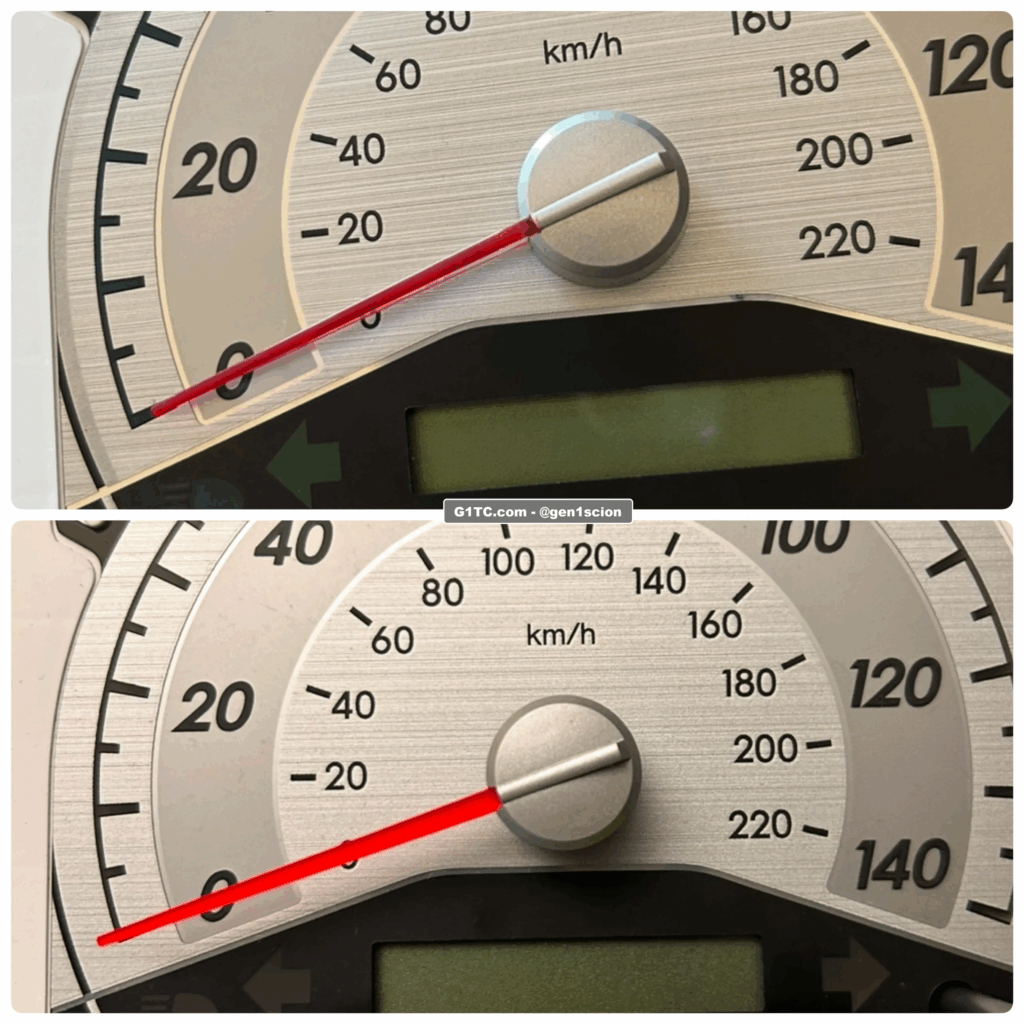
Here are some comparison shots
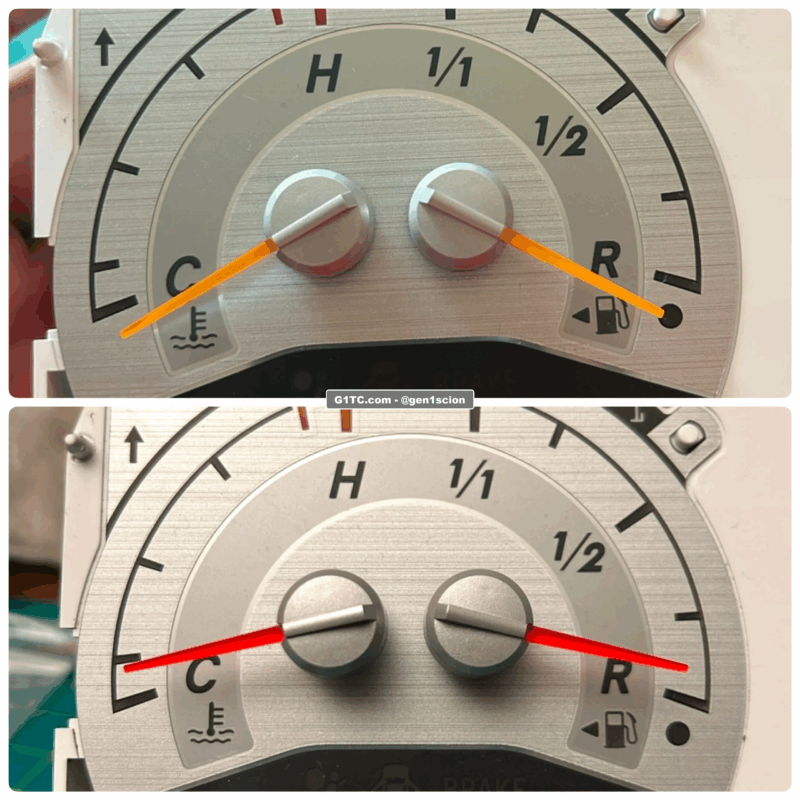
The thicker replacement needle is more apparent here on the speedometer.
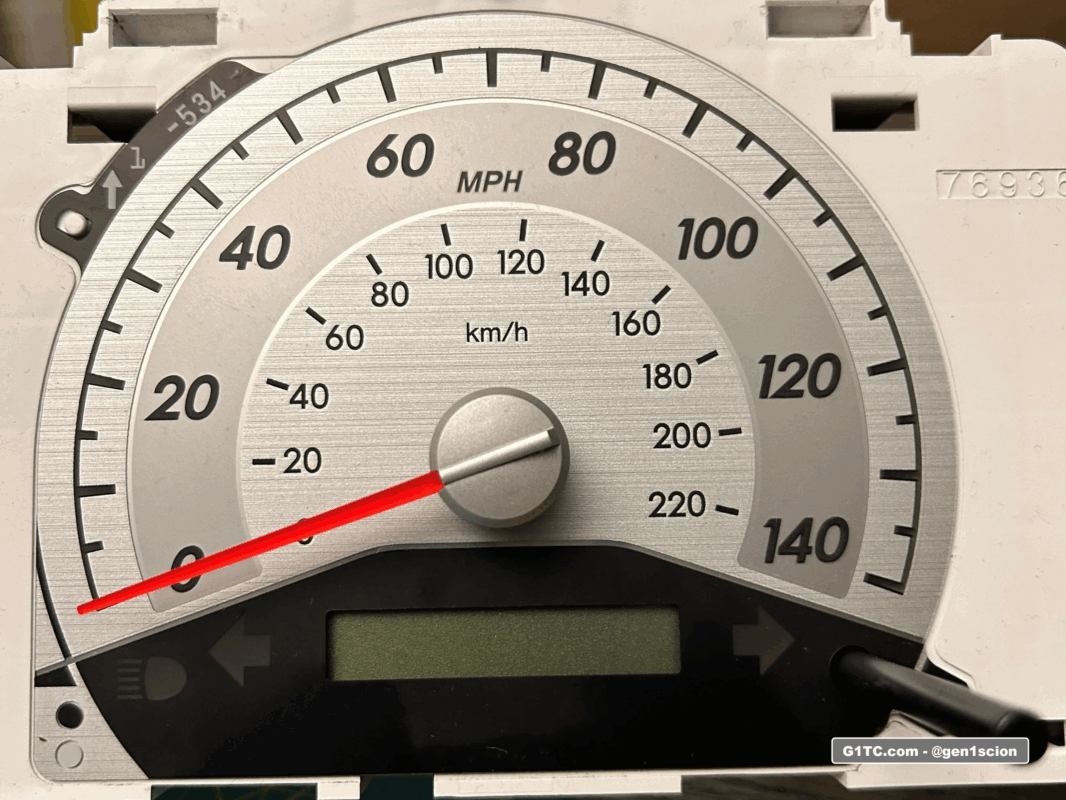
That’s it! Test it out and make sure none of the needles are dragging. Enjoy!
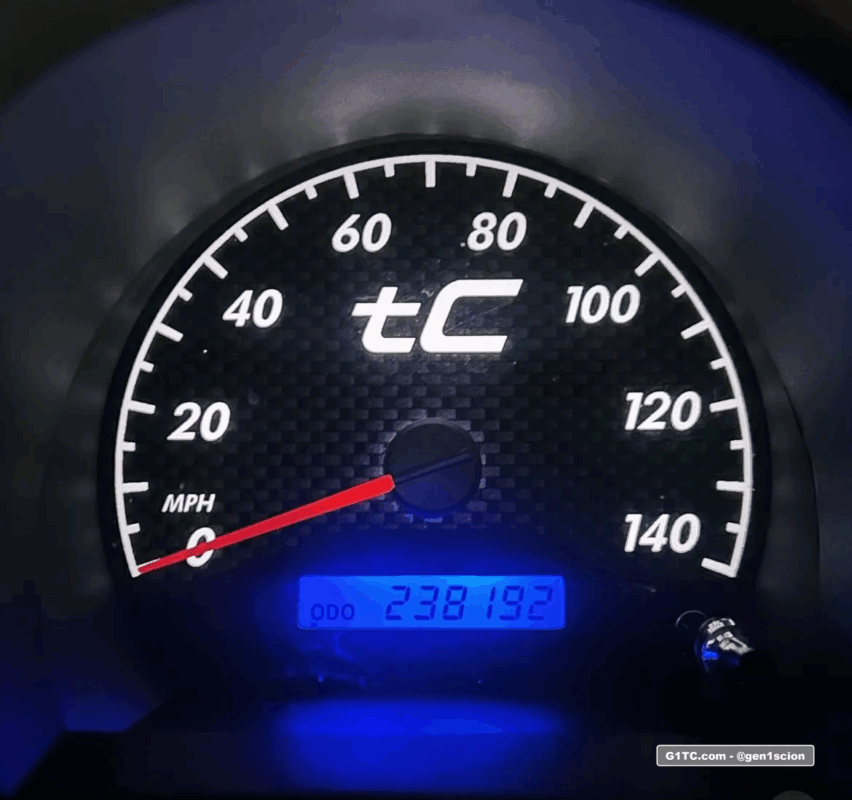
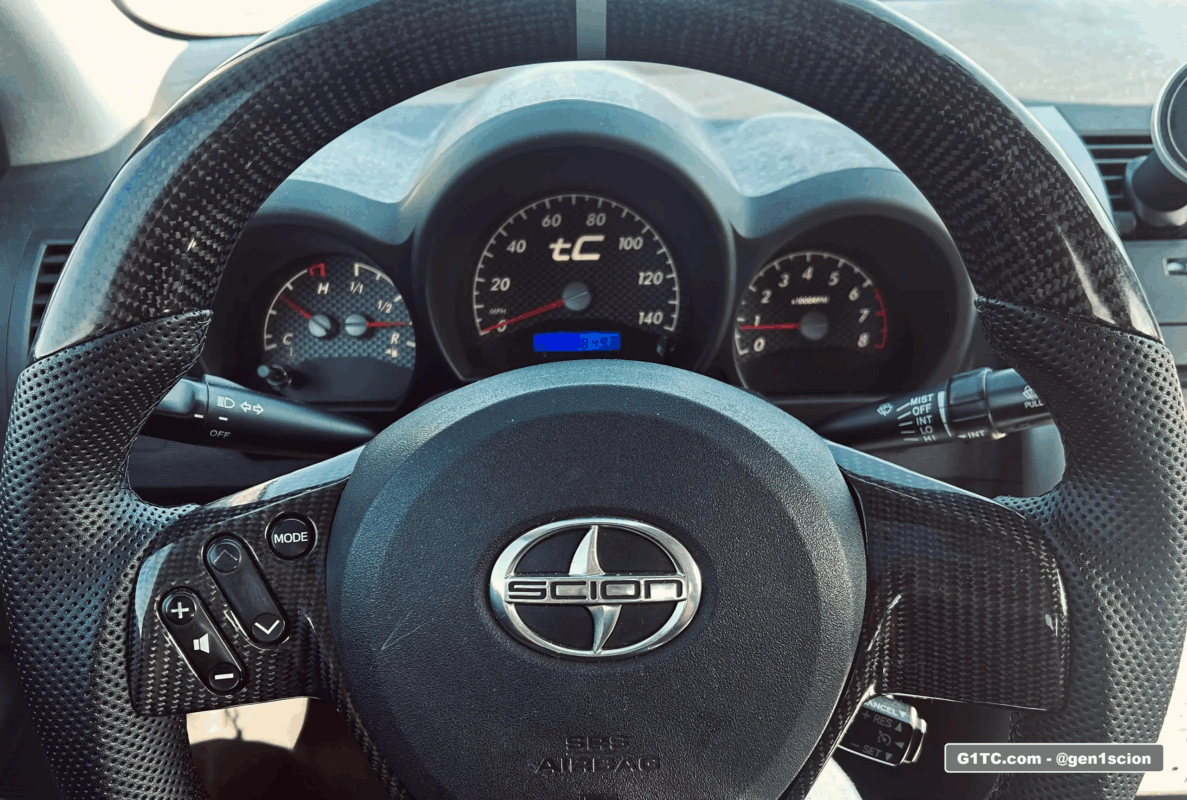
The Current look
Here’s my current look with Black Cat Custom gauge carbon fiber style faces, white LEDs, red OEM style needle swap, and TC2 carbon fiber steering wheel retrofit.
Links to my other DIY Cluster gauge articles
- How to wire up a test donor gauge cluster
- DIY LED cluster swap mod amber to white 2005-2010 Scion tC
- Changing colors on the gauge face using transparent wrap
- LCD color / change using polarizer film, and LED swap
- Black Cat Custom carbon fiber style gauge faces
- OEM style red needle swap
- AC Unit LED swap modification
- Changing the LEDs in your window and lock switch controls
Links to soldering tools and accessories
-
Adjustable heat soldering tool kit complete with extra tips, solder, flux, etc. You can use this for the DIY Cluster LED swap too, very handy to have
-
Butt connectors that melt solder to the connections, I really like these
-
Heat gun with melting shield, great for melting the butt connectors above. You can get in tight spots without heating up neighboring parts
-
Tube shrink wrap, I use this stuff all the time to cover up raw wire soldering and to water proof butt connectors
-
Mini fuse taps, these come in handy if you want to piggy back off existing HOT or switched AC power from the fuse box near the driver kick panel