OEM 10th Anniversary 10 Series illuminated locator badge emblem retrofit on TC1

10th anniversary illumination badge retrofit on to TC1 Scion tC 2005-2010
This article explains how I retrofitted the OEM 10th Anniversary illuminated badge emblem from a Scion FRS rear hatch trim found on eBay.

What are locator badges?

They are emblems that light up, technically called “locator badges” and designed to help you ID or locate your car. For example if you’re in a parking lot sea of cars looking for your car at night.
 
10th anniversay scion cityscape
10th Anniversay Scion Lineup

The 2013/2014 Scion tC 10th Anniversary (10 Series) is a limited-edition model featuring exclusive Silver Ignition paint, unique silver seat belts, an illuminated solar-powered shift knob, and an LED “Scion” locator badge. Only 3,500 units of the 10th Anniversary tC were produced, celebrating a decade of the brand. 

These parts are now obsolete from the dealer. When they were available, my understanding is that you’d have to provide the dealer with your VIN to get the part.  You have to find these on the used market.
 

Part numbers

If you want to try to find them, here are the FRS part numbers
  • Front: PZ367-18103
  • Rear: PZ367-18104
Other names for this part include
  • illuminated badge
  • illuminated emblem
  • locator badge
  • car finder

How illuminated badges work

On a normal 10th Anniversary Scion, the front and rear emblems will light up when you disarm the car, first white, then blue. This is done with a controller included on the car. They are triggered much like the dome light when you disarm your car. They turn on for a few seconds then fade off.
 
Here’s a link to the wiring diagram for the FRS, I just followed this as a guide to install mine. I bypassed the controller.

How I installed them

The emblem is a 3-wire harness, ground activated. One power and two grounds. One ground for each color.
FRS 10th anniversary illuminated badge emblem on hatch trim

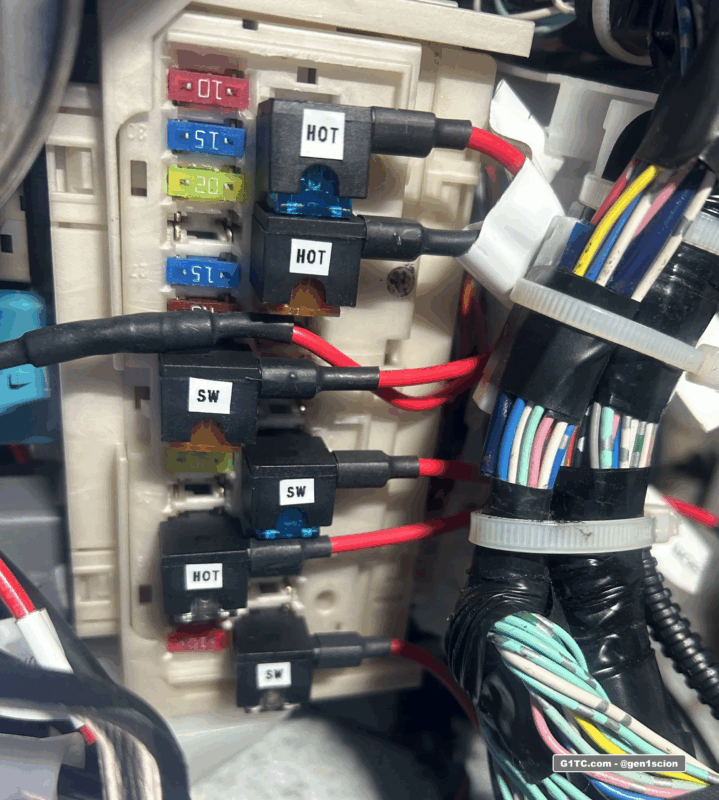
I have these hard wired into the car from the fuse box under the knee bolster, using a fuse tap on switched AC power. Then, I have two 2-prong switches that complete the ground circuit to each color. Meaning I can turn on just blue, or just white, or both.

OEM 10th anniversary badge switch buttons

Important considerations

My main concern is that I have read stories online of people who have issues with their emblem (e.g. LED burnout, accident, etc) and they can’t find replacements for it. Therefore I don’t want to have these lit up all the time. I only want to turn these on for a few minutes then turn them off. For instance, photo shoots, car shows, meetups, “for the Gram”, etc. Considering I already bought them used, I want minimal use on them.


Video of Grill Installation


1. Remove the grill and remove the emblem
2. Drill a hole in the middle of the base to feed the wiring
3. Dab silver sharpie on the back of the mounting tabs of the 10th Anniversary emblem
4. Drop the emblem on the base, squared up with the lines
5. The silver marking should have transferred over to the base.
 
Scion grill emblem removed marking

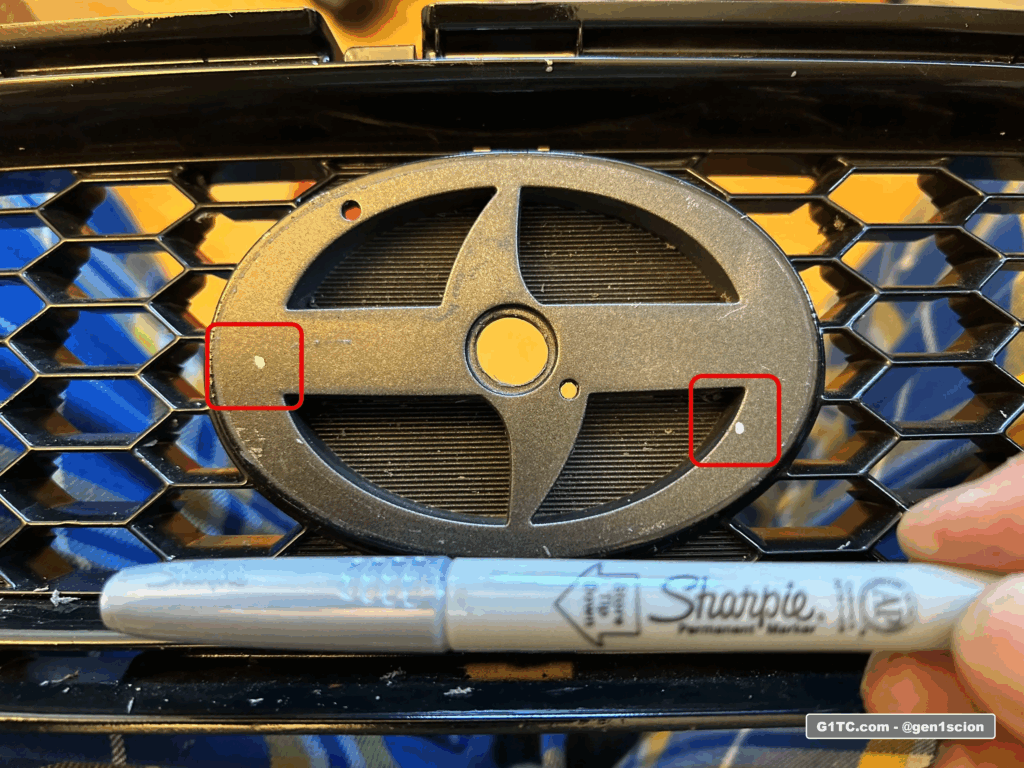
6. Drill a small pilot hole, then drill the actual size of the emblem peg

7. I had to custom cut 3M double stick tape to secure it
3m double sided tape back of Scion illumination emblem

8. I ran a 3-prong quick disconnect harness so that I could disconnect the grill assembly in case I have to take it or the bumper off.

bench testing the OEM 10th anniversary Scion illuminated badge emblem

3 wire waterproof disconnect socket used for illumination badge for easy service

3 wire waterproof disconnect socket used for illumination badge for easy service

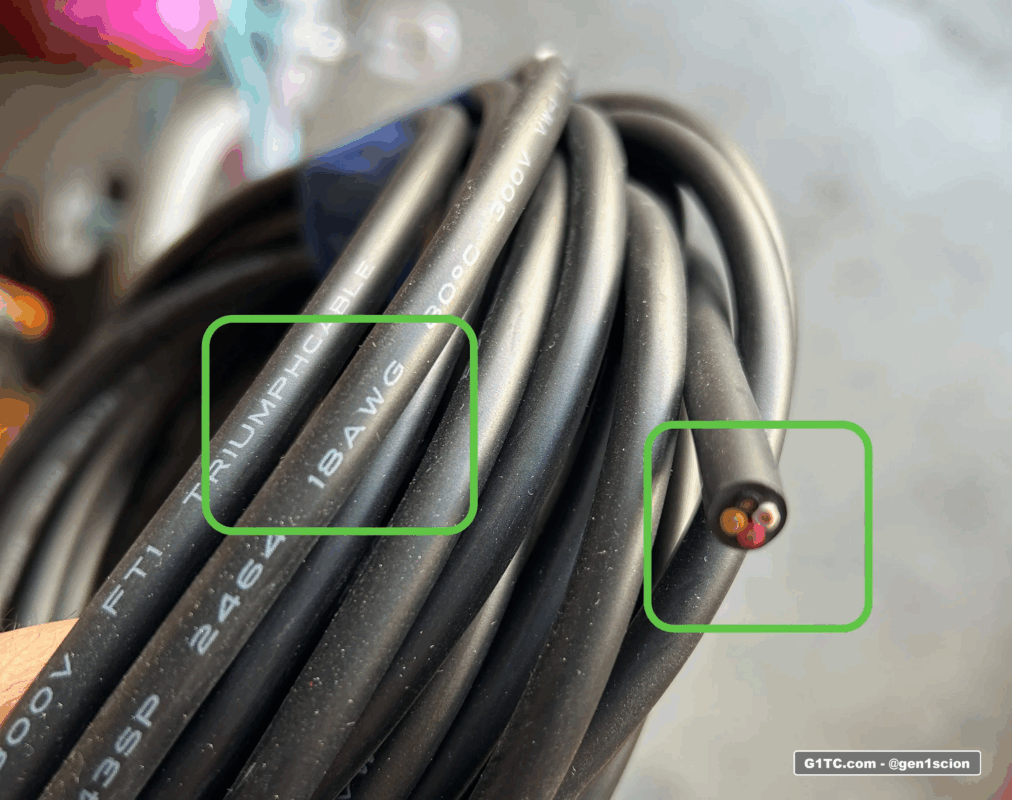
9. For the feed into the cabin, I routed my wire through the same access hole that the hood latch wire runs through. I use a dedicated 18awg 3-wire loom seen below.

18AWG 4 wire bundle
18AWG wire bundle

Switches in the cabin

I have the 12v power wire on switched AC via a fuse tap at the fuse block above the driver kick panel.
labelling your fuse taps hot or AC switched 12v power

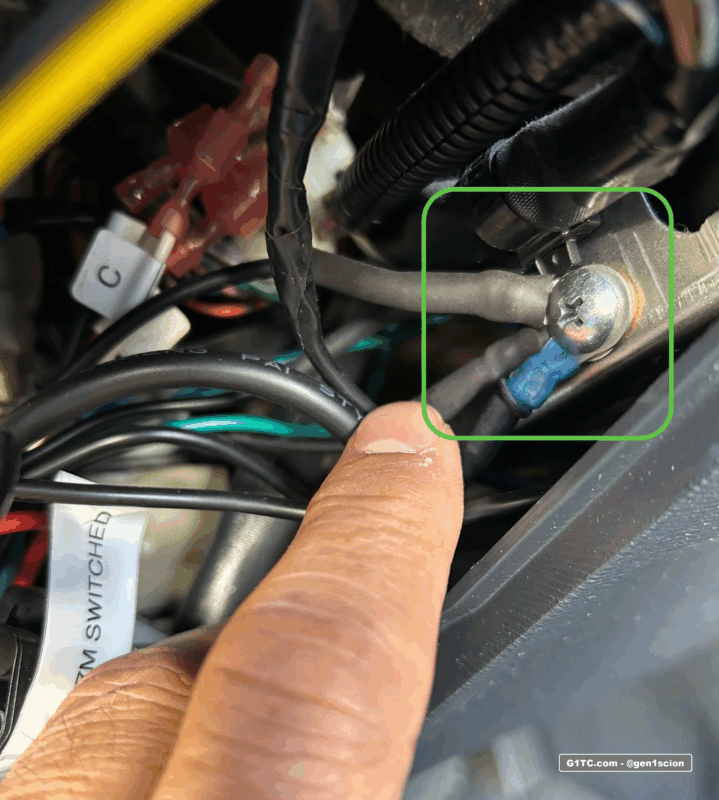
I grab ground from the nearby metal dash frame.

grounding point ground wire under dash for accessories
 
I use two 2-prong latching switches, one for each color. All they do is complete the ground circuit.
push button switches for OEM illuminated badge emblem

Now I can control 3 different lighting looks

10th anniversary illumination badge retrofit on TC1

Links to soldering tools and accessories


Disclaimer | Report Error